Configuring Board Tools
You can configure your tools board by board, or use a tool in several boards.
Edit the Dock
From your board, click the DOCK tab at the bottom of your screen.
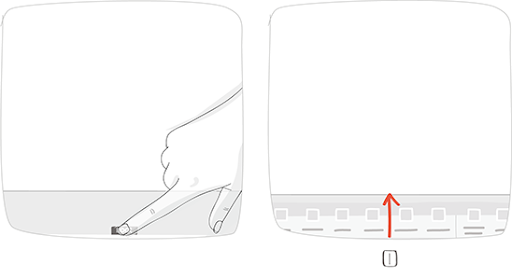
1 – Tools
Click the Pen icon.

The tools-editing screen appears and allows you to add, edit and delete tools.
Adding New Tools
- Click +.
- Add the required tools to your board.
- Click Apply.
- Click Save or continue to configure your Board Tools.
Note
Your dock can contain a maximum of 11 tools.
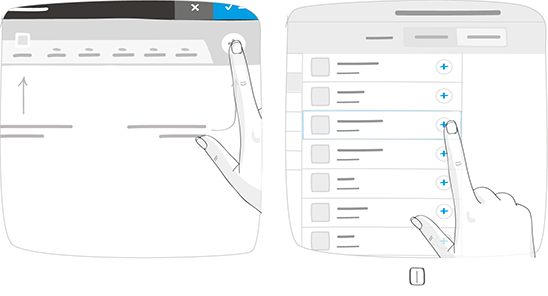
1 – iObeya: All pre-defined iObeya tools.
Room: Tools configured and already used on boards in your room.
Tip
To use the same tools on more than one board, you should add them from the tools catalog of your Room.
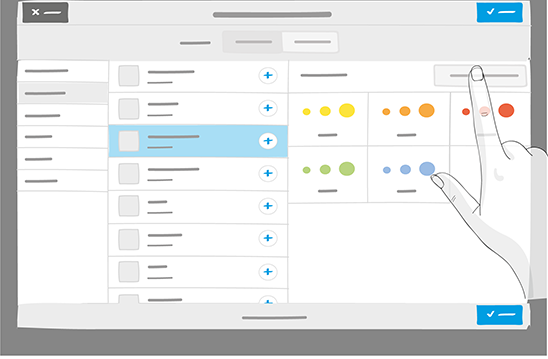
Editing and Configuring Tools
Your tools are added to your dock. To configure one, select and edit it in the lower part of the screen.
Note
Any modifications made to a given tool are applied to all other boards in the room that use the same tool.
Select one or more elements.
Configure the name, size, layout, color, etc. of the selected elements.
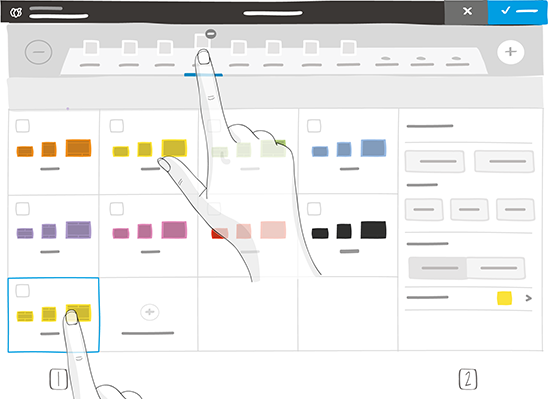
Click Save or continue to configure your Board Tools.
Tip
Change the position of a tool in the dock by grabbing it and sliding it to the right or to the left. You may reorganize the elements within a given tool by using the arrows in the bottom corners of each instance.
Creating Your Own Stickers Tool
The Stickers tool can be fully customized. You can combine several types of stickers within the same tool - those from the iObeya sticker catalog, and those you have created yourself. To do this:
From the Edit dock page, click +.
Select Stickers.
Click + to add a Stickers tool.
Click Apply.
Click Add an element.
Select an action from the list:
- Create a sticker:
Customize your sticker in the right-hand section. You can rename it, select the size(s) you want to use and choose from predefined colors or create a custom color.
- Add from the catalog:
Choose a sticker from the iObeya Stickers catalog.
- Add from an image:
Click Select an image… to choose from your computer.
Tip
Customized stickers should ideally be in PNG format with a transparent background, and 128x128 pixels.
Click Save.
Removing Tools
From the Dock
- From the Edit dock page, click a tool.
- Click
 .
. - Click Save or continue to configure your Board Tools.
From the Room
From the Edit dock page, click +.
Click the tool that you want to delete.
Click Delete from room.
Click Delete.
Returning to Your Board
Click Save on the top right of the screen to complete your configuration.