Configuring Free Text and Dataviz Elements
Creating Content with the Free Text Tool

After entering free text, a contextual menu allows you to modify the appearance of your text dynamically. The default text is in black, with 48-point size font, and a transparent background; it is also justified, and centered vertically as well as horizontally.
Free text parameters
- Font size
- From 12 to 276 pixels.
- Font color
- Choose from the iObeya color palette or personalize your own color.
- Fill color
- Choose from the iObeya color palette or personalize your own color.
- Adjustment type
- Normal / Text adapted to the zone / Zone adapted to the text.
- Alignment type
- Left / Centered / Justified / Right.
- Centering type
- From above / Centered / From below.

Tip
If you have already used the tool on your board, you can easily reuse its last configuration. Simply drag and drop the tool from the dock onto your board.
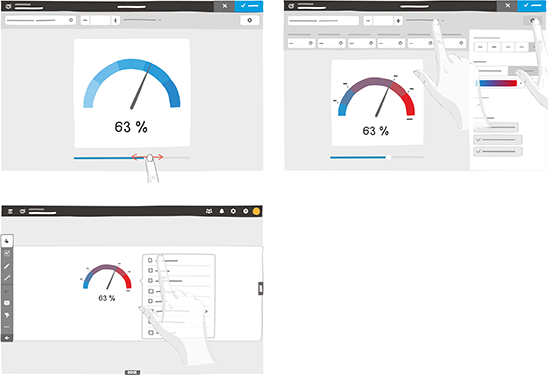
Using and Configuring the Gauge Tool
Drag and drop a gauge on your board.
A configuration window appears.
Define the current set point on your gauge and its title.
Modify the scale and threshold values.
Click the gear icon to open the personalization menu.
Click Save to place the configured gauge on your board.
Tip
To modify the current value or settings of a gauge after it has been set, click it once, then click Edit data and settings from the contextual menu. You may also reach the configuration interface by double-clicking the gauge.
Gauge parameters
- Number of colors
- 1 to 5.
- Colors
- Monochrome-shaded scale, select the base color, or preconfigured multicolor schemes.
- Unit of measure
- Unit of measure or symbol to appear near the current value on the gauge.
- Display current value
- Hide / Show the gauge’s current value as a number.
- Display min / max values
- Hide / Show the gauge’s minimum and maximum values.
- Display threshold values
- Hide / Show the values at which the gauge changes color.
Using and Configuring the Charts Tool
Drag and drop a chart on your board.
A configuration window appears.
Enter the series values, and its / their title(s) (optional).
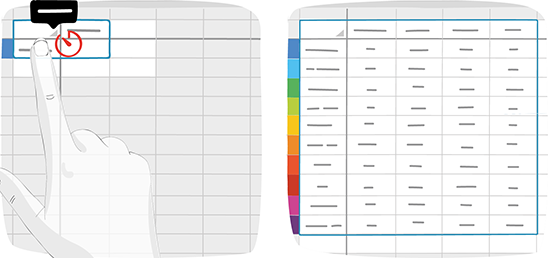
By clicking the column and row headers (gray dot), you can remove the column / row or displace it to make room for a new one. Click the gear icon to open the personalization menu.
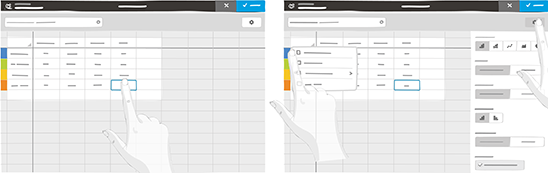
Click Save to place the configured chart on your board.
Tip
- Data can be copied from other spreadsheet software, and pasted into the chart interface in iObeya. To do so, paste the copied data (Ctrl + V or long press and Paste) into the first white cell.
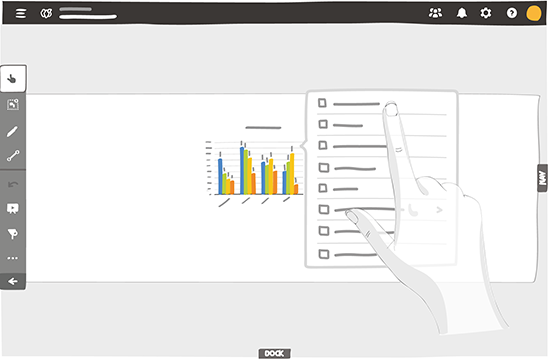
- To modify the data points or settings of a chart after they have been set, click it once, then click Edit data and settings from the contextual menu. You may also reach the configuration interface by double-clicking the chart. You can Change chart type in the same menu.
Chart parameters
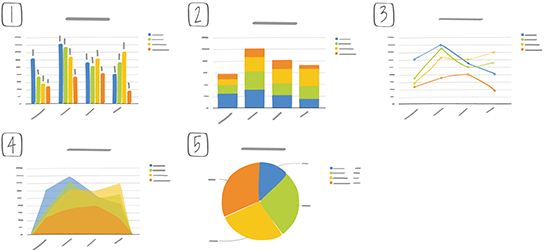
- Chart type
- Display the data as a Bar (1), Stacked Bar (2), Line (3), Area (4), or Pie (5) chart (see below).
- Series’ color scheme
- Multicolored (series colors can be assigned manually at the start of each row), or monochrome with a choice for the base color.
- Series organization
- Define the independent and dependent variables.
- Bar orientation (for Bar charts only)
- Choose horizontal or vertical orientation for bars.
- Values scale
- Automatic or manual scaling.
- Display options
- Display data values directly on the chart.
- Unit of measure
- Display units of measure directly on the chart.
See also