OAuth 2.0 Configuration
Introduction
This section describes how to configure and use iObeya as an OAuth 2.0 client for SharePoint API.
Registering iObeya in Your Office 365 Tenant
First of all, you have to register an iObeya application on Office 365 from Azure AD menu. This will allow you to get a client ID, you can then generate a key for this application in order to get a client secret.
Open https://portal.azure.com/ in a new tab.
Login with your Office 365 administration account.
Select Azure Active Directory ‣ App registrations.
Select New application registration, fill the form, then save.
Your client ID is displayed in the Application ID column.
Click Certificates and secrets.
Click New client secret.
Copy the generated value for future use.
Warning
Copy the key value right now. You won’t be able to retrieve it after you leave this blade.
Defining the Scope
- For SharePoint:
From the API permissions of your registered app:
- Click Add a permission.
- Select SharePoint from Request API permission.
- Click Delegated permission.
- In the section Select permission, select:
- AllSites ‣ AllSites.Read,
- MyFiles ‣ MyFiles.Read.
- User ‣ User.Read.All.
- Click Add permissions.
- For Microsoft Graph:
From the API permissions of your registered app:
- Click Add a permission.
- Select Microsoft Graph from Request API permission.
- Click Delegated permission.
- In the section Select permission, select User.read
- Click Add permissions.
Configuring External Applications in iObeya
To configure iObeya to access to SharePoint API as an OAuth client, you have to configure an external application in the administration web interface of iObeya.
Configure an application type.
From the administration web interface, you have to create an application type. This makes it easier to group application instances.
Click SETTINGS ‣ Accessible applications in iObeya.
Click Add application type.
Fill the Application type with
office365.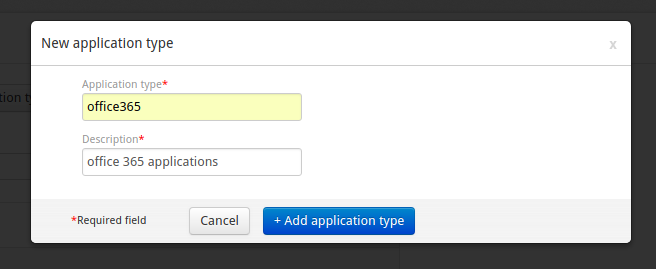
Warning
You have to use exactly office365 as the application type name, this name is used by the SharePoint add-on to find the list of Office 365 application instances.
Configure an application instance.
You can add a SharePoint application instance from an application type. This instance matches with a SharePoint instance that should return OAuth tokens.
- iObeya domains
You must select All domains to be able to retrieve your application instance during the configuration of a new external source.
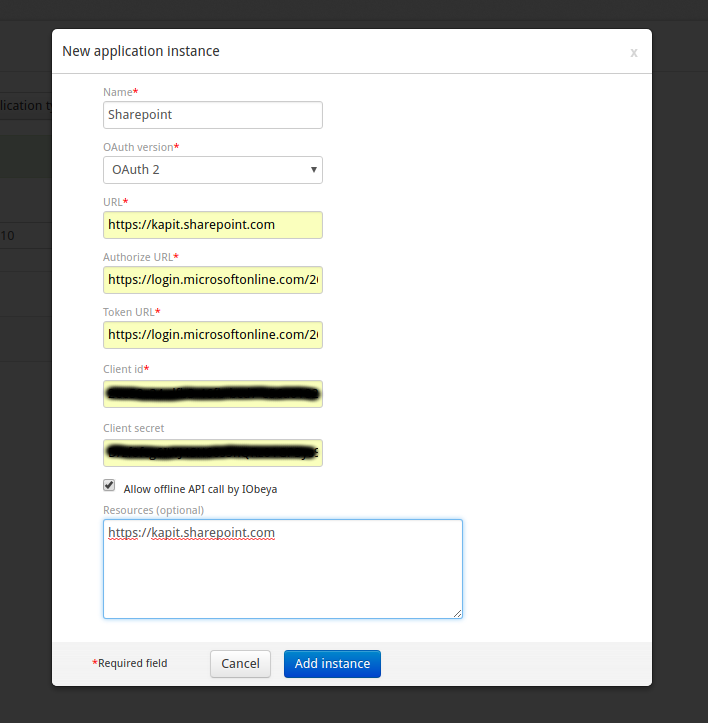
- Name
Name of SharePoint application instance, example: sharepoint.
- OAuth version
OAuth version used by SharePoint API, SharePoint needs OAuth 2.0.
- URL
SharePoint API base URL, this URL is not yet used by the iObeya SharePoint add-on, you can set your SharePoint base URL with this type of URL https://{tenant_name}.sharepoint.com.
- Authorize URL
Office 365 OAuth authorize URL, its value is https://login.microsoftonline.com/{tenant ID}/oauth2/authorize.
Note
You cannot use Version 2.0 URLs.
- Token URL
Office 365 OAuth token URL, its value is https://login.microsoftonline.com/{tenant ID}/oauth2/token.
Note
You cannot use Version 2.0 URLs.
- Client ID
Client ID of the application you created on Office 365. The Client ID corresponds to the application ID in Azure.
- Client secret
Client secret of the application you created on Office 365. The Client secret corresponds to the Value in Azure.
Note
The Value is only displayed once just after the client secret creation. To retrieve it see see Microsoft documentation.
- Allow offline API call by IObeya
This parameter allows the SharePoint add-on to refresh OAuth token automatically if needed.
- Resources
SharePoint resource to specify has the following value: https://{tenant name}.sharepoint.com
Warning
The Resources is required for sharepoint configuration, please specify its value (or clean old oauth token) before launching a new oauth dance.
Note
You can find OAuth endpoints from https://portal.azure.com/. Select Azure Active Directory ‣ App registrations, then select the endpoints menu on the top of the page.
Example of a SharePoint instance configuration:
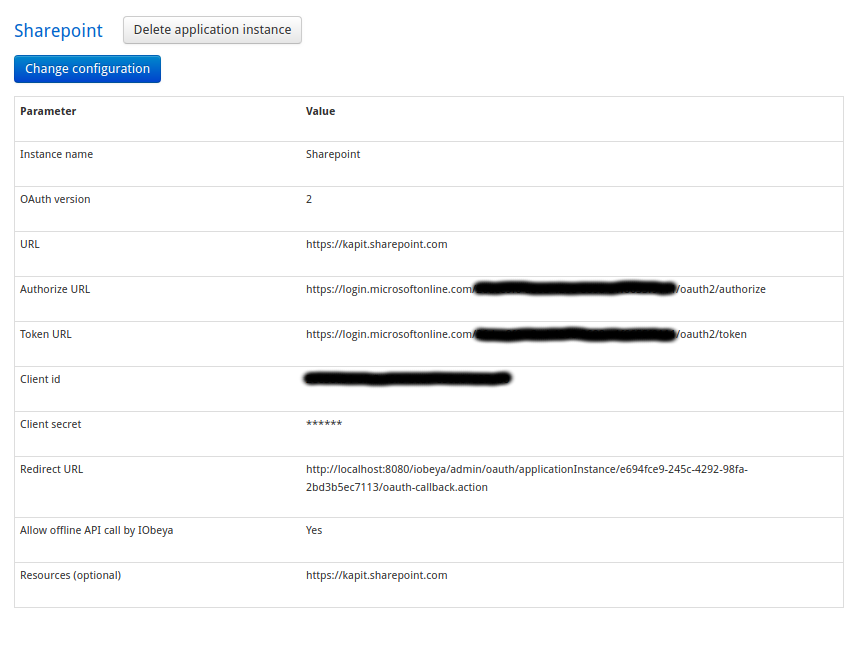
A callback URL (Redirect URL field) is generated while creating a new application instance. You will need to use this URL in Office 365 in order to configure iObeya’s access. Following screenshot shows an application instance’s details with the generated callback URL.
Configuring the SharePoint Application from Azure AD
To finalize iObeya application configuration on Office 365, set the callback URL got from the preview step.
- From https://portal.azure.com/, select Azure Active Directory ‣ App registrations.
- Select your application.
- Click Authentication.
- Click Add a platform.
- Select Web in the :guilabel:`Configure platform`pannel on the right.
- Click Add URI.
- Add the callback URL you got from iObeya administration.
Configuring the SharePoint Add-On to Use OAuth 2.0
You can now configure your SharePoint add-on to connect to SharePoint API with OAuth tokens.
From iObeya administration, access the external resource menu, then add a new SharePoint external resource:
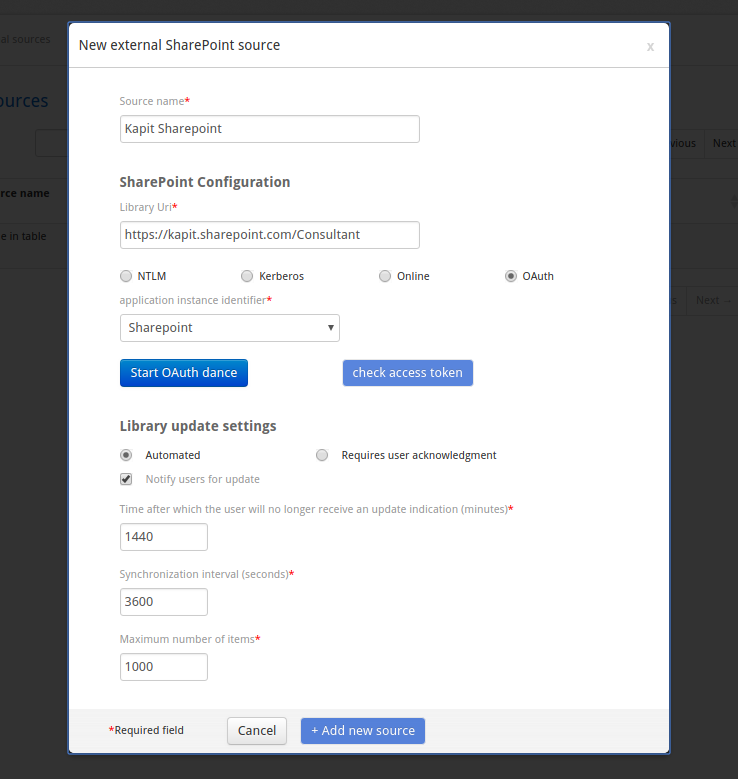
Start an OAuth dance to get OAuth access, then refresh tokens by selecting Start OAuth Dance.
A new OAuth dance starts, you will have to connect to azure AD with an account which has access to iObeya application configured in Azure AD.
Come back to the SharePoint configuration popup, then select check access token to check if the token has been generated successfully;
Save your configuration.
Your SharePoint add-on is started successfully. It can from now refresh automatically the OAuth access token if needed.