Configuring Your iObeya Platform
Warning
If you install iObeya for the first time, we advise you to carefully follow the different steps of this section.
This chapter explains how to configure your iObeya platform from the administration interface.
As a platform administrator you will learn how to:
- Define and modify the iObeya license on your iObeya platform.
- Configure domains.
- Configure an iObeya authentication policy.
- Configure the iObeya password security (only for the iObeya internal user management).
- Configure an iObeya email feature and notifications.
- Configure the frequency of iObeya platform jobs (scheduled tasks).
- Configure internal and custom add-ons.
Configuring Your License
Note
- Required permissions: Platform (Can use + Administrate).
- Required: iObeya license key provided by iObeya Support.
Changing/Saving the License
If you have purchased a new license, or if you are installing iObeya for the first time, you will need to provide information to iObeya Support which will generate a compatible License:
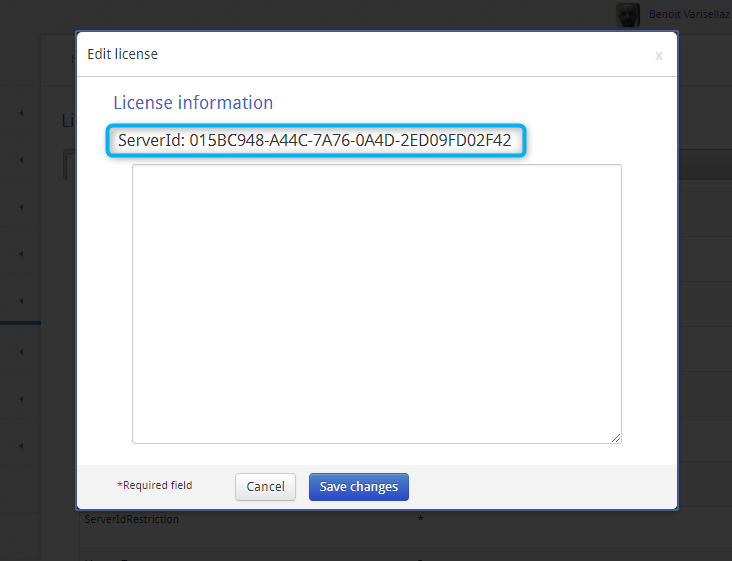
Installing the License for the First Time
After the deployment of the iObeya application on your server:
Go to the iObeya administration interface on that server.
The platform Administrator is automatically redirected to the license page.
Note the Server ID and send it by email to our Support team (support@iobeya.com).
You will then rapidly receive your new version 4.0 compatible license.
Copy and paste the license key text from the text editor into the license text zone on the license page.
Select Save.
The license becomes active immediately.
Updating the License
After purchasing a new license, or renewing an existing license:
- Go to iObeya administration interface.
- Select License in the left-hand side menu.
- Select Edit license.
- Open the new license file in a text editor.
- Copy the new license content, then paste it into the license text zone.
- Select Save changes.
The new or existing license becomes active immediately.
Note
After updating your license, check the details table to see the new license parameters.
Checking Information Concerning the License
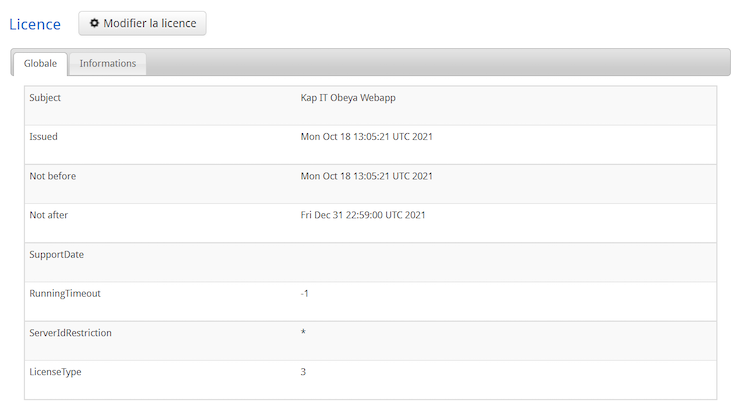
- Subject:
- License name or License owner name.
- Issued:
- Creation date of the license.
- Not before:
- License validity start date. You cannot activate the license before this date.
- Not after:
- License validity end date. You cannot use the iObeya platform after this date. To continue using iObeya, a new license has to be provided.
- SupportDate:
- Support end date for the active license. You cannot upgrade the iObeya platform to newer versions and no support will be provided after this date. To upgrade iObeya and get support, a new license has to be provided.
- RunningTimeout:
- Number of hours of use authorized by a Developer license.
- ServerIdRestriction:
- Display the server ID that is compatible with the active license.
- LicenseType:
- 0: On-premise commercial license
- 1: Demonstration license with a limited validity period
- 2: Developer license with a limited number of hours of use
- 3: Cloud commercial license
Configuring Domains
Domains allow platform administrators to partition their platform into several independent entities, ensuring confidentiality and security of the virtual rooms.
As a platform administrator, you need to configure:
the default domain.
- Change its name and default settings to adapt to your organization.
- Change the contact mail to display to the users if there is no more license available.
the iobeya-trial-domain domain.
- contact mail: you need to change the contact mail to be displayed to the users to request a standard room.
- template: you can create a custom room template allowing trial rooms to be created based on your standardized visual management boards and associated guidelines.
Warning
All trial rooms are created in this dedicated domain. The settings of this domain are read-only except the ones you have to configure.
See Managing Domains to find out more.
Configuring Authentication
As of iObeya version 3.6, authentication configuration has been integrated into the administration interface of iObeya. It is now possible to configure and change your authentication configuration without restarting your server.
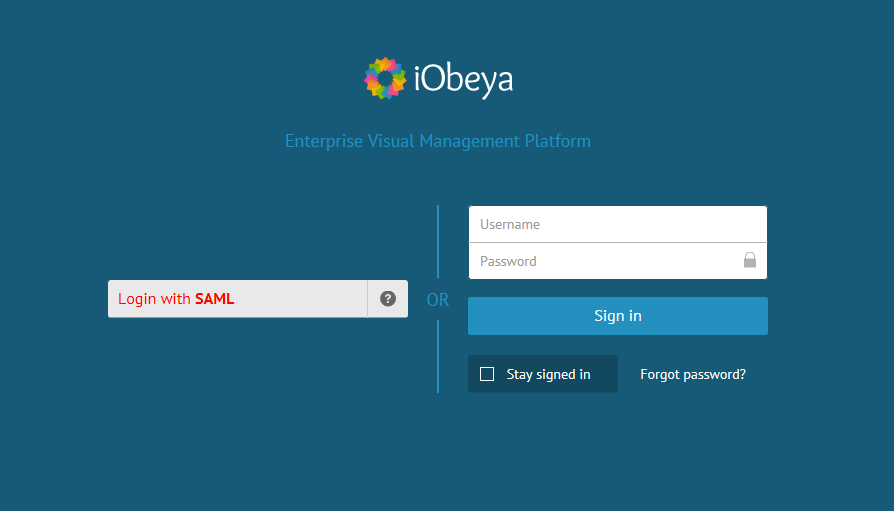
By default, only local users can connect to the application using form authentication. This is the default authentication protocol. If you wish to change this policy, or if you are already using another policy in a previous version of iObeya, the platform administrator needs to configure another authentication policy.
Creating a New Authentication Policy
A local platform administrator can create a new authentication policy by following these steps:
- Select Authentication policy in the left-hand side menu (SETTINGS section) of the administration interface.
- Select Add authentication policy.
- Set a name for the new authentication protocol, then validate.
A new authentication policy has been created. This policy is empty and not enabled for the moment.
Adding and Configuring an Authentication Mechanism
Standard Authentication
Every parameter is explained in more detail in the Advanced authentication section below. However, for customers wishing to implement standard authentication with LDAP or Local users with the same login page as usual, follow the procedure below:
In the administration interface of iObeya, go to SETTINGS ‣ Authentication Policies.
Create a new policy by clicking on the corresponding button and save.
You are redirected to the parameters of this policy.
Select New Mechanism, then:
- Add Form credentials mechanism.
- Add Local Users authentication mechanism.
- Add LDAP authentication mechanism.
Configure your LDAP.
Do not forget to add directory.name= + the name you defined above.
Once you have finished configuring, you must enable this authentication policy.
Advanced Authentication
iObeya provides several mechanisms for authentication. Choose your authentication mechanism by selecting an authentication mechanism parameter in the list of configurations.
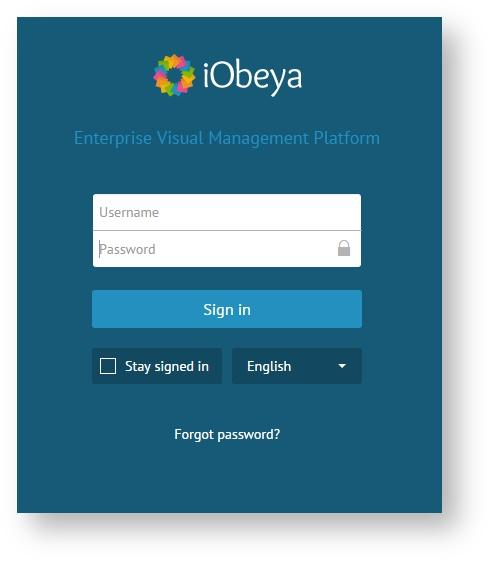
- Form
- The form authentication mechanism is the standard mechanism for entering credentials (login and password). With this mechanism, the application asks the user for their username and password and provides them to the web server or enterprise directory. This mechanism must be used with a credentials validation mechanism (such as local users or LDAP users).
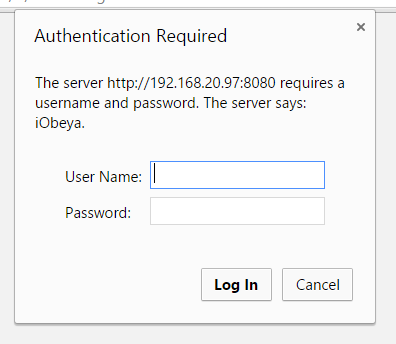
- Basic
With a basic authentication mechanism, the browser provides the username and password to the web server or enterprise directory. This mechanism must be used with a credentials validation mechanism (such as local users or LDAP users).
Warning
There is no timeout for auto logoff or manual logoff with this authentication method.
- Header
With a header authentication mechanism, the application retrieves the username from a request header. This mechanism is provided by some SSO systems. You have to make sure that your system and your iObeya users are synchronized. This mechanism does not require another mechanism for it to function.
For security reason, with this method, make sure that users cannot inject the header that defines the user in header requests.
Warning
There is no timeout for auto logoff or manual logoff with this authentication method.
- Container
With a container authentication mechanism, the application server provides security mechanisms to authenticate users. You have to make sure that iObeya users and application server users are synchronized. This mechanism does not require another mechanism to function.
Warning
There is no timeout for auto logoff or manual logoff with this authentication method.
- SAMLv2
iObeya also provides a mean to authenticate users (but not to authorize them) with the SAMLv2 protocol. For the SAMLv2 authentication to occur, the users returned by the SAMLv2 IdP should exist in the iObeya database.
There are 2 ways to do this, you can:
- synchronize with LDAP server used by the IdP (with the LDAP add-on)
- or activate the provisioning on login in the SAML configuration.
To activate the provisioning on login in the SAML configuration:
- From the admistrator platform homepage, click SETTINGS ‣ Authentification policies.
- Click Configure on a policy.
- Click Edit information on an authentification mechanism.
- From the Authentification attributes section, click Allow account creation.
- Fill in:
- IdP Username Attribute Name,
- IdP Lastname Attribute Name.
Note
If you use both LDAP synchronization and provisioning on login: make sure all users created by provisioning on login exist in your LDAP directory.
As of version 3.6 of iObeya, SAMLv2 is automatically installed with iObeya as an add-on. This is disabled by default and needs to be enabled by the platform administrator in the ADD-ONS section.
Warning
- As for now, there can only be one active SAML authentication mechanism
per authentication policy.
- The iObeya API cannot work if you do not configure at least a Form or a Basic authentication mechanism.
- Local user
- This mechanism is the standard way to validate credentials, using local password management. This mechanism must be used with a mechanism for credentials prompt (such as form or basic authentication).
- LDAP
This mechanism validates credentials against an LDAP directory. This mechanism must be used with a mechanism for credentials prompt (such as form or basic authentication).
As of version 3.6 of iObeya, enterprise directory is automatically installed with iObeya as an add-on. This add-on is disabled by default and needs to be enabled by the platform administrator in the ADD-ONS section.
Note
As of version 3.6 of iObeya, you can use several compatible authentication methods in the same policy, and allow dual authentication.
It allows you, for example, to configure SAMLv2 authentication with a local user form authentication.
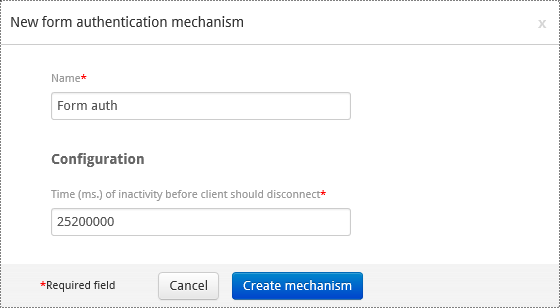
Configuring a Form Authentication Mechanism
- Add the form authentication mechanism to the authentication policy.
- Set a name.
- Specify the time of inactivity in ms before client disconnection.
- Select Create mechanism.
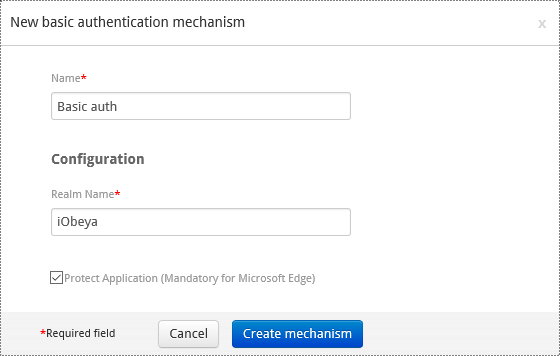
Configuring a Basic Authentication Mechanism
Warning
There is no timeout for auto logoff or manual logoff with this authentication method.
Add the basic authentication mechanism to the authentication policy.
Set a name.
Set the real name attribute.
Optionally, uncheck Protect application.
This option is mandatory for Microsoft Edge.
Select Create mechanism.
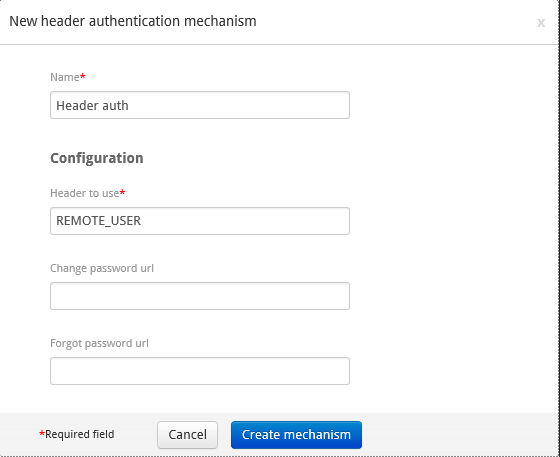
Configuring a Header Authentication Mechanism
Warning
There is no timeout for auto logoff or manual logoff with this authentication method.
- Add the header authentication method to the authentication policy.
- Set a name.
- Set the header to use.
- Optionally, set the specific change and forgot password URLs.
Configuring a Container Authentication Mechanism
Warning
There is no timeout for auto logoff or manual logoff with this authentication method.
- Add the container authentication mechanism to the authentication policy.
- Set a name.
- Optionally, set the specific change and forgot password URLs.

Configuring a SAMLv2 Authentication Mechanism
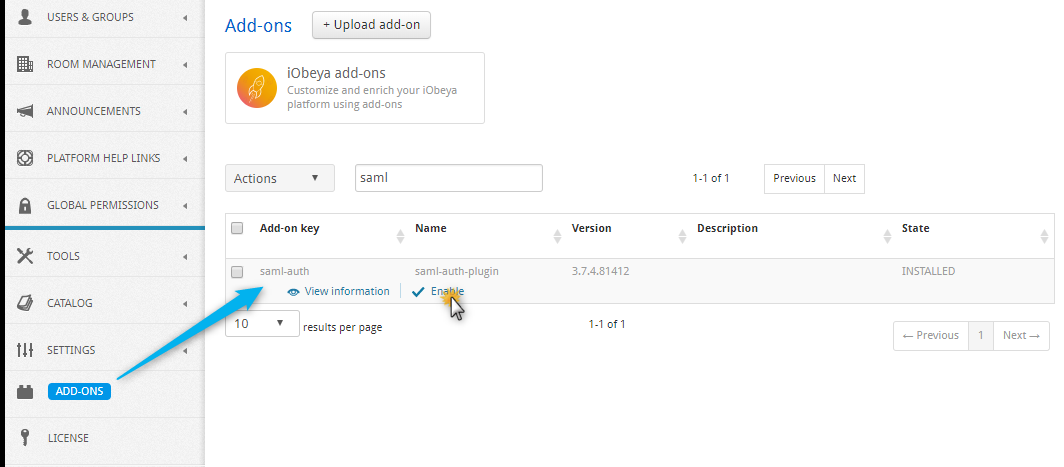
Ensure the SAMLv2 add-on is enabled.
Access the ADD-ONS section.
Verify that the SAMLv2 add-on has an ENABLED status, not INSTALLED.
If the status is INSTALLED, enable the add-on by clicking on Enable.
Access the configuration interface of the authentication policy.
Add the SAMLv2 authentication mechanism to the authentication policy.
Set a name that will appear on the login page.
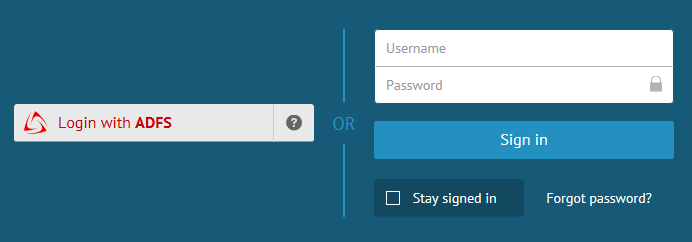
Customize the look of the login page by setting a text color and an icon to illustrate your SAMLv2 provider.
It will be useful to customize the login page when using dual authentication with SAMLv2 and form mechanisms.
Configure the metadata.
Upload metadata file, or set the paths/URL, to access the file of the Identity Provider.
If this already exists, upload the iObeya metadata file.
Generate it if it is the first time configuring SAMLv2 authentication in iObeya.
Configure the Key management section.
Configure the Authentication attributes section.
Optionally, customize the SAMLv2 authentication mechanism in the Additional settings section.
Here is the description of each parameter and their possible values
Metadata
- Metadata for the identity provider
To authenticate users with SAMLv2, iObeya needs to know the Identity Provider it should use and the features it supports. This information is provided in the IdP metadata.
- Metadata for iObeya (SP)
iObeya metadata.
- Values
- Upload the iObeya metadata file, or generate it.
- Entity ID of iObeya
The entity ID of iObeya to be used for iObeya metadata generation, or to retrieve data from uploaded metadata.
- Values
For metadata generation, default value is the URL where iObeya metadata will be available, that is <SERVER_URL>/saml/metadata.
For uploaded metadata, this can be empty or undefined, if there is only one entity ID in the metadata file.
Keystore
- Keystore file
Keystore file containing the necessary keys.
- Values
The keystore should be generated with Keytool which is part of the Java standard distribution.
Note
Use a Keytool version compatible with the JDK version used to deploy iObeya.
See Technical requirements to know which JDK version you are using.
Here are examples of key generation and certificate extraction. Example usages of keytool:
Generate key
mycompany.comin keystorekeystore.jkskeytool -genkey -keystore keystore.jks -alias mycompany.com -keyalg RSA -sigalg SHA256withRSA -keysize 2048 -validity 1095
Note
validity = period before expiration in days
Extract X509 certificate from key
mycompany.comin keystorekeystore.jkskeytool -export -keystore keystore.jks -alias mycompany.com -file mycompany.com.cert –rfc
Possibly reimport certificate signed by certification authority (should use the same alias as private key)
keytool -import -keystore keystore.jks -alias mycompany.com -file mycompany.com.signed.cert
- Password of the keystore
Password of the keystore itself.
- Values
- Any string
- Passwords for the keys in the keystore
Passwords for the keys in the keystore.
- Values
JSon formatted object, where keys are the key names and values are passwords as strings.
Example:
{"mycompany.com":"iobeya123",
 "signing.mycompany.com":"iobeya456"}
- Name of the default key
Name of the default key to use when a specific key has not been defined for a particular task (signing, encryption, tls/ssl). Private and public keys must be present in the keystore at keystorePath.
- Values
- The name of a key present in the keystore.
Authentication Attributes
- idpAuthAttributeName
The name of the attribute that is returned by the Identity Provider to be used as an identifier to authenticate the user in iObeya. It will be mapped to the iobeyaAuthAttributeName property.
- Values
- Any string.
- Name of iObeya user authentication attribute
Name of iObeya user attributes that should match the value of the attributes whose name is idpAuthAttributeName.
- Values
email
Username
- Allow account creation
If necessary, create an iObeya account when a user connects via SAML.
- Values
- Boolean
Additional Settings
- Logout method
Allows the choice of the logout action in iObeya.
- Values
- Local
- When a user logs out from iObeya, she stays connected to the IdP, but is disconnected from iObeya.
- Global
- When a user logs out from iObeya, the IdP will be asked to perform a single logout (IdP tries to contact all connected SPs to disconnect them).
- Custom
- When a user logs out from iObeya, she is redirected to a custom URL, for example, the logout URL of the IdP.
- Security profile
Security profile for verification of message signatures.
- Values
- metaiop
SAMLv2 Metadata Interoperability Profile.
Uses cryptographic data from the metadata document of the entity in question. No checks for validity or revocation of certificates is done in this mode. All keys must be known in advance.
- pkix
- Signatures are deemed as trusted when credentials can be verified using PKIX with trusted keys of the peer configured as trusted anchors.
- SSL security profile
Security profile for verification of SSL/TLS endpoint trust.
- Values
Same as sslSecurity:
- metaiop
- pkix
- SSL Hostname Verification
Hostname verifier to use for verification of SSL connections
- Values
- default
- org.apache.commons.ssl.HostnameVerifier.DEFAULT
- defaultAndLocalhost
- org.apache.commons.ssl.HostnameVerifier.DEFAULT_AND_LOCALHOST
- strict
- org.apache.commons.ssl.HostnameVerifier.STRICT
- allowAll
- org.apache.commons.ssl.HostnameVerifier.ALLOW_ALL, does not perform any validation.
Signing Algorithm
URI identifying the algorithm variant to use for signing. This will only be taken into account to select the hash function (sha256, sha512, …), given that the algorithm is already specified by the signing key (attributes defaultKey/signingKey ).
- Values
The valid URIs are the OpenSAML supported subset of those in:
- Digest Method for signature reference
URI identifying the digest algorithm to be applied to the signed object.
- Values
The valid URIs are the OpenSAML supported subset of those in:
- Signing Key
Name of the key to use for signing.
Private and public keys must be present in the keystore at keystorePath.
- Values
- The name of a key present in the keystore.
- Encryption key
Name of the key to use for encrypting.
Private and public keys must be present in the keystore at keystorePath.
- Values
- The name of a key present in the keystore.
- TLS Key
Alias of private key used for SSL/TLS client authentication.
No client authentication is used when value is not specified.
Private and public keys must be present in the keystore at keystorePath.
- Values
- The name of a key present in the keystore.
- Trusted keys
Keys included as trusted anchors during PKIX evaluation. Keys are only used with PKIX security profile.
- Values
- Comma separated list of key names from the keystore (@keystorePath).
- Max authentication age
Maximum time of the authentication token. User needs to authenticate if this time is spent since the last connection.
- Values
- Time in seconds the IdP configuration can override this configuration.
- Scoping inclusion
When true, include scoping (should be false when using Microsoft ADFS or Azure AD as IdP).
- Values
- boolean
- Enable SAML 2.0 ECP profile
Enables support for the SAML 2.0 ECP profile.
- Values
- boolean
- Support for unsolicited response
Enables support for unsolicited responses (IdP-Initialized SSO).
- Values
- boolean
- Metadata signature
When true, sign metadata (using XML Signature using certificate corresponding to signingKey).
- Values
- boolean
- Requirement of signature for logout requests
When true, only accept signed logout requests from IdP.
- Values
- boolean
- Sign logout requests sent to IdP
When true, sign logout requests sent to IdP.
- Values
- boolean
- Requirement of signature for logout responses
When true, require from IdP to sign logout responses.
- Values
- boolean
- Signature of logout responser
When true, sign logout responses sent to IdP.
- Values
- boolean
Warning
When updating from version 3.4.4 or below, to version 3.5 or above, default values for signing algorithm and signature reference digest methods have been updated from SHA-1 to SHA-256 due to security concerns. In case of incompatibility, we suggest updating IdP hash methods, but it is still possible to set values explicitly to SHA-1 (http://www.w3.org/2000/09/xmldsig#rsa-sha1) in attributes signingAlgorithm and signatureReferenceDigestMethod.
Troubleshooting
In the case of configuration problems, it can be helpful to activate the debug logs related to SAMLv2 in the log4j configuration file.
<logger name="org.opensaml">
 <level value="DEBUG"/>
</logger>
<logger name="org.springframework.security.saml">
 <level value="DEBUG"/> </logger>
 <logger name="com.iobeya.security.web.authentication.saml"> <level value="DEBUG"/>
</logger>

<root>
...
 <appender-ref ref="debugfile"/> </root>
</root>
Adding and Configuring Local User Authentication Mechanism to the Policy
After choosing between form or basic authentication methods (supported method for local user authentication):
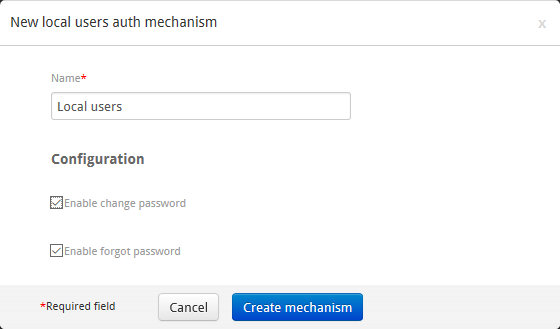
- Add a new mechanism to your authentication policy by clicking on Add new authentication mechanism.
- Select Local user authentication mechanism.
- Configure options to let iObeya manage, or not, the change password and forgot password behavior for local users.
Adding and Configuring External User Authentication Mechanism to the Policy
After choosing between form or basic authentication methods (supported method for external user authentication), platform administrators need to:
Configure the connection between iObeya and the external user directory.
This will allow platform administrators to validate their configuration and add users or groups from the enterprise directory to iObeya, and activate the synchronization mechanism between iObeya and the external directory.
Add and configure your authentication policy to allow users to authenticate to iObeya using the configured directory.
Configuring Your Enterprise Directory Access
The administration interface includes an enterprise directory configuration page, providing information on how the add-on is configured. This page is useful for checking the add-on configuration directly from the administration interface, as well as for finding potential causes for login issues.
Ensure the enterprise directory add-on is enabled.
Access the ADD-ONS page.
Verify that the enterprise directory add-on has an ENABLED status, not INSTALLED.
If the status is INSTALLED, enable the enterprise directory by clicking on INSTALLED.
Edit the enterprise directory configuration.
Access the directory configuration page in the SETTINGS section.
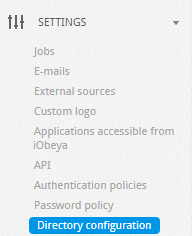
Click Edit configuration and set parameters.
Parameters are listed at the end of this section.
Click Save configuration.
If necessary, check the configuration using the diagnostics, by clicking on Show details at the top of the page to display more information.
Note
The diagnostics consists of a list of error or warning messages that might have an impact on the correct functioning of the enterprise directory add-on.
The diagnostics test that:
- The host is reachable.
- The port is open.
- The Base DN is found.
- The different defined attributes exist.
Review these diagnostics if you have any issue in querying your enterprise directory, in order to identify the root causes.
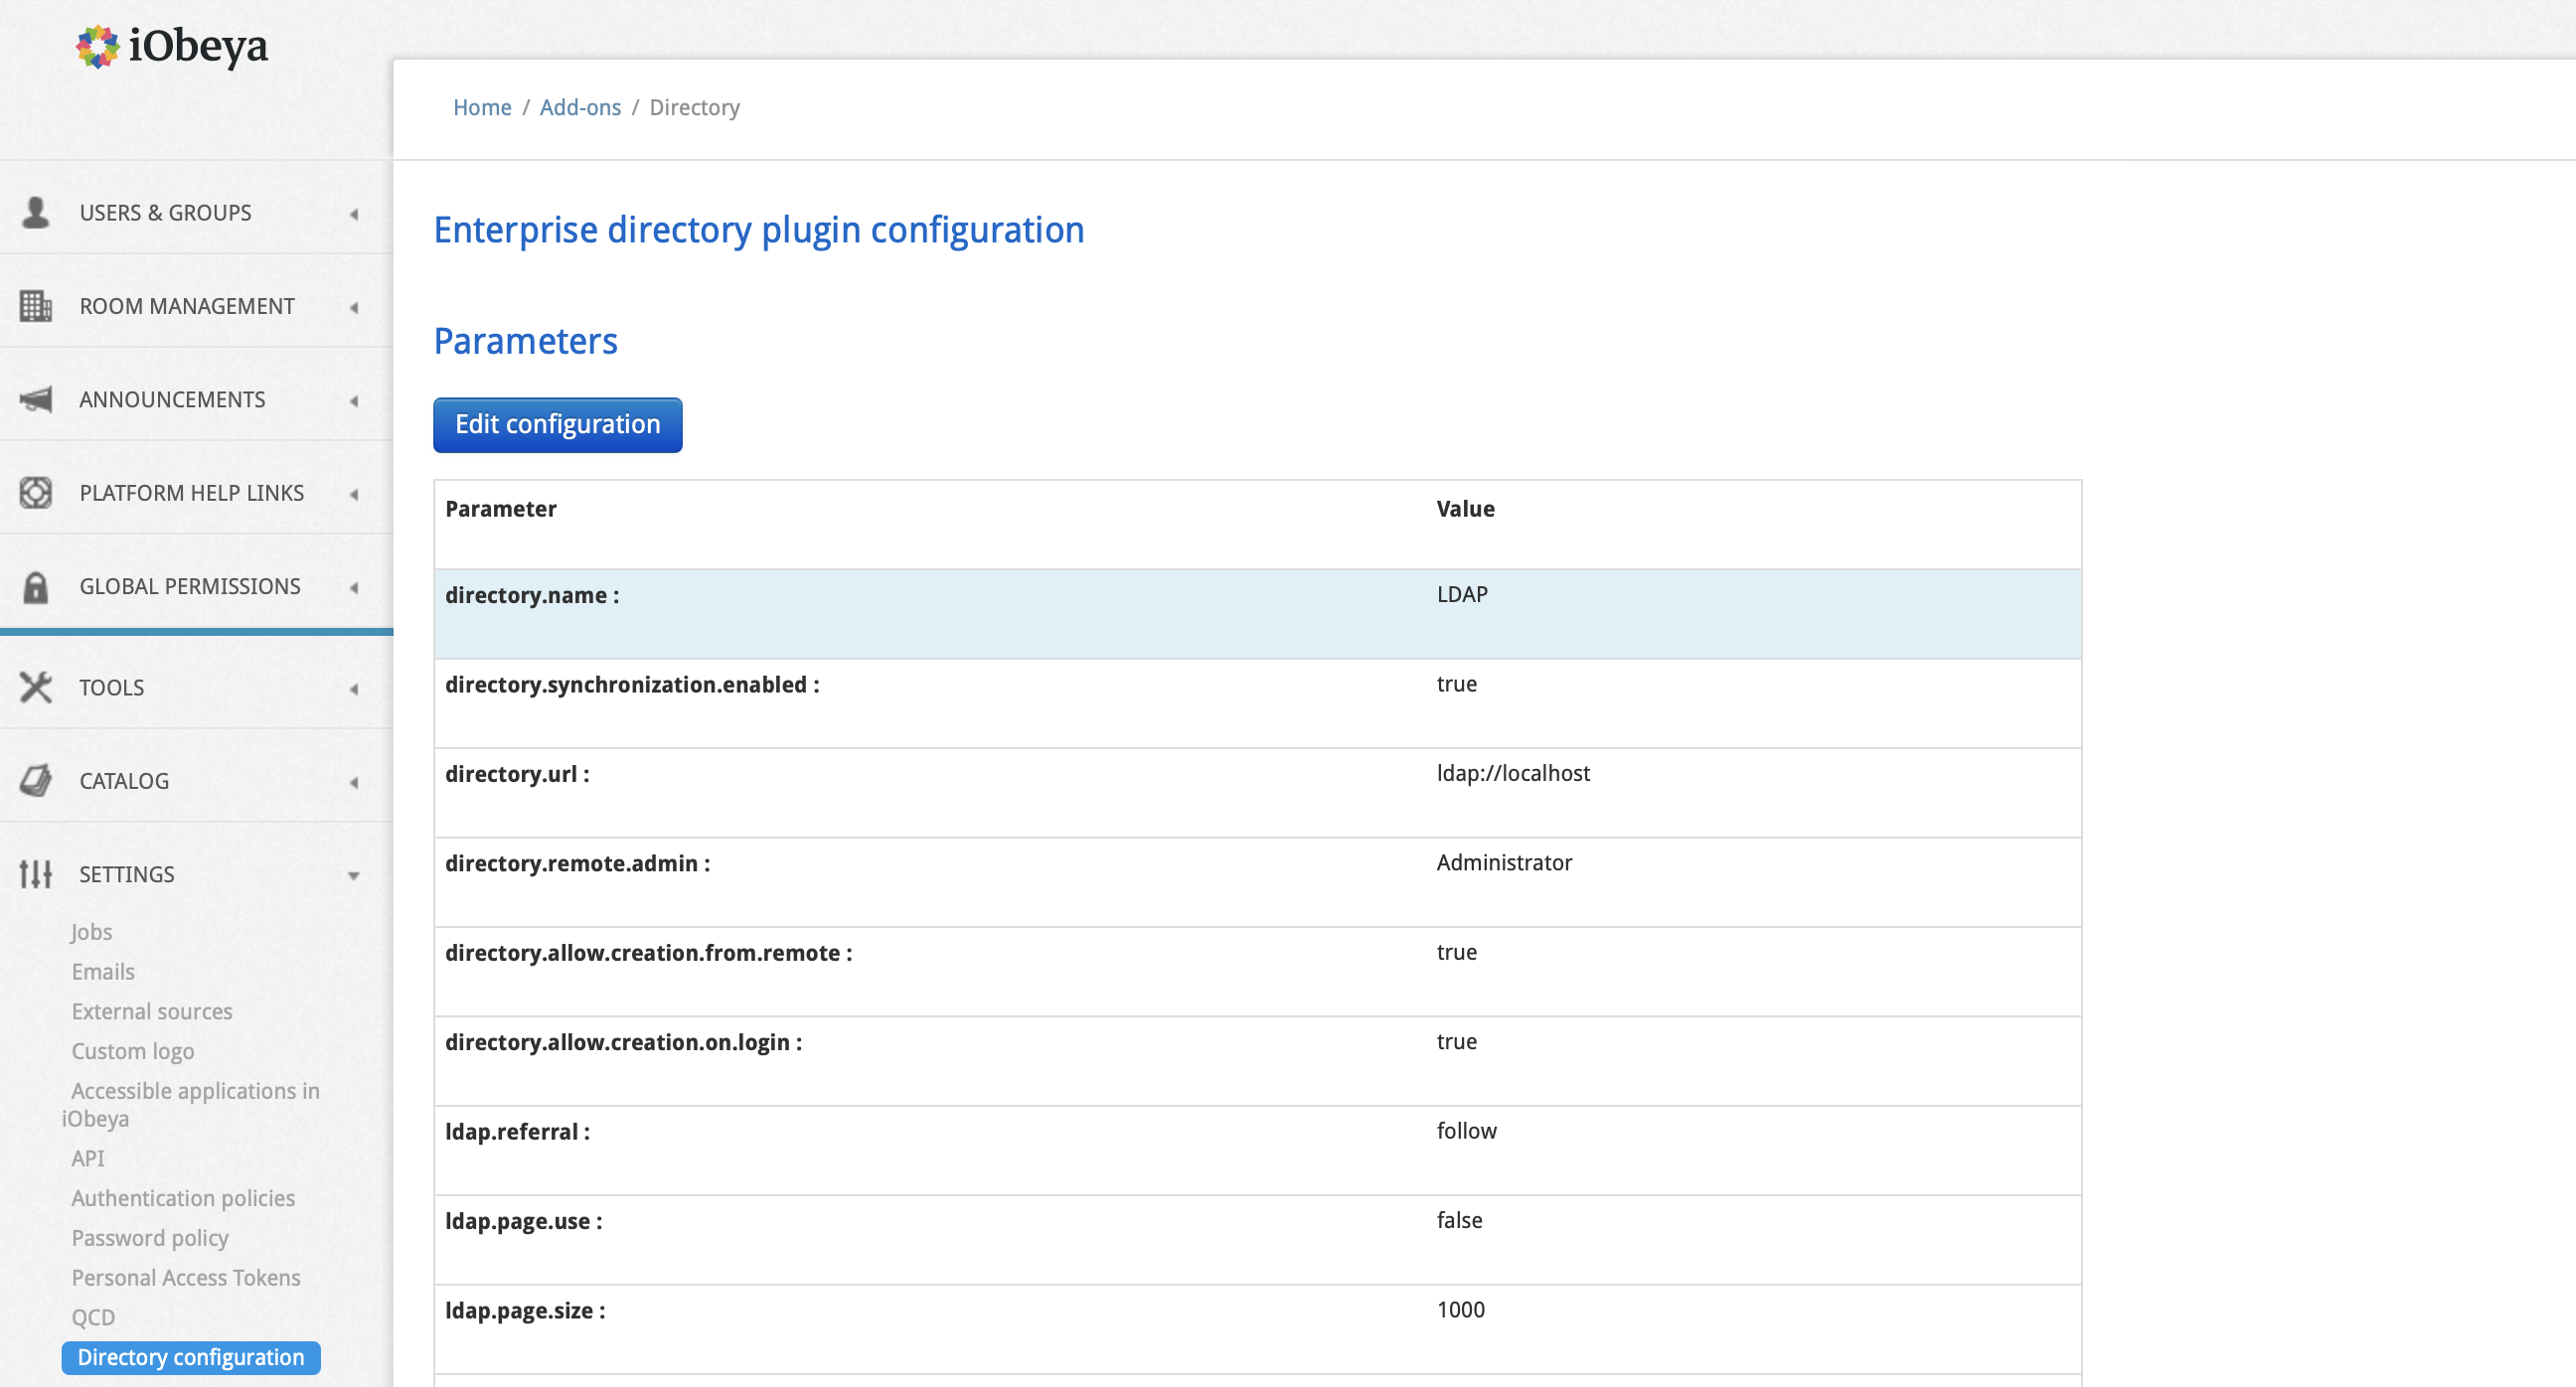
When the configuration is correctly set:
There are 2 new entries in the USERS & GROUPS section that allow platform administrators to request users and groups directly in the directory, and add them to iObeya.
Synchronization between directory and iObeya is enabled. External users and groups are automatically synchronized in iObeya by the SynchronizationDirectory job.
Platform administrators can create an authentication policy using this external configuration (directory.name is mandatory to identify this configuration).
Here is the description of each parameter and its possible values.
- directory.name
- Name of the directory. Mandatory to identify this parameter when a platform administrator configures an external user authentication mechanism.
- directory.synchronization.enabled
This parameter is a boolean. This parameter must be set to true. It enables the synchronization between iObeya and the enterprise directory.
- Value
- True or False.
- directory.remote.admin
Remote administrator username. This user will be created as a local user with platform administration permissions.
- Value
- The value is the username in LDAP or Active Directory of the iObeya platform administrator, e.g.: ADMINISTRATOR=vhugo.
- directory.url
URL of the directory. The url scheme defines the type of directory (ldap/files…). Supported schemes are: ldap://, ldaps:// and file://. File format can be TXT or LDIF.
- Value
- The value can be an IP address, or an address name e.g.: directory.url=ldap://192.168.25.87:389
- directory.file.format
The file formats supported are CSV or LDIF. These parameters are used only if directory.url is a file. Additional parameters directory.file.quote and directory.file.delimi ter can be defined if the format selected is CSV.
- Value
- directory.file.format = CSV.
- directory.file.quote
Define the string delimiter.
- Value
- Default value is ‘’.
- directory.file.delimiter
Define the field delimiter.
- Value
- Default value is ‘t.
- directory.disable.authentication
This parameter is a boolean. Set this parameter to true if you do not want to authenticate the user against the directory
- Value
- True or False.
- ldap.referral
Based on javax.naming.Context. REFERRAL values. Define how to handle referral (links).
- Value
- Ignore, Follow, Throw.
- ldap.connect.timeout
Timeout for connect (optional).
- Value
- The value is a time in ms.
- ldap.read.timeout
Timeout for read (optional).
- Value
- The value is a time in ms.
- ldap.page.use
Needed on some servers to handle a large number of users.
- Value
- True or False.
- ldap.page.size
Size of a page for paged result.
- Value
- By default =1000.
- ldap.range.use
Mandatory for Active Directory (only) with large groups.
- Value
- True or False.
- ldap.range.size
Size of attribute set for range request.
- Value
- By default =1000.
- ldap.bind.username
Define the default user to connect to the LDAP server. Leave blank if anonymous.
- Value
- The username to connect, or blank if the connection is anonymous, e.g.: ldap.bind.username=gdmaupassant.
- ldap.bind.credential
Define the password of the user to connect to the LDAP server. Leave blank if anonymous.
- Value
- The password of the user to connect, or blank, e.g.: LDAP_PASSWORD=belami
- ldap.schema.base.dn
Define the base domain name of the LDAP server.
- Value
- List of key=value separated by comma to define the base domain name, e.g.: ldap.schema.base.dn=dc=mycompany,dc=com.
- ldap.schema.user.base.dn
Define the base domain name for users.
- Value
- List of key=value separated by comma to define the base domain name, e.g.: ldap.schema.user.base.dn=dc=mycompany,dc=com.
- ldap.schema.group.base.dn
Define the base domain name for groups.
- Value
- List of key=value separated by comma to define the base domain name, e.g.: ldap.schema.group.base.dn=dc=mycompany,dc=com.
- directory.schema.objectclass.attribute
Define the object class attribute in the LDAP server.
- Value
- The name of the attribute, e.g.: directory.schema.obje ctclass.attribute=objectclass.
- directory.schema.user.objectclass
Define the object class value to define a person in the LDAP server.
- Value
- The name of the attribute, e.g.: directory.schema.user .objectclass=person.
- directory.schema.user.id.attr
Define the object class value that represents a user id in the LDAP server.
- Value
- The name of the attribute, e.g.: directory.schema.user.id.attr=uid.
- directory.schema.user.group.def.by.uid
Determine if the LDAP groups should be identified by their uid.
- Value
- True or false, e.g.: directory.schema.user.group.def.by.uid=true.
- directory.schema.user.group.def.attr
Define the object class value that represent a group member id in the LDAP server.
- Value
- The name of the attribute, e.g.: directory.schema.user .group.def.attr=memberUid.
- directory.schema.user.firstname.attr
Define the user first name attribute.
- Value
- The name of the attribute, e.g.: directory.schema.user .firstname.attr=givenName.
- directory.schema.user.lastname.attr
Define the user last name attribute.
- Value
- The name of the attribute, e.g.: directory.schema.user .lastname.attr=sn.
- directory.schema.user.mail.attr
Define the user email attribute.
- Value
- The name of the attribute, e.g.: directory.schema.user.mail.attr=mail.
- directory.schema.user.service.attr
Define the user service attribute.
- Value
- The name of the attribute, e.g.: directory.schema.user .service.attr=service .
- directory.schema.user.site.attr
Define the user site attribute.
- Value
- The name of the attribute, e.g.: directory.schema.user .site.attr=location.
- directory.schema.user.language.attr
Define the user language attribute.
- Value
- The name of the attribute, e.g.: directory.schema.user .language.attr=language.
- directory.schema.user.country.attr
Define the user country attribute.
- Value
- The name of the attribute, e.g.: directory.schema.user .country.attr=country .
- directory.schema.group.objectclass
Define the object class value to define a group in the LDAP server.
- Value
- The name of the attribute, e.g.: directory.schema.grou p.objectclass=posixGroup.
- directory.schema.group.name.attr
Define the object class value that represents a group name in the LDAP server.
- Value
- The name of the attribute, e.g.: directory.schema.group.name.attr=cn.
- directory.schema.default.group
Define a group name where users imported from the directory are added. This directory is created automatically if it does not exist.
- Value
- The name of a group in iObeya, e.g.: iobeya-users.
- directory.search.user.field.attr
Define a list of the user searchable criteria in the administration interface.
- Value
- The ordered list of class separated by comma, e.g.: directory.search.user.field.attr=uid,givenName,sn.
- directory.search.user.field.lbl
Define the labels corresponding to the user searchable criteria.
- Value
- The list of labels separated by comma, e.g.: directory.search.user .field.lbl=Login,First Name,Last Name.
- directory.search.user.max
Define the maximum number of search results of users.
- Value
- e.g.: directory.search.user.max=100.
- directory.search.group.max
Define the maximum number of search results of groups.
- Value
- e.g.: directory.search.group.max=100.
- directory.batch.size.default
Define the size by default of a batch.
- Value
- By default =100.
- directory.batch.size.user.in.group
Number of users to add to a group during a single transaction.
- Value
- e.g.: directory.batch.size.user.in.group=100.
- directory.batch.size.user.out.group
Number of users to remove from a group during a single transaction.
- Value
- e.g.: directory.batch.size.user.out.group=100
- directory.batch.size.user.delete
Number of users to delete during a single transaction.
- Value
- e.g.: directory.batch.size.user.delete = 100.
- directory.batch.size.user.update
Number of users to update during a single transaction.
- Value
- e.g.: directory.batch.size.user.update = 100.
- directory.batch.size.group.delete
Number of groups to delete during a single transaction.
- Value
- e.g.: directory.batch.size.group.delete = 100.
- directory.batch.size.group.update
Number of groups to update during a single transaction.
- Value
- e.g.: directory.batch.size.group.update = 100.
- directory.allow.creation.from.remote
Allow the addition of users or groups to a room directly from the LDAP, without adding the users previously in iObeya.
- Value
- True or False.
- directory.allow.creation.on.login
If necessary, create an iObeya account when a user connects via LDAP.
- Value
- True or False.
Adding and Configuring External User Access in an Authentication Policy
Access the configuration screen of the authentication policy.
Add a new mechanism to your authentication policy by clicking on Add new authentication mechanism.
Select LDAP authentication mechanism.
Select the LDAP directory name in the list specified during the configuration of LDAP access in the previous step.
Configure URLs of change and forgot password to allow external users to be redirected to the external forms of change and forgot password.
If empty, no links will be shown to users.
Select Save.
Allowing external user authentication
Prerequisite : to allow external user authentication you need to use an IdP.
- Configure SAMLv2. See Configuring a SAMLv2 Authentication Mechanism.
- Activate the provisioning on login. See Advanced Authentication ‣ SAMLv2.
Warning
This operation allows external users to create an iObeya account.
Combining Mechanisms
You can combine several mechanisms in the same policy. The order in which they are listed is important in the way multiple mechanisms interact, as this defines their priority (first mechanism has highest priority).
Tip
Platform administrators have the ability to configure several credentials validation mechanisms for the same authentication protocol. This allows local and external users to connect on the same platform
If a user is known by several authentication mechanisms, the first authentication mechanism referenced in the policy configuration is taken into account.
SAMLv2 can be mixed with form:
If SAMLv2 is the first mechanism, then users are redirected to IdP for connection.
To connect using form authentication in this case, user must disconnect, then form login is displayed. Otherwise login url can be used to force use of form login.
If form is the first mechanism, then the form is always displayed if user is not connected. Then the user can choose to use IdP, or enter a credentials in the form.
Warning
- Using multiple SAMLv2 IdPs is not supported. If you defined more than one IdP, only the first will be used.
- Header and container mechanisms cannot be used with other mechanisms.
Note
SAMLv2 is only compatible with form authentication as an alternative credentials prompt mechanism. It does not work with header, container, or basic authentications.
Changing Your Authentication Policy
When a new authentication policy is configured correctly, the local platform administrator can change the current authentication policy to the new one.
Warning
If platform administrators have made errors in the policy configuration, it may be possible that you cannot login with an account after changing the authentication policy.
First, we advise the testing of the configuration in a pre-production environment.
Also, do not forget to copy the link shown during the change process.
This link is an encoded, protected link allowing platform administrators to restore the default local authentication policy. This link is written in the log file when a policy is activated (this might be a way to retrieve it if you forgot to note it).
- Move the cursor over the new authentication policy, then select Edit information.
- Select Enable.
- Copy the link shown in the confirmation popup to restore the default local authentication policy, if there is an issue with the newly enabled policy.
- Close the confirmation popup.
All users will be disconnected and redirected to the new authentication system.
Warning
Ensure you keep a local platform administrator account even if the selected authentication policy does not allow local access. If there is an issue with your authentication policy, the link provided disables the current authentication policy and enables the default authentication policy, allowing only local user authentication.
Downloading and Importing an Authentication Policy
To easily transfer policy configurations, platform administrators can download and upload authentication policies from the authentication policy page.
To download an authentication policy:
- Move your cursor over an authentication policy.
- Select Download that will create a
.policyfile.
To upload an authentication policy:
- Select Upload policy.
- Select an existing backup of an authentication policy.
- Select Save.
Note
An imported authentication policy is always disabled by default, even if the policy was enabled when you downloaded it.
Tip
Downloading and importing the active policy is the recommended way to modify this policy.
Managing the Password Policy
This section allows platform administrators to configure the level of security of the password for local users of the platform. This option is for platforms where user management is not totally externalized, and allows the creation of local users.
Defining the Password Policy Option
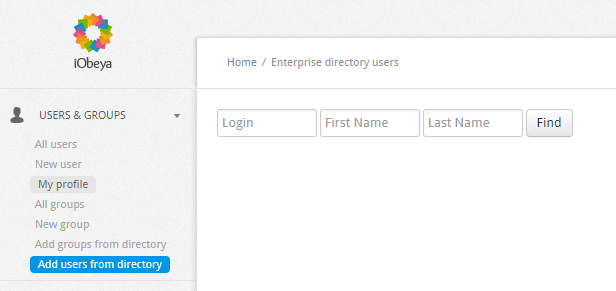
Platform administrators can enable or disable this option:
If this option is disabled, the user can set their password without requirements.
If this option is enabled, the user must fulfill the requirements defined in the password policy to set their password.

If enabled, platform administrators can use the default password policy:
At least 8 characters.
At least one (1) number.
At least one (1) character in lowercase and one (1) character in uppercase.
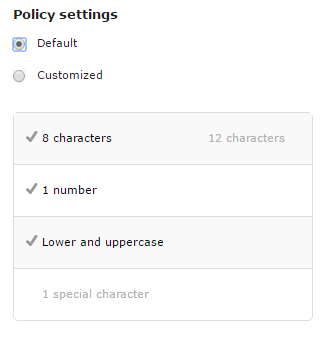
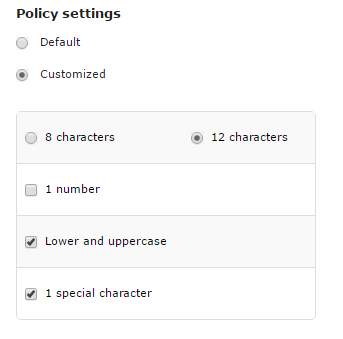
The platform administrator can customize the password policy settings by selecting the Customized option and choosing the rules to apply for new passwords.
Defining the Forgot Password Section
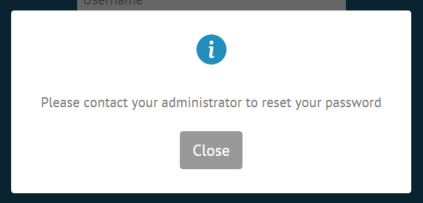
This section allows platform administrators to define a specific message for users who have forgotten their password, to explain the procedure to follow to reset it when the mail server is not set correctly and/or the forgot password template is disabled.
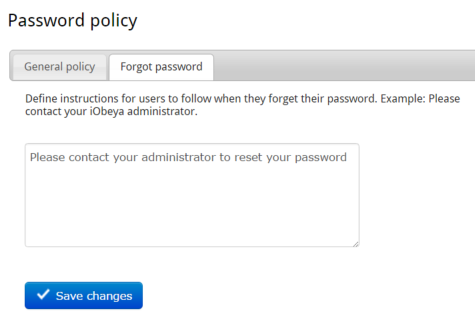
When the user clicks on the Forgot password link, they will receive this message.
Configuring Email Notifications
Platform administrators can configure the iObeya platform to automatically send emails to users in different cases.
SMTP integration is used to send emails when:
- A platform administrator creates a new local user.
- A platform administrator resets the password of a user.
- A user wants to change their password.
- A user wants to retrieve their password.
- A room administrator grants a user access to a room.
Warning
To work correctly, email feature needs to meet certain requirements:
- The mail server must be configured correctly and accessible from the iObeya server.
- The EmailTasks job must be scheduled (if not, scheduled emails will not be sent and will remain blocked in the email queue).
- email templates (corresponding to the use case you require) must be enabled.
Defining the Mail Server in iObeya
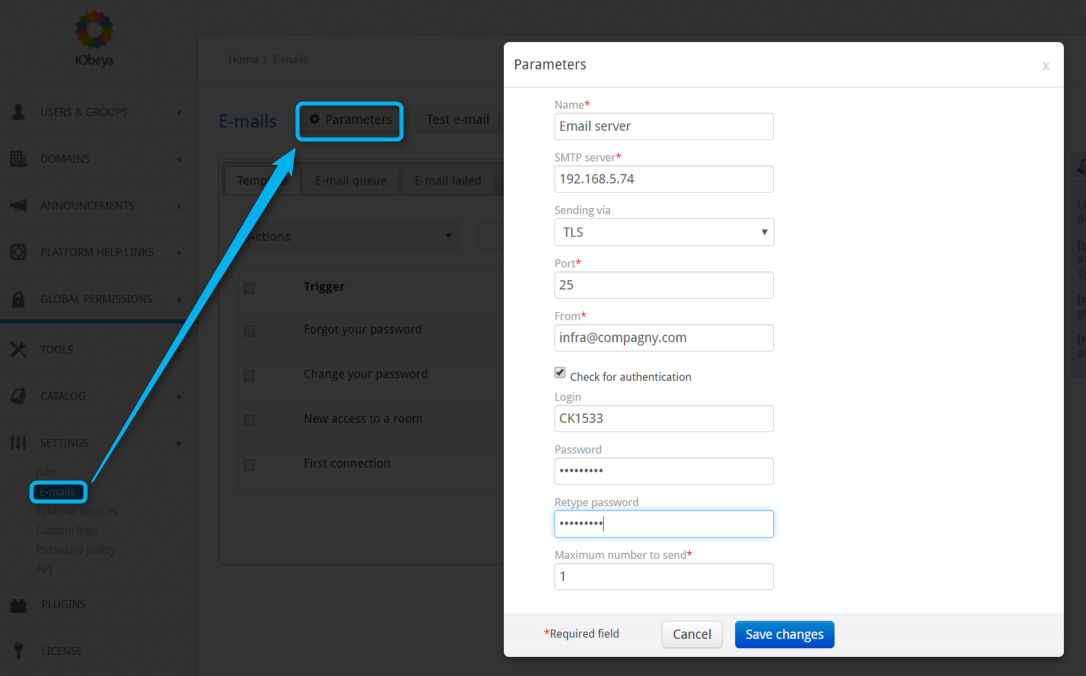
Set the mail server parameters in iObeya:
Select email in the left-hand side menu (SETTINGS section) of the administration interface.
Select Parameters.
Define the parameters:
- Enabled
Uncheck to disable server and stop using email.
- Name
A user-friendly name for the configuration profile that you choose in order to identify it easily.
- SMTP Server
The IP address or the hostname of the SMTP server.
- Cryptographic protocol used
TLS or SSL.
- Port
SMTP port of the mail server.
- From
email address that sends the automatic emails.
- If an authentication is required
Check the Check for authentication box, and complete the corresponding fields.
- Maximum number to send
Maximum number of messages to send in one instance.
Select Save.
Test the parameters to ensure that your email settings are set correctly.
See the procedure below this section.
Schedule the EmailTasks job in Jobs submenu of the SETTINGS section.
This job is paused when the mail server is not responding, or not configured correctly. See Configuring jobs.
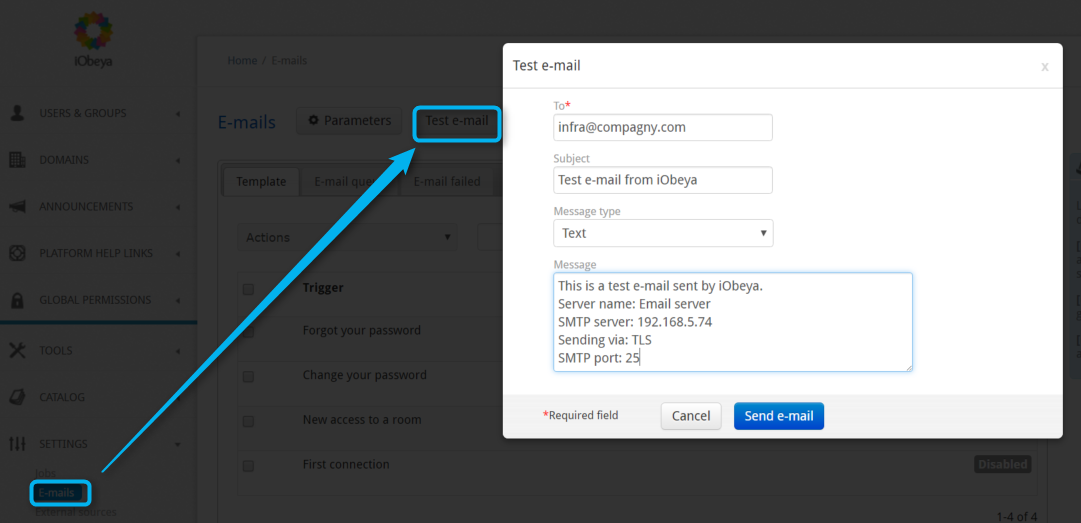
Testing Email Settings
Select Test email.
A popup appears with each field populated automatically:
- To
Default email address is the address of the current user.
- Message type
HTML or Text.
- Message
Parameters of the mail server.
Optionally, modify some fields and select Send email to check that the server is configured correctly.
The mail is sent directly.
Check the recipient’s Inbox to confirm that the email function is correctly configured.
Configuring Email Templates
The mail server must be configured correctly, the EmailTasks job must be enabled, and these templates must be enabled to be functional.
List of Email Templates
- Forgot your password
- email sent when a local user clicks on the Forgot password link on the iObeya login page, or when a platform administrator resets the password of a user. This email contains a link to reset the password.
- Change your password
- Confirmation email sent after resetting password.
- New room access
- email sent when a user is added to a room directly from the iObeya user interface by a room administrator.
- First connection
- email sent when a local user has been created on the platform. This email contains a link to set the password.
- iObeya account room invitation
- email sent when a room administrator send an invite to an email address that is already linked to an iObeya account.
- New account room invitation
- email sent when a room administrator send an invite to an email address that is not linked to any iObeya account.
Enabling/Disabling a Template
- Check the boxes of the template(s) that require enabling/disabling.
- Open the Actions menu.
- Select Enable or Disable.
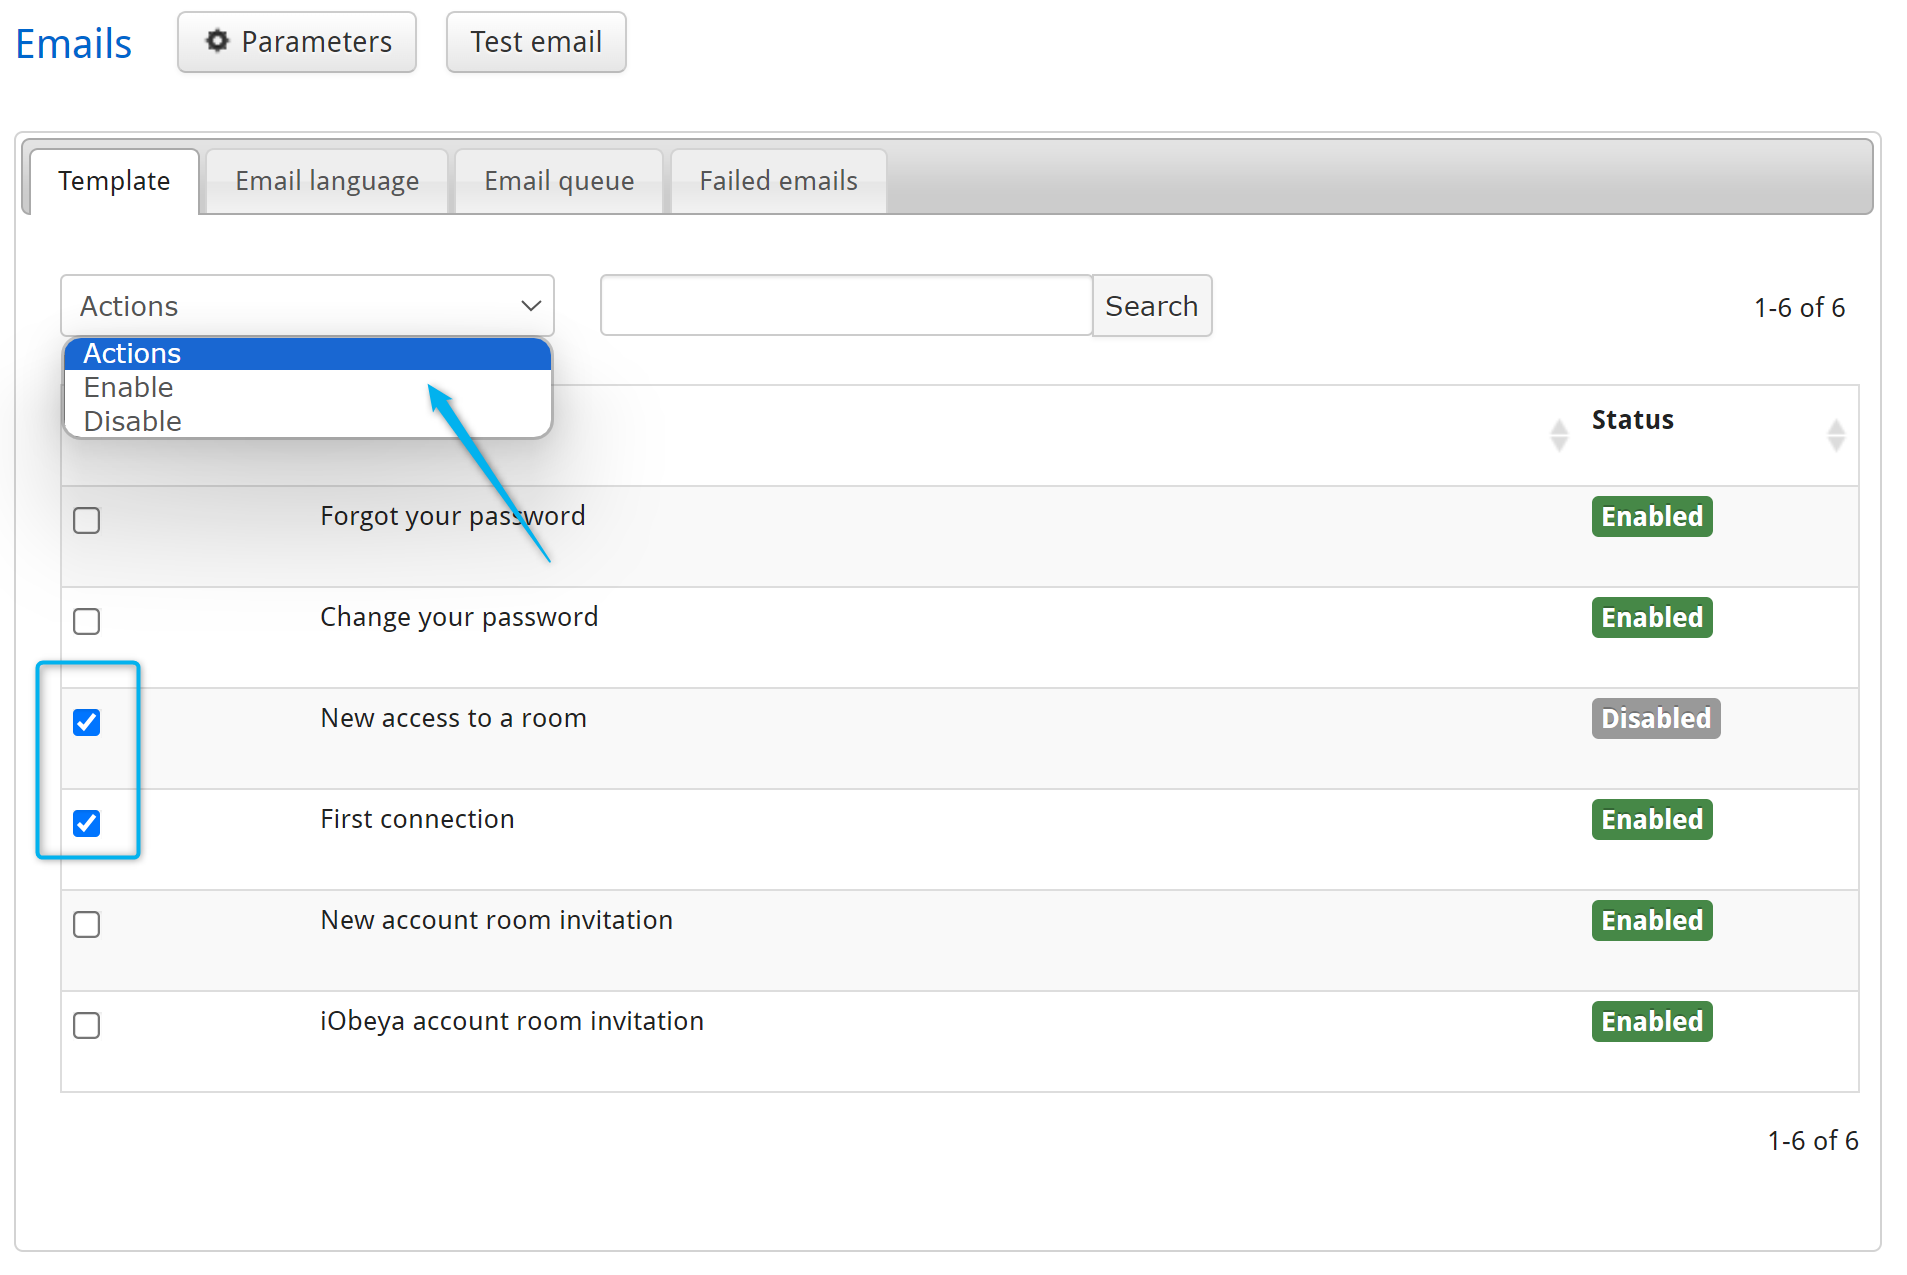
Warning
Please note that deactivating certain templates may prevent associated functions from working properly.
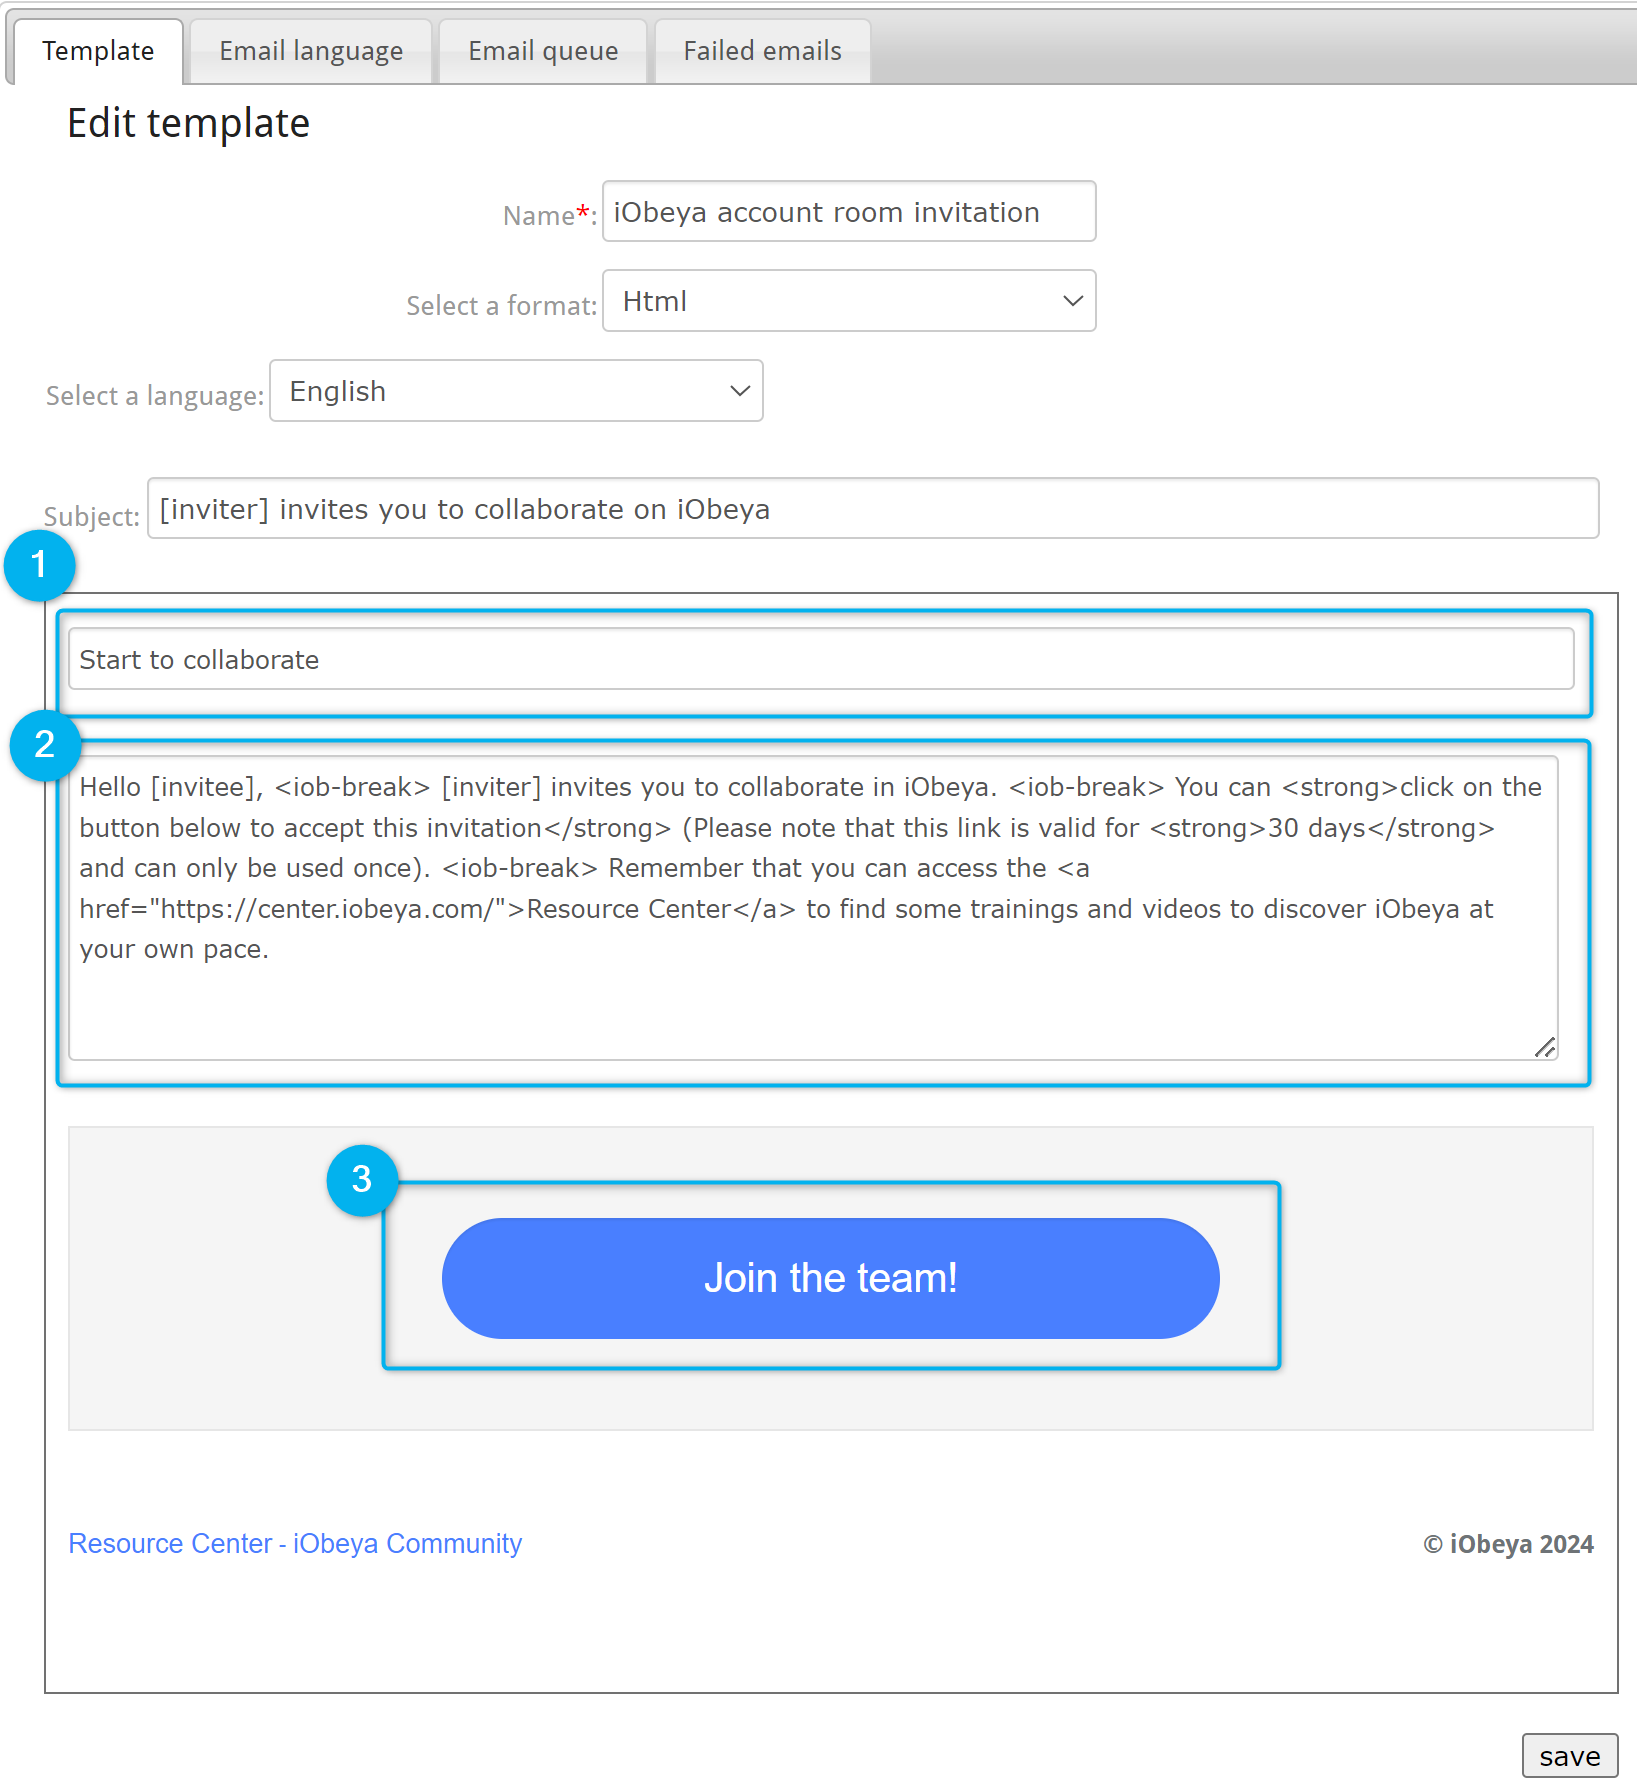
Customizing a Template
To customize a template and/or its parameters, move the cursor over it and select Edit template:
- Name: the name of the template can be changed.
- Select a format: HTML or Text.
- Select a language: English, French, German or Japanese.
- Subject: define the email subject.
Then you can modify the content by filling in these three fields:
- First field: title that will be displayed in bold in the email received.
- Second field: the main content that will be displayed bellow the title and before the call to action button.
- Button: the text of the call to action button can be edited. Leave it blank if you don’t want to have a button.
Note
It is possible to use HTML code to format the text in the second field corresponding to the main content of the email, but its rendering may vary on different mail clients.
In the email templates, you have access to different variables that can be used in the main content to generate dynamic content:
- [user]: Full name of the user who will receive or send the email depending on the template.
- [login]: Login of the user who will receive the email.
- [email]: Email of the user who will receive the email.
- [admin]: Full name of the room admin who added a user to a room.
- [room]: Full name of the room to access.
- [inviter]: Full name of the user who invites you to a room.
- [invitee]: Full name of the user who will receive the invitation to access the room.
- [invitation_url]: Description of the invitation URL.
- <iob-break> : A tag used to separate different sections of a paragraph. Every time you use <iob-break> after a section, the content will be wrapped in HTML tags containing basic styling.
Below are all variables listed for each template which can be used during the email template customization.
- Forgot your password: [user], [login], [email], <iob-break>
- Change your password: [user], [login], [email], <iob-break>
- New access to a room: [user], [login], [email], [admin], [room], <iob-break>
- First connection: [user], [login], [email], <iob-break>
- New account room invitation: [inviter], [invitation_url], <iob-break>
- iObeya account room invitation: [inviter], [invitee], [invitation_url], <iob-break>
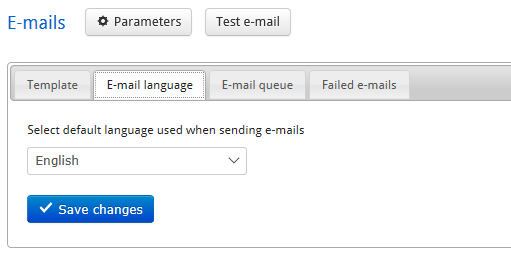
Configuring the Email Default Language
As the language is not a mandatory field when a platform administrator creates a user, they can configure the email default language for users who have not already selected their preferred language.
In the email language tab, select the default language and save changes.
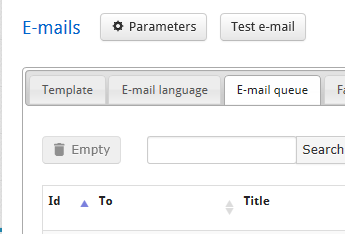
Consulting and Emptying the Email Queue
emails waiting to be sent are stored in an email queue in iObeya. The email queue will be updated periodically according to the email parameters and the periodicity of the email job (see Configuring jobs).
Display the email queue by clicking on the corresponding tab, and use the Search function to find a particular email and check its status.
To empty iObeya’s email queue, select Empty. All emails in the queue will be deleted and not be sent.
Configuring Jobs
A Job scheduling feature has been added to avoid platform administrators relying on their system administrator for some management tasks.
It enables platform administrators to more efficiently manage:
- DataSourceTasks
- Synchronizes external sources that have been configured.
- DomainsAndRoomTasks
- Checks the domain or rooms that must be archived (see Archive).
- ElemSynchronizationTask
- Synchronizes synchronized cards and copies.
- EmailsTasks
- Performs regular sending of emails waiting in the email queue. This job is disabled by default, platform administrators have to enable it after configuring the mail server.
- EmptyTrashJob
- Removes the corresponding elements from the trash. These elements will actually be deleted by the PurgeJob.
- IntegrityCheckTasks
- Launches a check of database integrity, and fixes it if necessary.
- monCountJobPlan
- Updates global counters (monitoring).
- monitoryJobPlan
- Updates data monitoring.
- PurgeJob
- The purge period is defined when installing and configuring the application. This job permanently deletes every element in a deleted state (rooms, domains, boards, elements on boards). Deleted elements are kept on the platform during the retention period (default value 7 days).
- PurgeNotifications
- Deletes notifications that are older than 60 days.
- PurgeUnusedRegistrationTokens
- Deletes Firebase Cloud Messaging registration tokens which has exceed their time-to-live.
- RebuildIndexTasks
- Rebuilds the indexes. It is not scheduled because you have to use it only in case of issues concerning users and/or groups (e.g. if users do not seem to appear anymore).
- ReplayEventsTask
Deletes and reconstructs views.
Warning
This job takes a long time and blocks most of iObeya features like boards or elements creation).
- SendNotifications
- Sends all pending notifications.
- StatisticsTasks
- Updates each room’s statistics.
- SynchronizeDirectory
- Synchronizes users and groups added in iObeya with the LDAP add-on.
- TimeActorJob
- Updates board’s screenshots when card’s color changes in case of closer or passed due date.
To manage different job scheduling activities, or even to run jobs on-demand, go to the administration interface and select Jobs in the left-hand side menu in the SETTINGS section.
- To run a job immediately, move the cursor over the job and select Run now.
- To edit scheduling, move the cursor over the job and select Edit information.
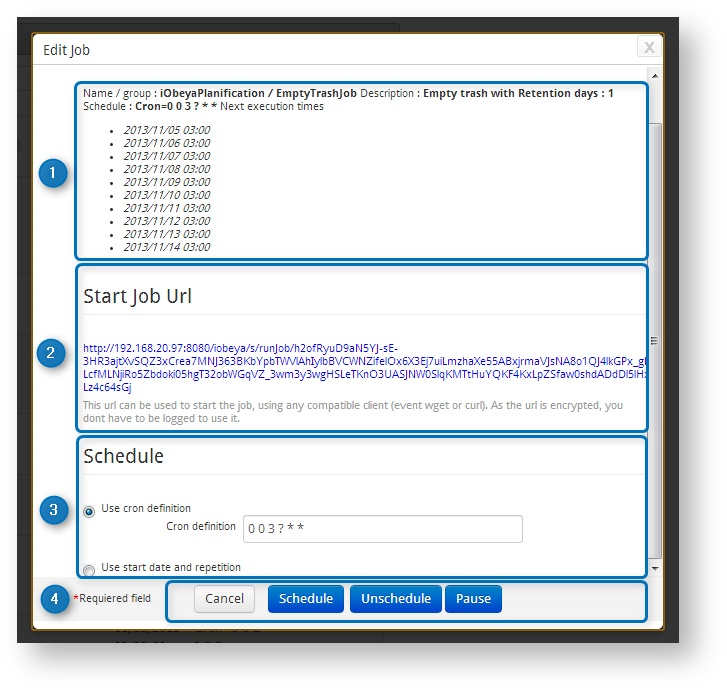
On the scheduling editing page, you will find:
- Information
Summary with the name, description, and current scheduling of the edited job.
There is also a URL to launch a job immediately. It has the same effect as clicking on the Run now icon of the previous page, except the URL can be saved as a bookmark to run the job on-demand.
Tip
This is an encrypted URL for each unique platform administrator so that it can be launched without the need to provide any credentials (e.g. if it is used in a batch script, there is no need to include credentials in the script).
If the user who generated this URL does not have the permission to administrate the platform anymore, the job URL will no longer work.
- Schedule section
Allows platform administrators to select a trigger method, and to configure it.
- CRON
- Jobs are scheduled using CRON syntax.
- Start date and repetition
- Jobs are scheduled based on a date and a frequency.
- Control buttons
- Cancel
- Cancel changes, and go back to the Jobs section interface.
- Schedule
- Save the changes, and schedule the job.
- Unschedule
- Stop scheduling the job.
- Pause/Resume
- Put the job on hold.
OAuth Client: Applications Accessible From iObeya
This section describes how to configure and use iObeya as an OAuth client.
Configuring External Applications in iObeya
To configure iObeya to access external applications as an OAuth client you have to configure this external application in the administration interface of iObeya. The configuration of external applications requires two steps:
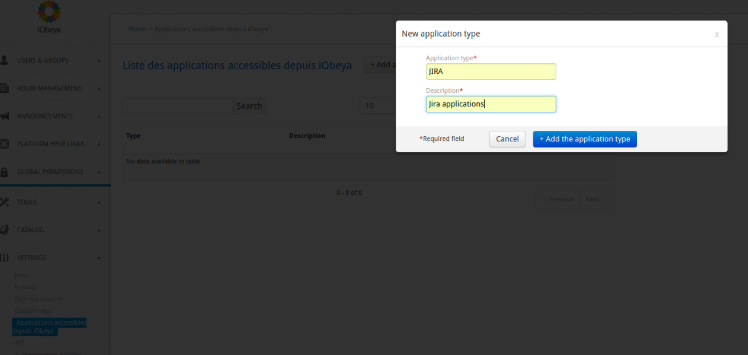
Configure an application type.
From the administration interface you have to create an application type, facilitating the grouping of application instances.
To do this, simply access the SETTINGS ‣ Applications accessible from iObeya menu and add a new application:
Configure an application instance.
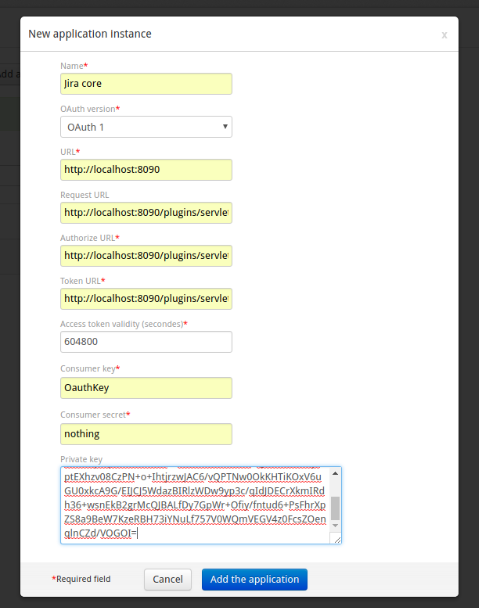
You can add a new application instance from an application type. This instance matches with an external application that should return OAuth tokens. iObeya supports OAuth 1 and OAuth 2.0 external applications. There are specific fields according to the OAuth version.
For OAuth 1 you have to specify:
- A default access token validity
This property is required because with OAuth 1 it is not always possible to get the access token validity.
- Private key
iObeya supports OAuth 1 with RSA-SHA1 signature encryption.
For OAuth 2.0 you have to specify:
- Resources
This property is required. For instance, to access Microsoft graphs API you must specify the following value: https://graph.windows.net/
Below an example of a new application instance configuration.
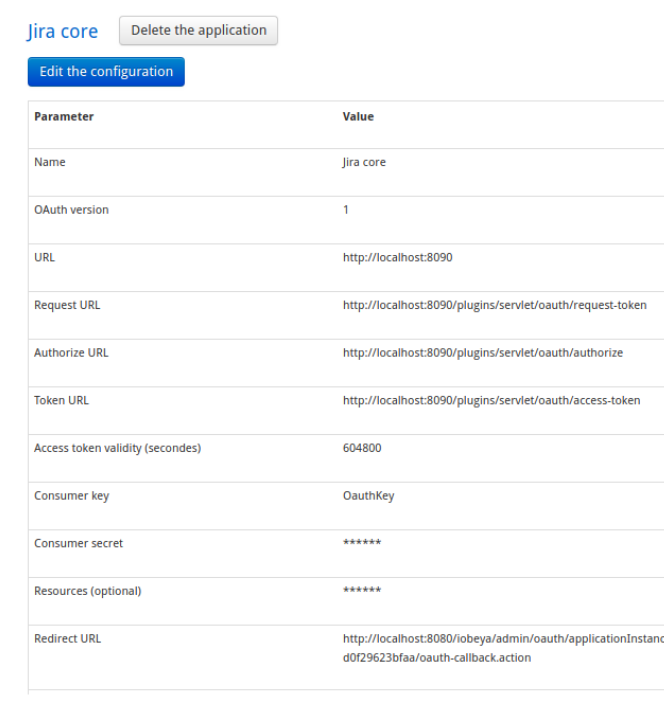
A callback URL (Redirect URL field) is generated while creating a new application instance. You will need to use this URL in the external application to configure iObeya’s access. The following screenshot shows an application instance’s details with the generated callback URL.
Configuring the iObeya Application in an External Application (Jira Example)
To configure an OAuth client application in Jira you have to access the application’s submenu from the administration interface.
Then access the Application links menu and configure a new application link for iObeya. In the configuration popup, update the OAuth tab in the Incoming Authentication menu as follows:
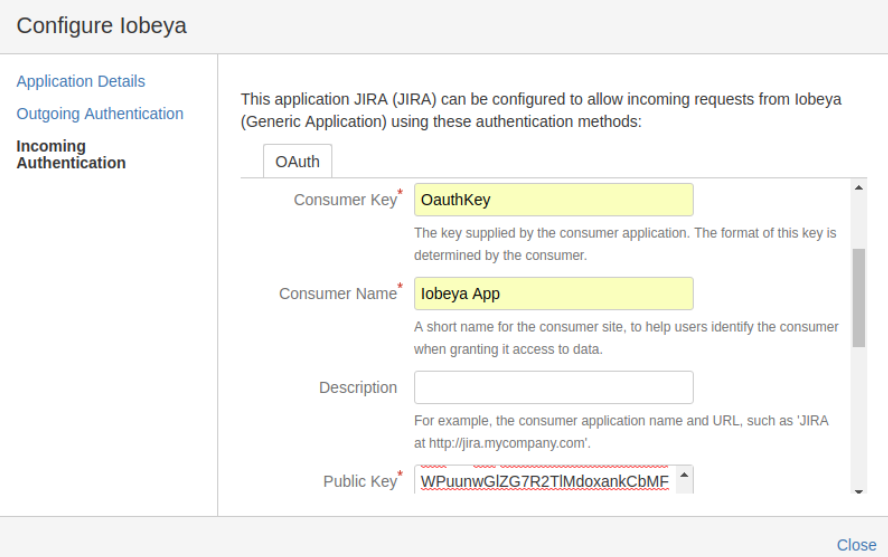
Note
In the case of Jira, at the end of the Consumer Callback URL you must add the ‘?’ character, otherwise the redirection will fail. This error is due to the fact that Jira automatically adds the / character at the end of callback URL while saving the configuration.
After saving this configuration you are now ready to generate and use OAuth tokens from iObeya.
API
iObeya allows external applications to use its API via OAuth tokens.
To use the iObeya API with OAuth tokens from an external application you will have to configure this external application in the iObeya administration interface.
Configuring Source Connectors
A source connector is a connection from iObeya to an external data source.
External source connectors are present in the ADD-ONS section of the platform administration interface.
Warning
By default, the SharePoint connector is not installed, you have to download it from the iObeya Resource Center.
Configuring CORS (Cross-Origin Resource Sharing)
CORS is a mechanism that allows restricted resources on a web page to be requested from another domain outside the domain from which the resource originated.
Platform administrators can define URLs to filter domains that are permitted to request iObeya resources.
Warning
The iObeya API cannot work if you do not configure at least a Form or a Basic authentication mechanism.
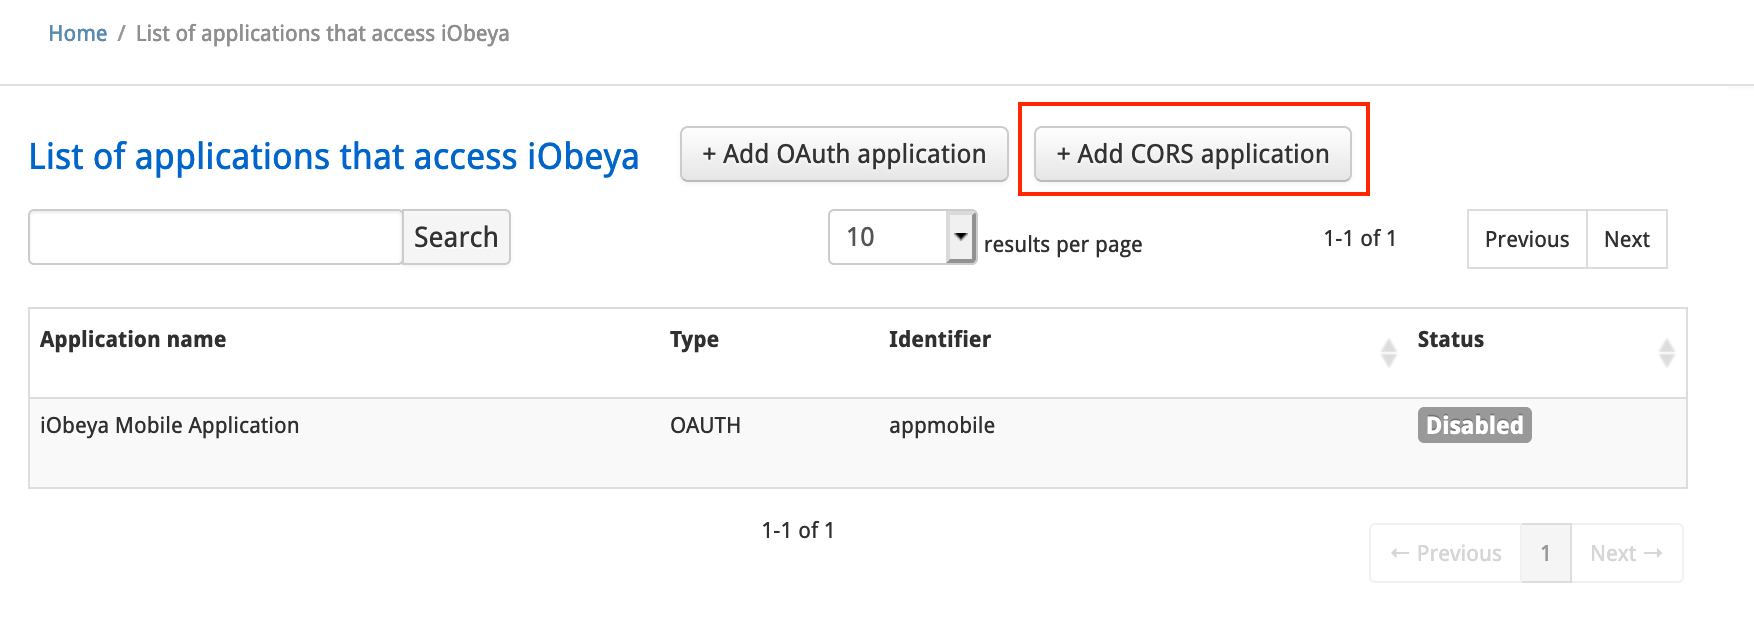
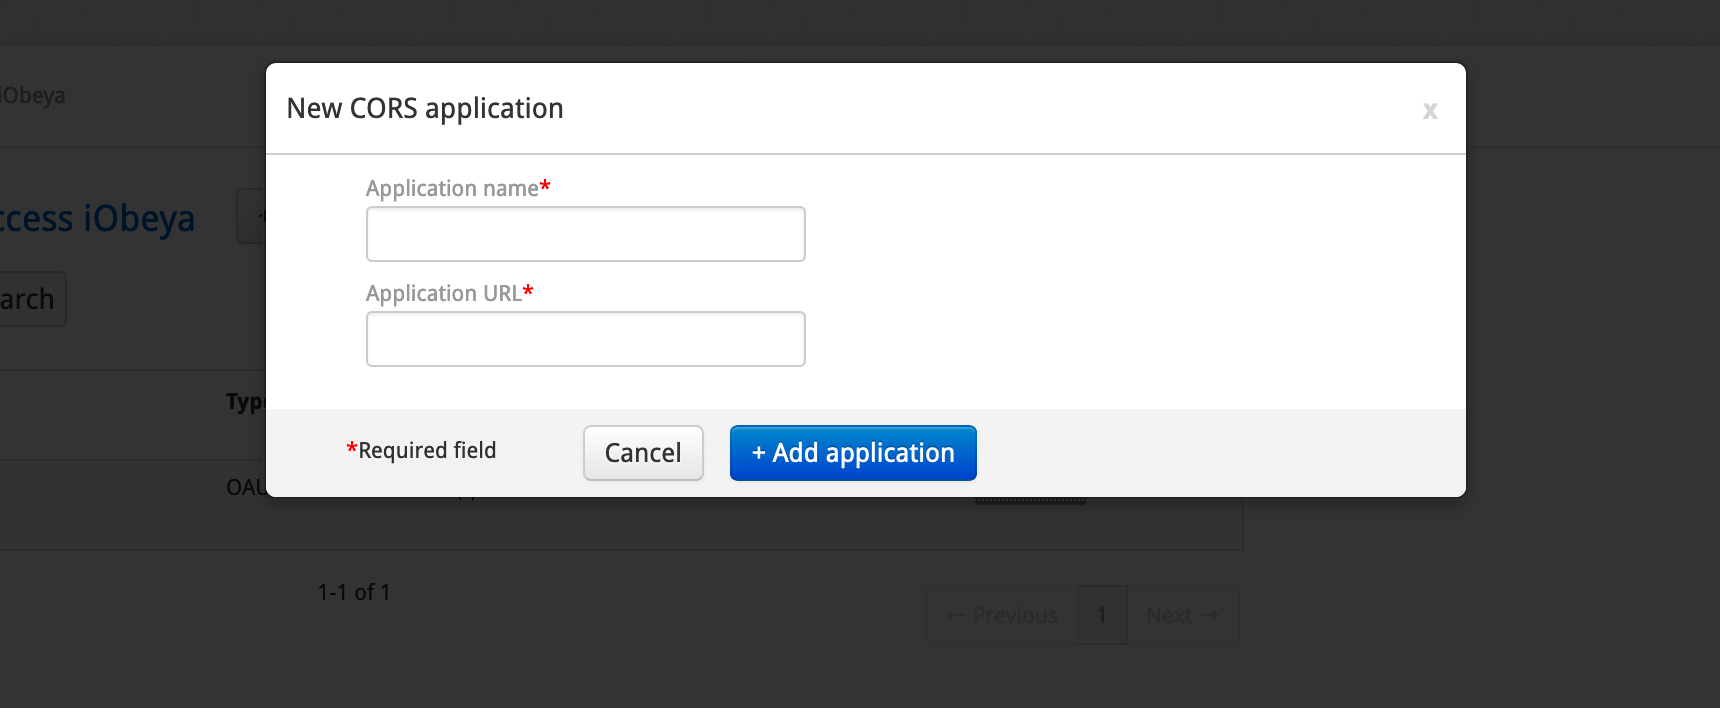
Adding an Authorized URL
From the administration interface click SETTINGS ‣ API.
Click Add CORS application.
Fill in Application name and Application URL.
Click Add application.
Managing Authorized URLs
Editing an Authorized URL
- Move the cursor over the authorized URL to be edited.
- Click Display configuration.
- Click Change configuration.
- Change the URL configuration, then confirm.
Deleting an Authorized URL
- Move the cursor over the category to be deleted.
- Click Delete application.
OAuth Server
Configuring an External Application
From the administration interface click SETTINGS ‣ API.
Click Add OAuth application.
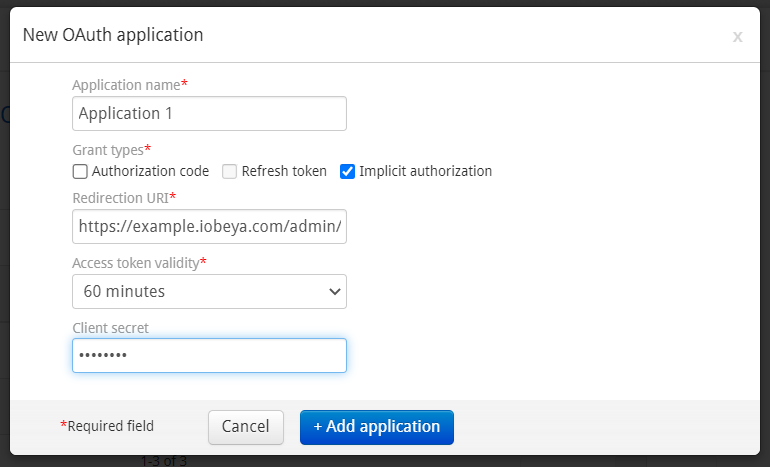
Fill in:
- Application name
Name of the external application.
- Redirection URI
The external application callback URL. This URL will be called by iObeya in order to send an OAuth authorization code or OAuth access token.
- Grant types
The OAuth grant types allowed by iObeya. The external application will be able to choose one of these grant types to generate or refresh OAuth tokens.
Note
The implicit grant type does not allow you to generate a refresh token.
- Access token validity
The lifetime of the access token generated for the external application. The possible values are 1/10/60 minutes or 365 days.
Note
The 365 days token validity is only available if the option Authorization code is not checked and Implicit authorization is checked. This value is useful to generate a long-lived token.
- Refresh token validity
The lifetime of the generated refresh token. The possible values are 7/90/360 days
- Client secret
Allows to configure a client secret when it’s required by the external application (e.g. Microsoft Power Automate). This value cannot be displayed or recovered later. However it’s possible to change the client secret value of an existing OAuth application if the value is lost/fogotten.
Click Add application.
Note
After saving a new external application in iObeya you can get the OAuth client_id from the detail of that external application. This client_id is the identifier of the external application.
Generating OAuth Tokens
Once an external application is configured in the iObeya administration interface, you can generate OAuth tokens from this external application by calling these following iObeya OAuth endpoints:
GET /s/oauth/authorize- The iObeya OAuth authorization endpoint.
These are the query parameters you will have to specify:
- client_id (required)
- The external application identifier.
- response_type (required)
- code for authorization code grant type or token for implicit grant type
- redirect_uri (optional)
- The external application callback URL.
- state (optional)
- Unique and non-guessable arbitrary value used to mitigate CSRF attacks.
- code_challenge (optional)
- Hashed random value (PKCE)
- code_challenge_method (optional)
- plain or S256
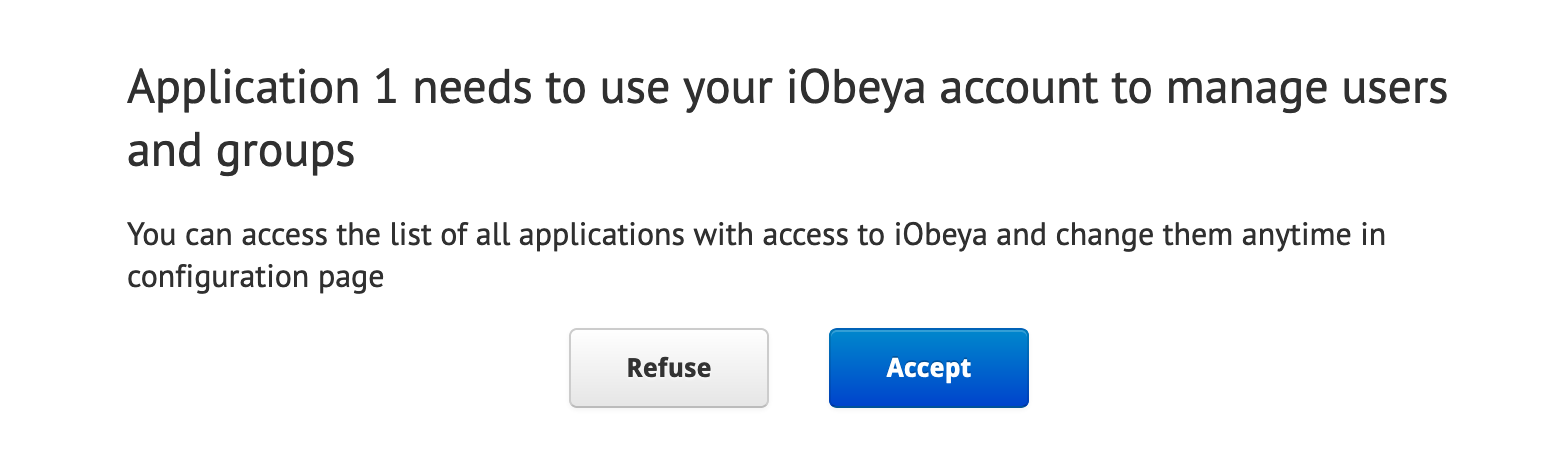
Once called, the authorize URL will display a confirmation dialog to the user:
POST /s/oauth/token- The OAuth 2.0 token endpoint.
The client must authenticate using one of the following methods:
- Basic Authentication
- Including client_id in the request body
- Including client_id in the request parameters
These are the request parameters you will have to specify:
- code (required with authorization_code grant type)
- The authorization code returned by the authorize endpoint.
- redirect_uri (required with authorization_code grant type)
- The external application callback URL.
- grant_type (required)
- authorization_code or refresh_token.
- code_verifier (required with authorization_code grant type if code_challenge was used)
- Code verifier for PKCE.
- refresh_token (required with refresh_token grant type)
- A valid refresh token.
Managing Add-Ons
Note
Required permissions: Platform (Can Use + Administrate).
An add-on is a complementary module to the iObeya platform that extends the application’s functionalities. Some add-ons are included out-of-the-box with iObeya, while others are available for manual installation.
Warning
Once installed some add-ons cannot be disabled nor uninstalled. Therefore we strongly recommend to test any add-on on a test environment first before deploying it on a production environment.
Warning
- iObeya Enterprise on-premises
- Add-ons are managed entirely from the administration interface for installation or update.
- iObeya Enterprise online
- Contact our Support team (support@iobeya.com) to install or update add-ons.
Installing an Add-On
This section describes how to install an add-on to your iObeya platform.
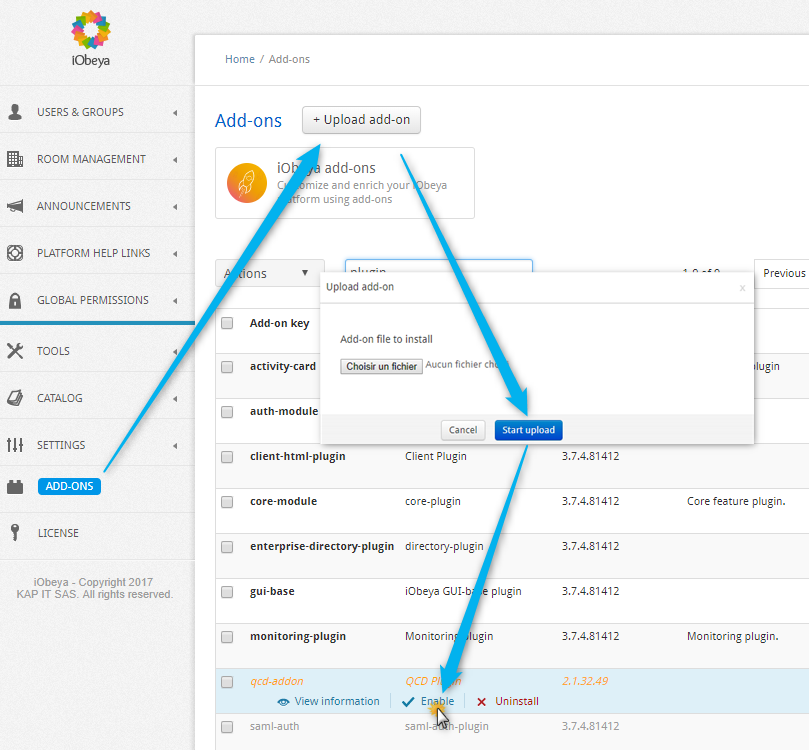
Go to the ADD-ONS section in the left-hand side of the menu of the administration interface.
Select the button +Upload add-on.
Select the JAR file corresponding to the add-on in your filesystem.
Once uploaded, the add-ons appears in the list.
(optional) If the add-on needs to be configured (depends on the add-on), the Configure option is listed.
Enabling an Add-On
This section describes how to enable an add-on to your iObeya platform.
Go to the ADD-ONS section in the left-hand side of the menu of the administration interface.
Select the button +Upload add-on.
Select the JAR file corresponding to the add-on in your filesystem.
Once uploaded, the add-ons appears in the list.
Click Enable.
(optional) If the add-on needs to be configured (depends on the add-on), the Configure option is listed.
Updating an Add-On
See Setup and maintenance documentation ‣ Add-ons.
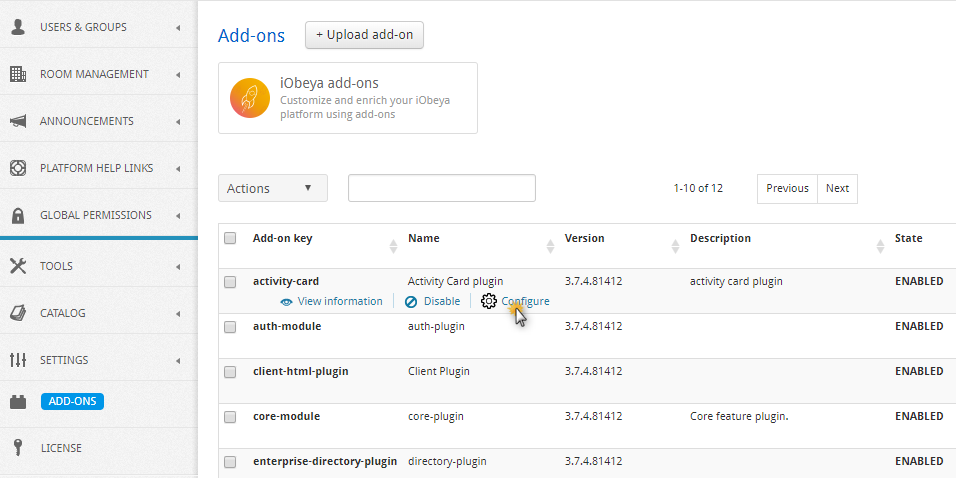
Accessing an Add-On Configuration
To manage and configure the iObeya add-ons:
Select ADD-ONS in the left-hand side of the menu of the administration interface.
Configure an add-on by clicking on Configure if available (do not forget to select Save).
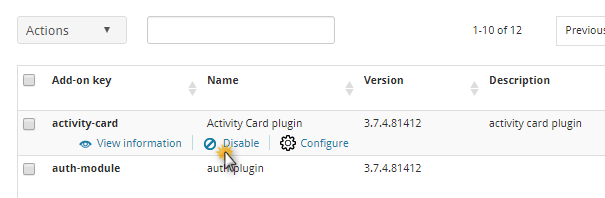
Disabling an Add-On
Some add-ons can be disabled if needed. This action is available in the ADD-ONS section of the administration interface.
Click Disable to disable it. The add-on state will then be changed to DISABLED.
Uninstalling an Add-On
Some add-ons can be uninstalled and removed from an iObeya platform. This action is available in the ADD-ONS section of the administration interface.
Click Uninstall to uninstall it. The add-on will no longer appear in the add-ons list.
Managing Personnal Access Tokens
The Personnal Access Token (PAT) is a token that allows you to retrieve data from an external system. Some iObeya features, such as the ADO add-on and others, require this type of token.
Add a Personal Access Token
To add a PAT refer to the documentation of the add-ons using PAT authentication.
See the corresponding documentation for more information.
Delete a Personal Access Token
You can delete a PAT from the admin platform.
You may need to delete a PAT if you mistyped your token or if you want to delete an expired token.
- From the SETTINGS menu, click Personal Access Tokens.
- Select the token you want to delete.
- Click Delete.