Managing Users and Groups
Introduction
This chapter explains how to manage and administrate user accounts on the platform.
As a platform administrator you will learn how to:
- Create, edit and delete users.
- Create, edit and delete groups.
- Manage users in your groups.
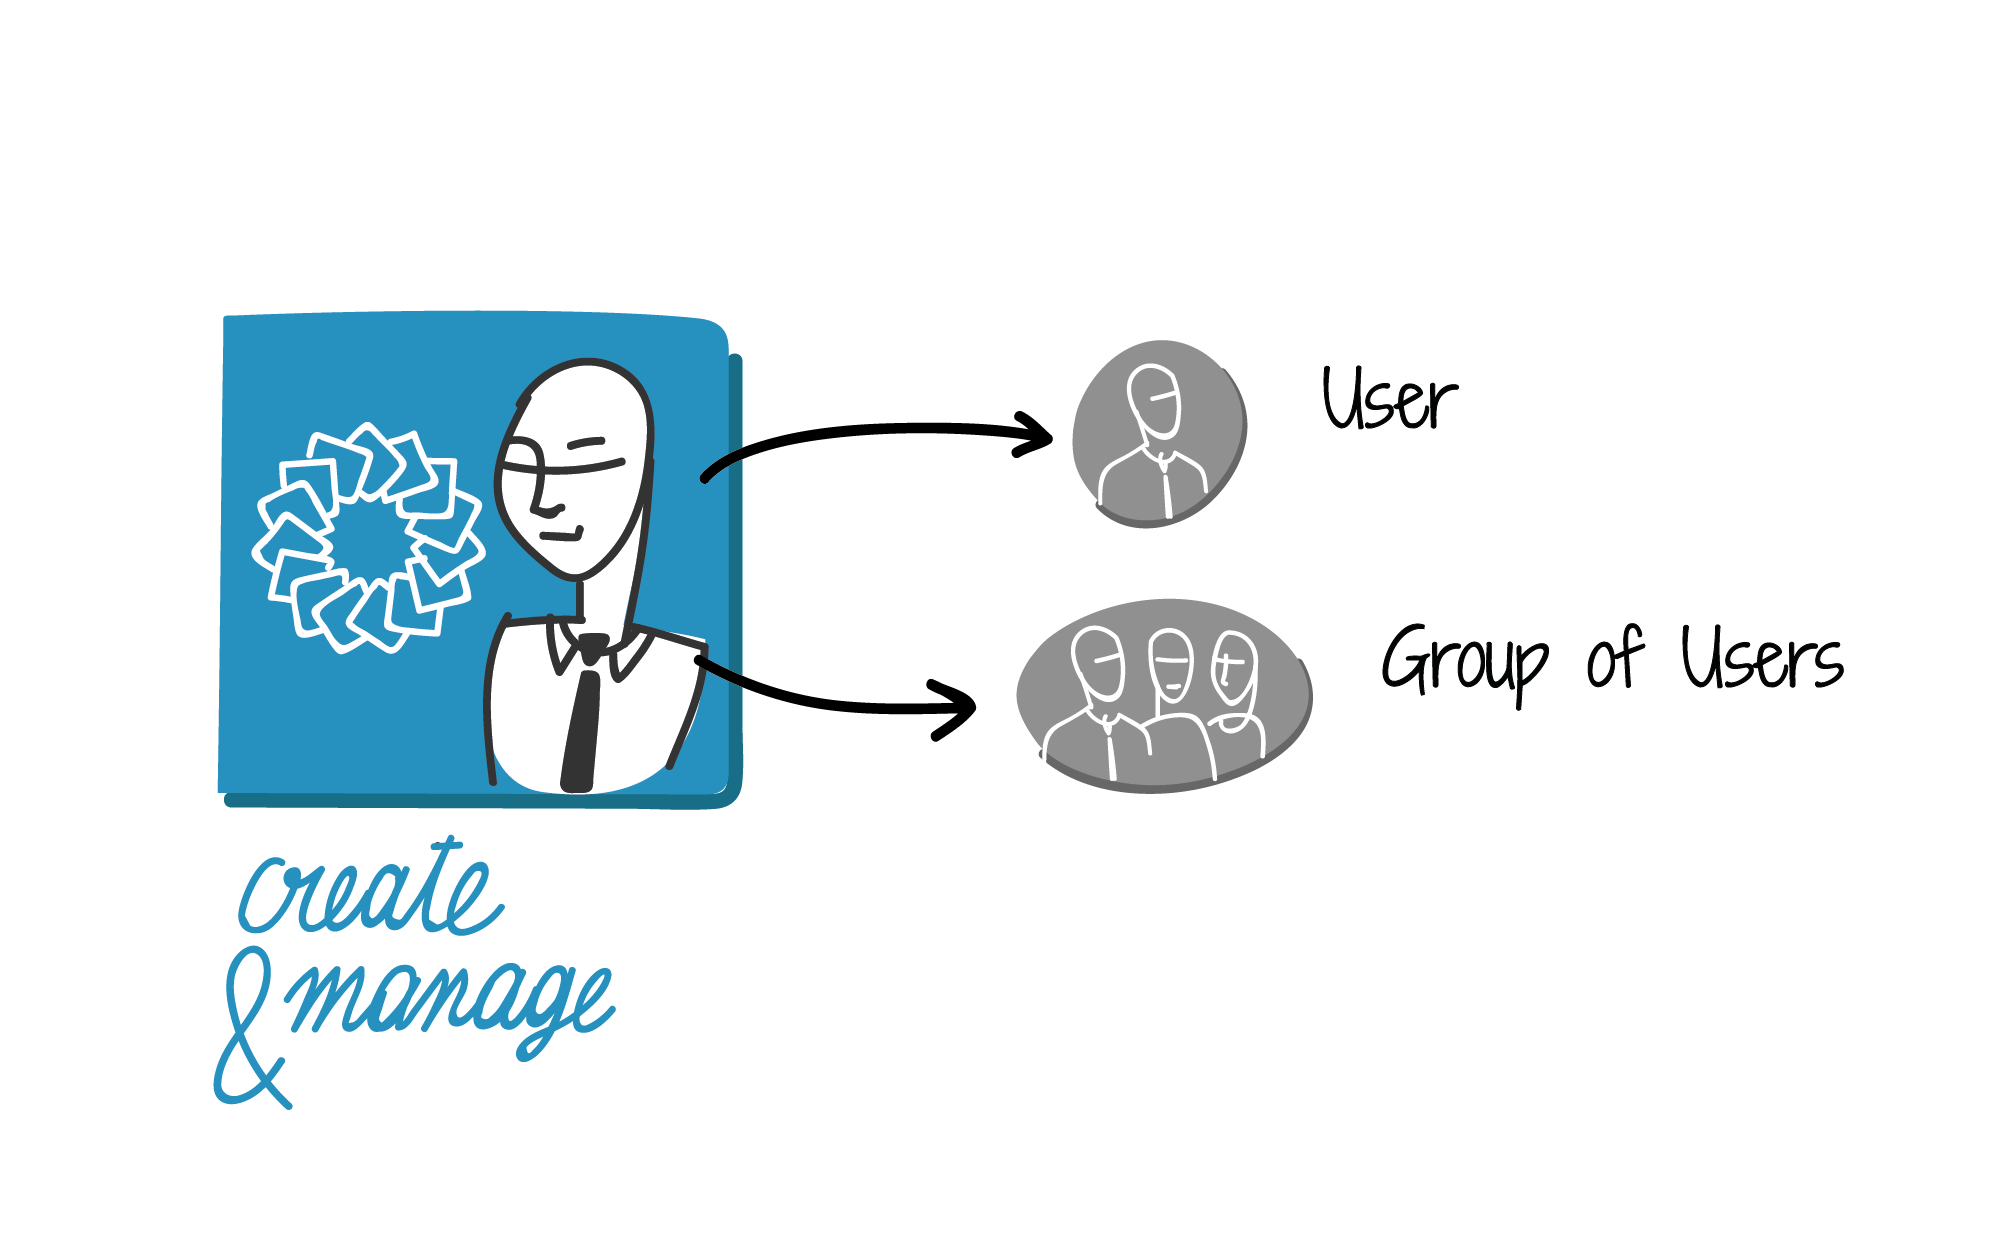
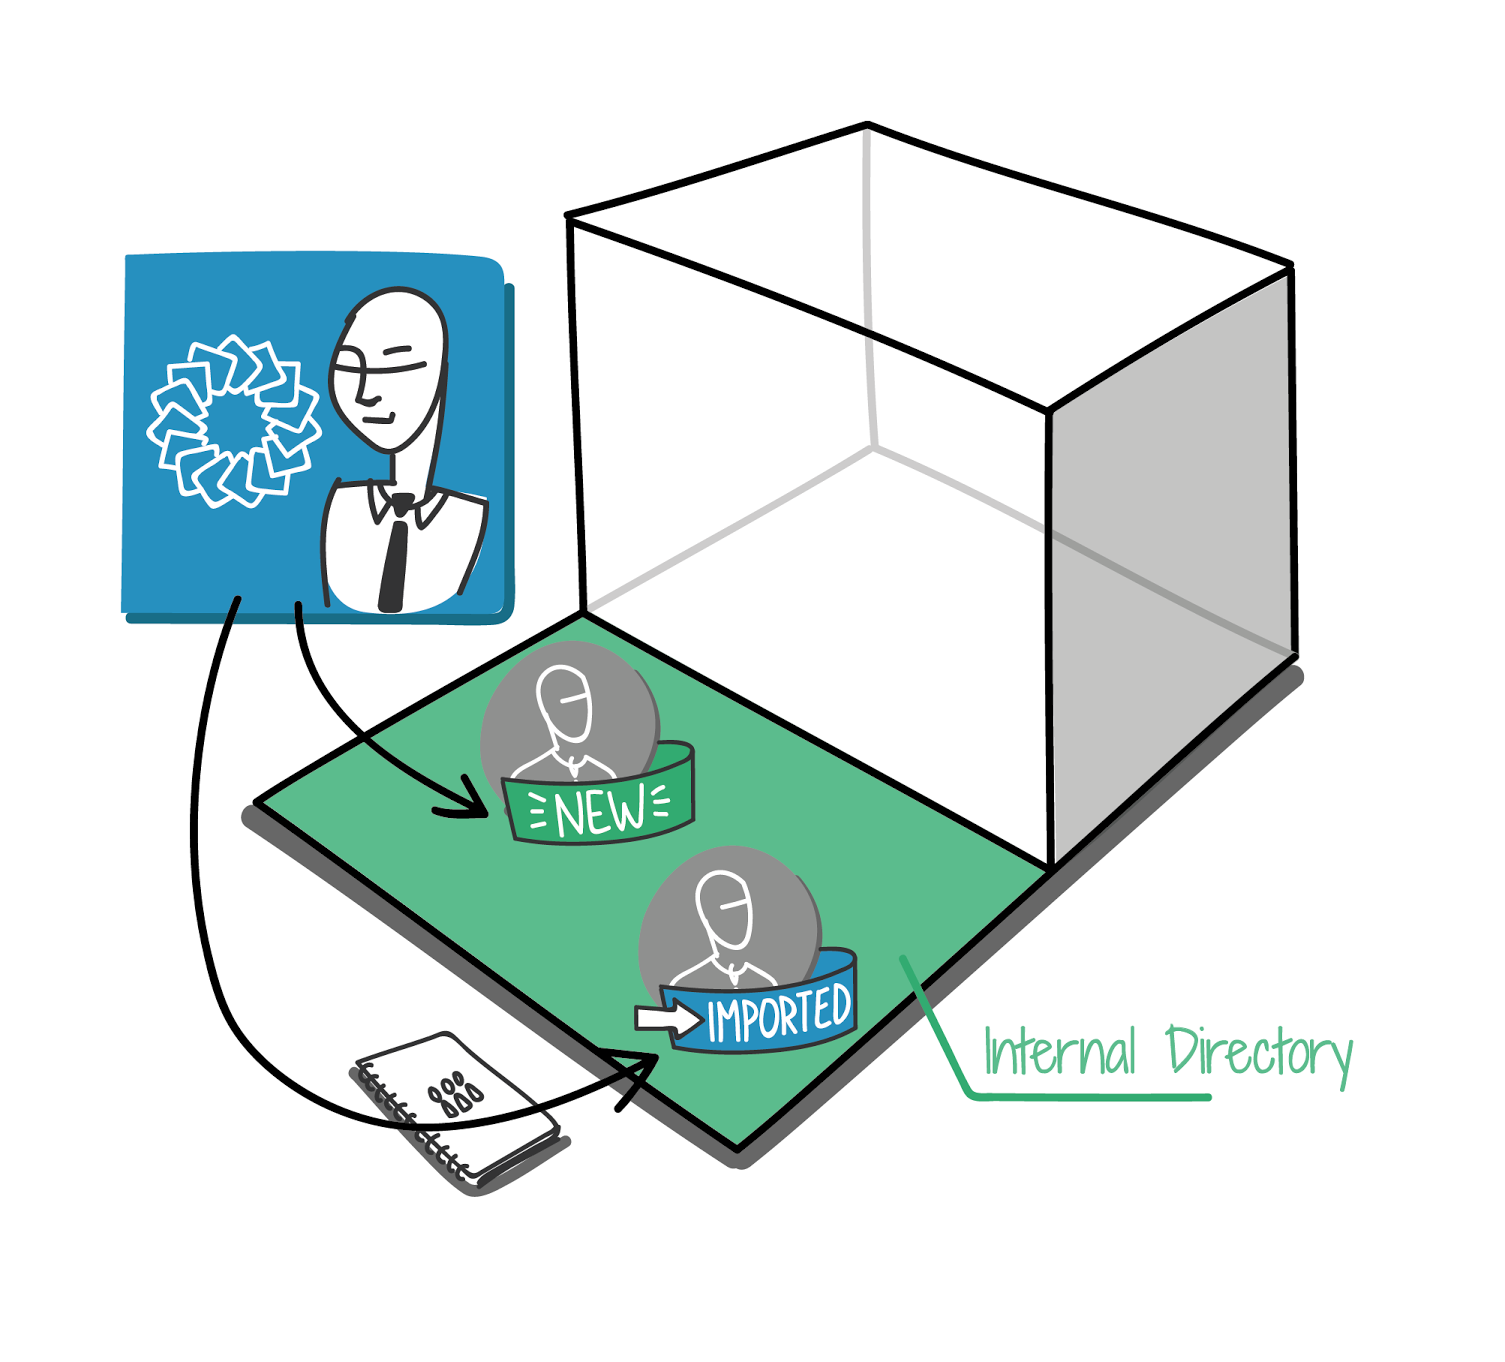
Users and groups can be managed locally (created directly on the platform), or externally (synchronized from an enterprise directory). Depending on your user management policy you will learn how to manage your users and groups on the platform.
Creating Users
Warning
Users can be managed in different ways, depending on whether the enterprise directory add-on is installed, or not. Check the Add-on settings page to identify whether the enterprise directory add-on is installed or not on your platform. If it is enabled, user management will vary depending on the parameters.
Refer to the Configuring enterprise directory access section for more details, and to avoid potential issues.
Creating a New Local User
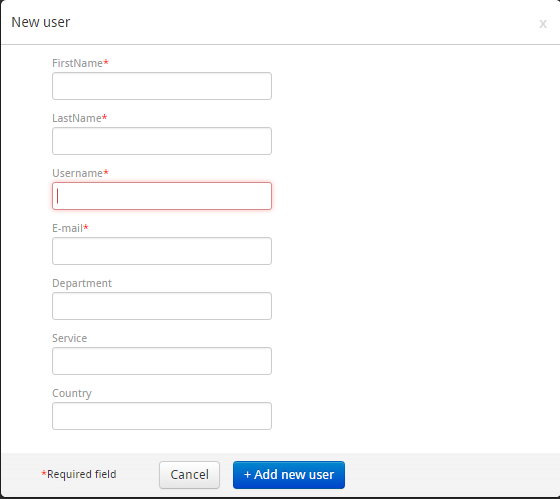
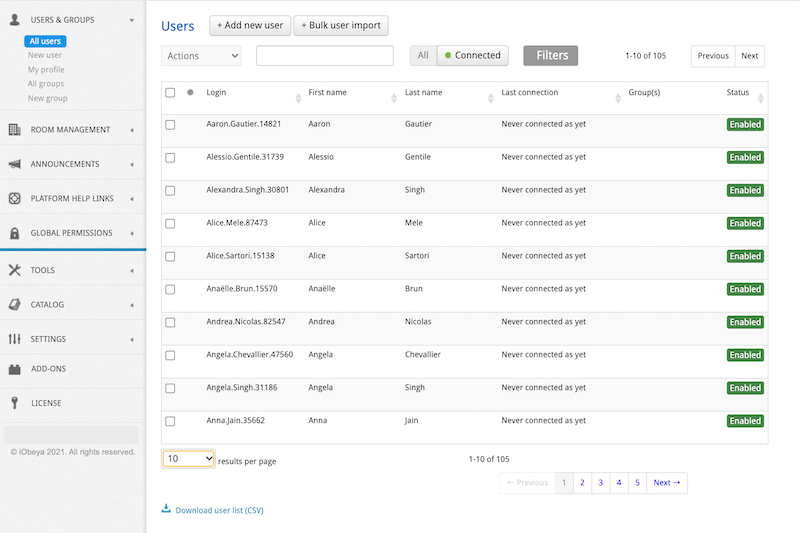
Select New user or All users in the left-hand side menu, then Add new user.
Fill out at least the required fields, then select Add new user.
Warning
As of version 3.4, when creating a new local user, a platform administrator cannot set the password of that new user directly during the creation process.
If the mail server is configured correctly and the email template First connection is enabled, an email with a temporary link will automatically be sent to the user. Otherwise, a new popup appears containing the temporary link to be sent manually to the new user.
The temporary link is a one-time URL valid for 30 days.
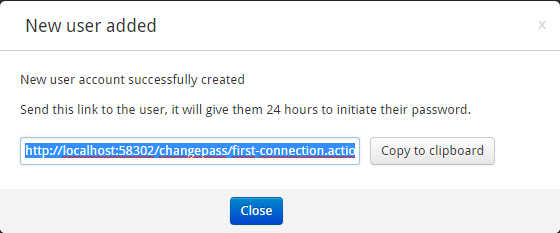
The new user is now listed.
When the new user receives and follows the link, they will be able to define their password and connect to iObeya.
Note
If you do not have any welcome group on your platform, new users will only get the Can use permission at platform level. This means that the user will be able to connect to the platform, but will not be able to access any rooms, as they have yet to be assigned to one.
If you have one (or more) welcome group on your platform, new users will be able to use iObeya as soon as their account is created and will get the permissions attached to the group(s) they are assigned to.
More information about welcome groups: welcome-group
Synchronizing Users From Your Enterprise Directory
Warning
The enterprise directory add-on must have been configured in order to use it.
To learn how to do so, refer to the Configuring enterprise directory access section.
If the add-on is configured correctly, a group or an individual user from your enterprise directory can be added to iObeya. The main benefits of this are central user management (everything is managed in the local enterprise directory), and a single account per user (in accordance with the organization’s user management policy).
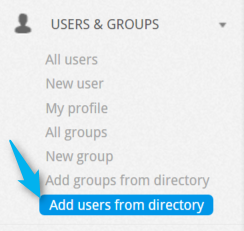
In the left-hand side menu, select Add users from directory in the USERS & GROUPS section.
Complete at least one of the following fields: Login, First name, or Last name.
Move the cursor over the user to be added.
Optionally, select View information to check that it is the correct user that has been identified for addition.
Select Add to automatically create the user in iObeya.
Optionally, add a selection of users by checking the boxes and clicking on Add at the top of the page.
Bulk Import of Users
This feature allows platform administrators to create or update users in mass using a CSV file.
This feature is available in the screen listing all users.
Tip
Platform administrators can use bulk import to create local accounts that can be synchronized later with an external directory.
Populating your User Import File
We advise you to use the bulk user import template to create your own import file. This template is a CSV file using tabulation as the separator.
You can find the information about columns used in the CSV import file below:
- Username
Mandatory if you want to update existing users and change the login.
Must be unique. This information is available in the CSV export of the users available at the bottom of the list of the users declared on your platform.
- Login
Mandatory
Must be unique. If a login already exists, the user will not be created. If you want to update existing users without updating the login field, this field can be used as a reference instead of the Username field.
If you bulk import a user with an existing login into a group, this user is added to the group.
- Firstname
- Mandatory
- Lastname
- Mandatory
- Mandatory
- Department
- Optional
- Service
- Optional
- Country
- Optional
- Language
Optional
If set, the user interface will load using the specified language by default for the corresponding user.
The possible values are:
- de
- If you want to set German as default language
- en
- If you want to set English as default language
- en-US
- If want to set English (US) as default language
- es
- If you want to set Sanish as default language
- fr
- If you want to set French as default language
- ja
- If you want to set Japanese as default language
- ru
- If you want to set Russian as default language
- zh
- If you want to set Chinese as default language
- Password
Optional
If set, the user can connect with this password without the need to initialize it on first connection. This password does not need to respect the password policy settings.If not set, the user will have to create a password:
If the mail server is activated, the user will automatically receive an email with a hyperlink to create a password
If the mail server is not activated, the platform administrator needs to download the bulk import report to retrieve the hyperlink, and then send it to the user.
The password link is only valid for 24 hours.
Creating Users
Warning
If the password is not set in the CSV file, the user will have to create a password.
If the mail server is activated, the user will automatically receive an email with a hyperlink to create a password. The password link is only valid for 30 days.
If the mail server is not activated, the platform administrator needs to download the bulk import report to retrieve the hyperlink, and then send it to the user. The password link is only valid for 30 days.
To bulk create user accounts:
Select Bulk user import.
A new screen appears prompting the upload of the CSV file.
Optionally, download the Bulk user import template (CSV).
This file is preformatted, with examples and in a CSV structure.
Refer to the section Populating your user import file for more details.
Upload your CSV file.
Optionally, select a group to allocate your users to.
New users and updated users will be added to this group.
Warning
If there is a problem during the import procedure due to a group exceeding your license in a room, the transaction will be reversed and users will not be created
Select Start import.
You will receive notifications for creation errors and successes.
Download the bulk import report.
This document will resume your import. It contains a status concerning the bulk import, and passwords or password links.
Managing Users
Editing a User
Editing User Information
Warning
If a login is changed, its user will have to reset their password.
If the mail server is activated, the user will automatically receive an email with a hyperlink to reset their password. The reset password link is only valid for 24 hours.
If the mail server is not activated, the platform administrator needs to download the bulk import report to retrieve the reset password link, and then send it to the user. The reset password link is only valid for 7 days.
Tip
An externally managed option is enabled by default for users added from the enterprise directory add-on, so that a password cannot be defined for these users.*
The users who are members of the enterprise directory have this option enabled automatically during the enterprise directory synchronization. As of version 3.4.5, you can now check or uncheck this box manually. If you uncheck this box, the user will be managed by iObeya as a local account, meaning you can change or reset the user password. If you check this box, the user password will not be managed by iObeya and should be managed by LDAP or SSO (meaning you create a local account and delegate the authentication to SSO).
Select All users in the left-hand side menu.
Move the cursor over the user you wish to edit.
Select Edit information.
A popup window opens.
Edit the different fields and determine the suitability of the user avatar.
You cannot add an avatar.
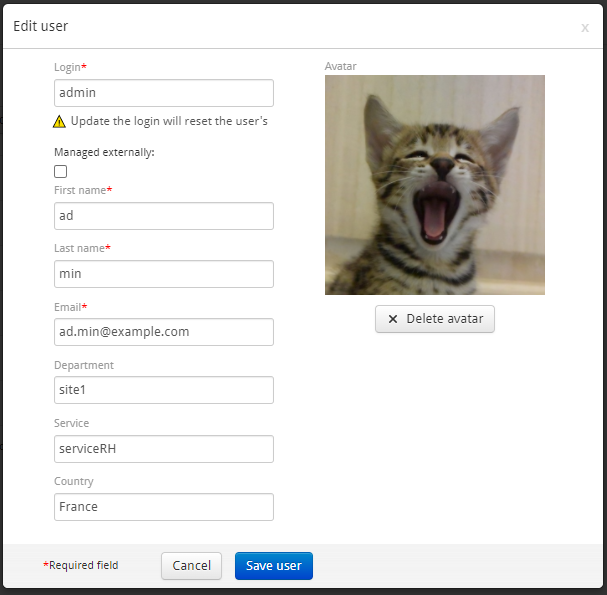
Select Save user.
Bulk Editing of Users
Warning
If a login is changed, its user will have to reset their password.
If the mail server is activated, the user will automatically receive an email with a hyperlink to reset their password. The reset password link is only valid for 24 hours.
If the mail server is not activated, the platform administrator needs to download the bulk import report to retrieve the reset password link, and then send it to the user. The reset password link is only valid for 7 days.
To bulk edit users:
Download the user list using this section: Downloading a List of Users.
Edit the CSV file as needed.
From the administration platform homepage, click USERS & GROUPS ‣ All users.
Click Bulk user import.
Upload your CSV file.
Optionally, select a group to allocate your users to.
In the Import option, select Update user information for existing accounts.
Select Start import.
You will receive notifications for creation and update errors and successes.
Download the bulk import report.
This document will resume your import. It contains a status concerning the bulk import, and passwords or reset password links.
Enabling or Disabling a User
This feature allows platform administrators to deny access to a user in iObeya. This user and their rights are not deleted, but they will not be able to connect to iObeya.
- Select a user in the list.
- Select Enable/Disable the user account.
Tip
To bulk enable/disable users, make a selection by checking boxes, then select the Actions list.
Viewing User Information
Viewing General User Information
- Select All users in the left-hand side menu.
- Move the cursor over the user you wish to view information about.
- Select View information.
Downloading a List of Users
You can download the entire list of users in CSV by clicking on this link:

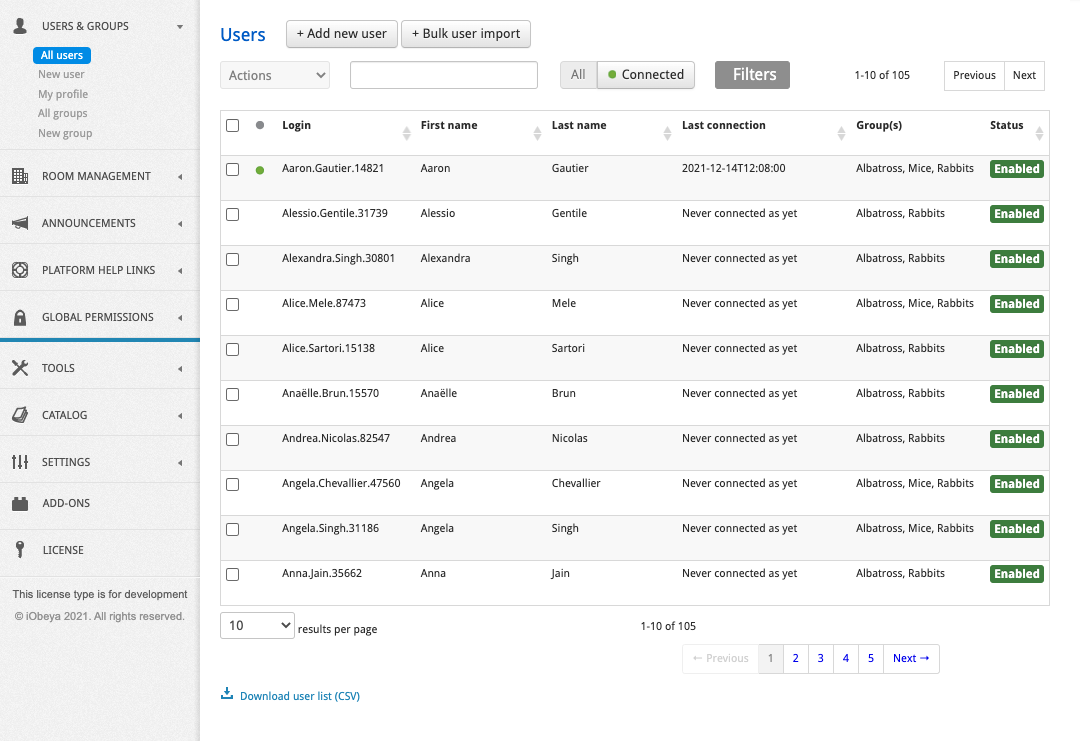
Viewing User Connection Status
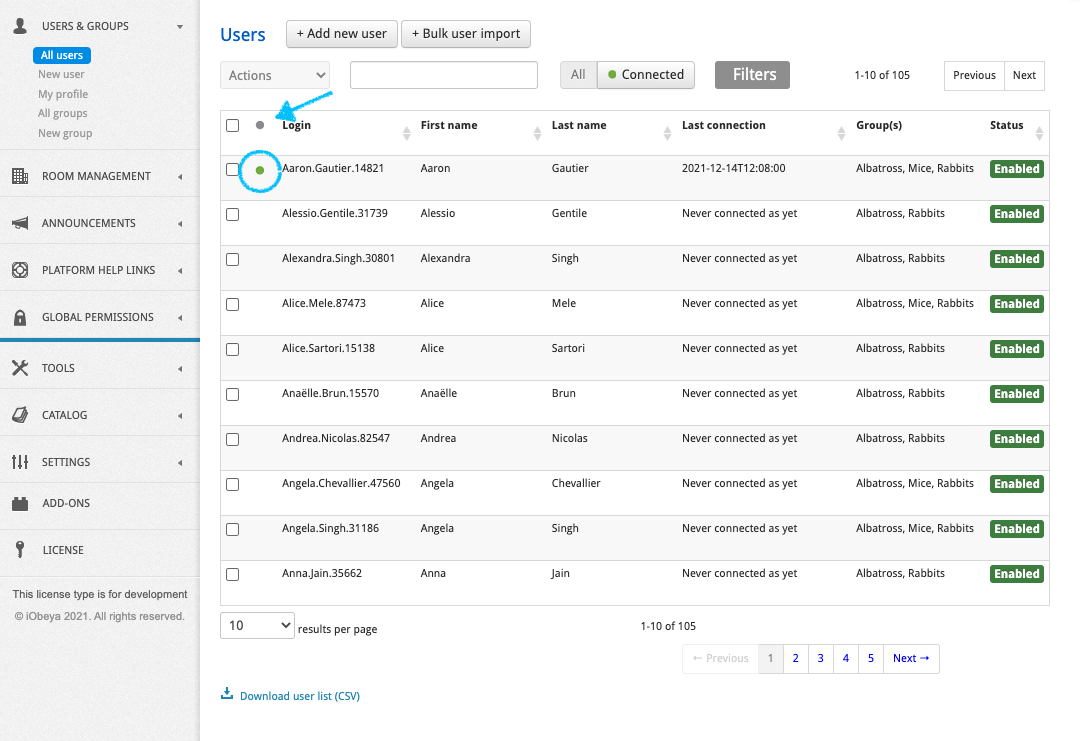
A visual indicator appears in the list of users in iObeya’s administration interface. A green dot indicates that a user is connected to the client application.
Tip
You can filter connected users by clicking on Connected at the top.
Managing the Password of a Local User
Changing the Password of a Local User
Platform administrators can set the password of a user manually.
Warning
Platform administrators can change passwords without necessarily respecting the password policy.
- Select a user in the list.
- Select Change password.
- Complete the New password and Confirmation fields.
- Select Update.
Resetting the Password of a Local User
A platform administrator may need to reset the password of a user for several reasons. To reset the password of a user:
- Select the user in the user list in the administration interface.
- Select Reset password.
- If the mail server is configured correctly and the forgot password template is enabled, an email with a temporary link is sent to the user to reset their password. The link is valid for 24 hours.
- If the mail server is not configured correctly or the forgot password template is disabled, a popup appears with the temporary link for the platform administrator to reset the password for the user. The platform administrator must send this link manually to the user. The link is valid for 7 days.
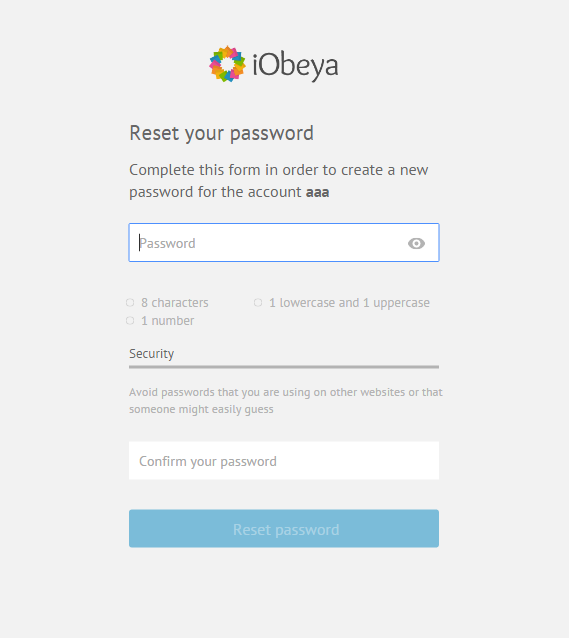
When the user receives the link, they can reset their password by completing the fields (in accordance with the password policy requirements).
Warning
The current password of the user is effectively reset when the user follows the temporary link. Before using the temporary link, the user can connect with their current password.
The temporary link is active during 24 hours. After this period, the platform administrator will have to reset the new password again.
Deleting a User
To delete a user:
- Select All users in the left-hand side menu.
- Move the cursor over the user you wish to delete.
- Select Delete.
Tip
To bulk delete users, make a selection by checking boxes, then select the Actions list.
Creating Groups
In iObeya, users can be associated into different groups to facilitate the administration of permissions. This means that any permission you manage at the platform, domain, or room level, can be assigned to a whole group, automatically granting permissions to the users belonging to that group.
As a result, a platform administrator does not have to repeat the action of adding or removing a permission for each individual user. The platform administrator will only change the group permissions and manage access for all group members.
Note
If a user has individual permissions and has been added to a group with more permissions, their global permissions can be seen by clicking on the See accumulated permissions tab (see also Permissions reminder).
Welcome group
The welcome groups allow your users to access and use iObeya as soon as their account is created.
Once activated, this feature allow you to add automatically every new user to welcome groups when their account is created, wheither it is created using:
- manual creation by the platform administrator,
- manual bulk import creation by the platform administrator,
- auto-provisionning via your enterprise directory,
- search from the enterprise directrory by the platform administrator,
- daily synchronization from an enterprise directory synchronized with iObeya.
You can use welcome groups to manage permissions for new users on several domains at a time.
Tip
To benefit from an autonomous deployment of iObeya throughout your organisation, use the welcome groups with other self-service features of iObeya such as:
- allow users to create rooms,
- allow room administrators to rename and archive rooms.
Creating a New Local Group
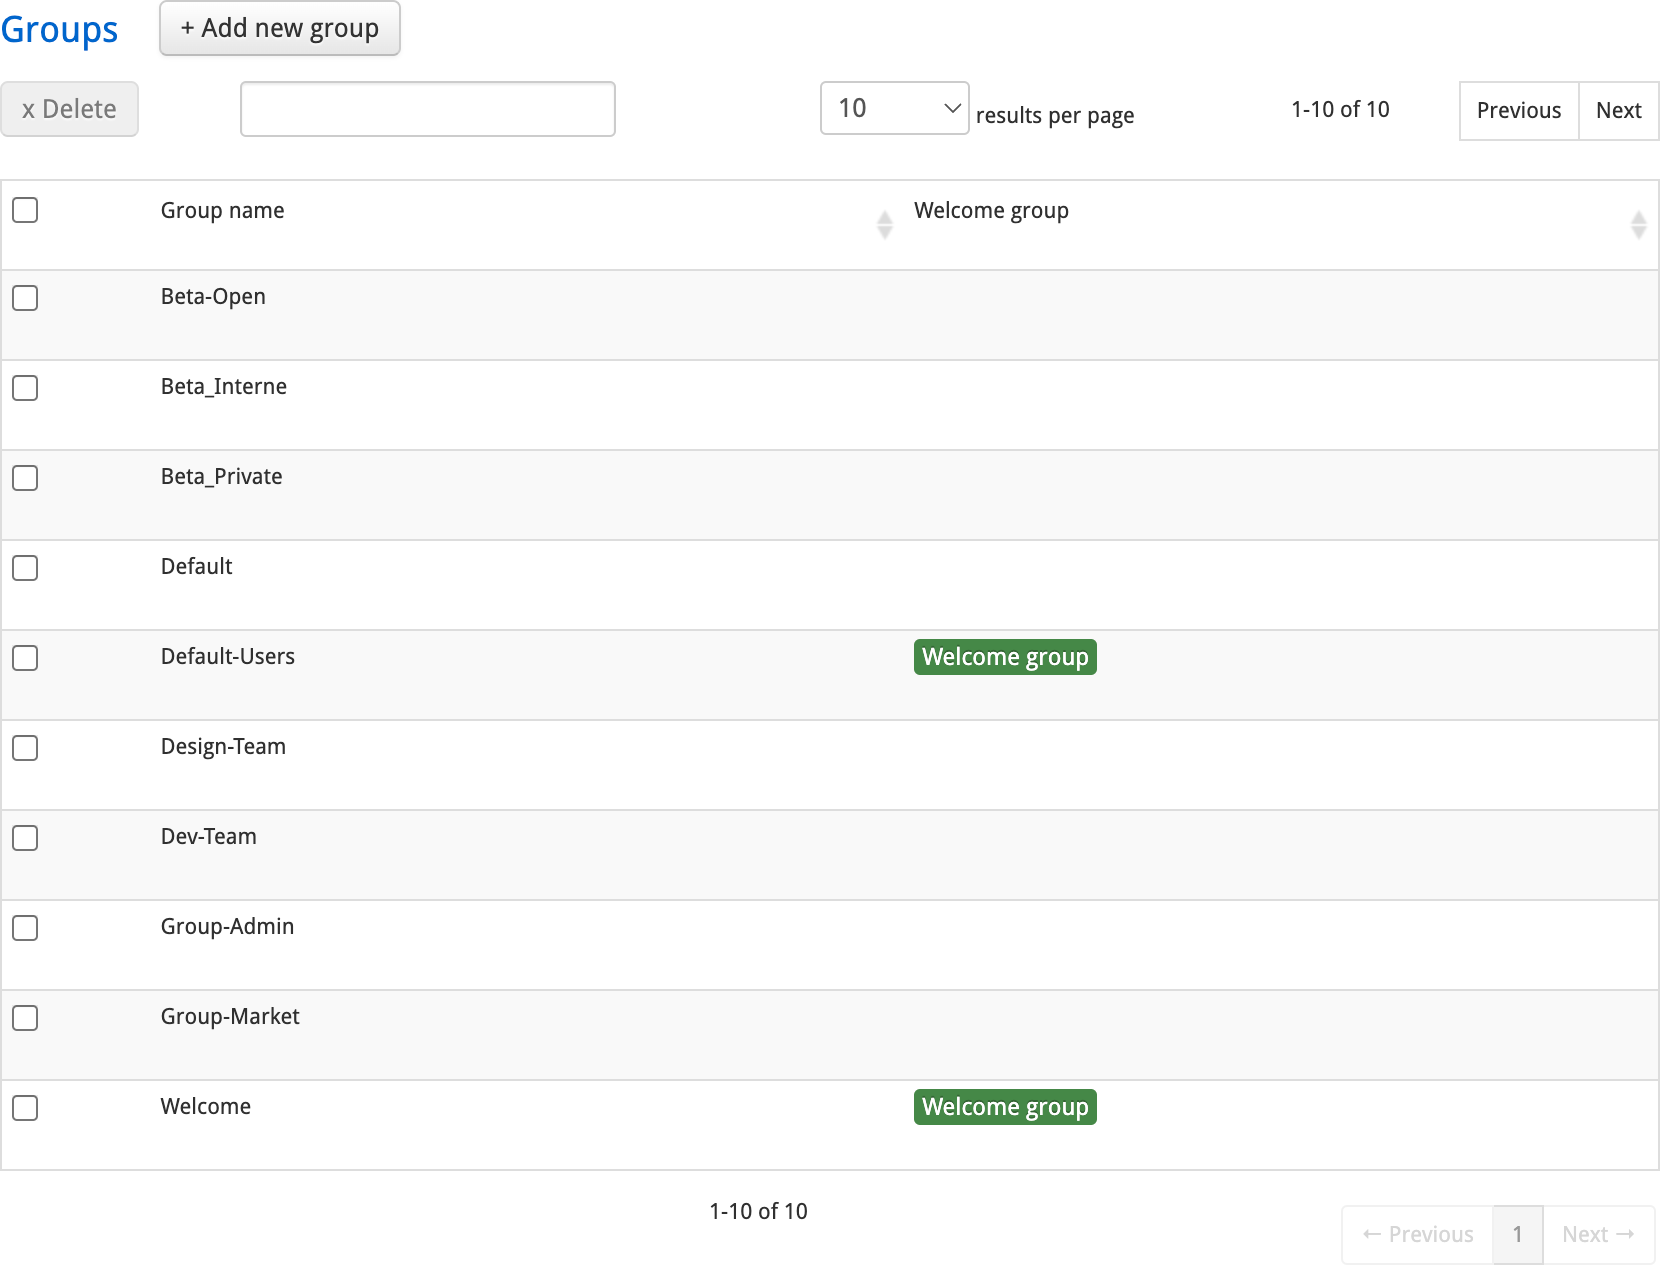
Select All groups in the left-hand side menu.
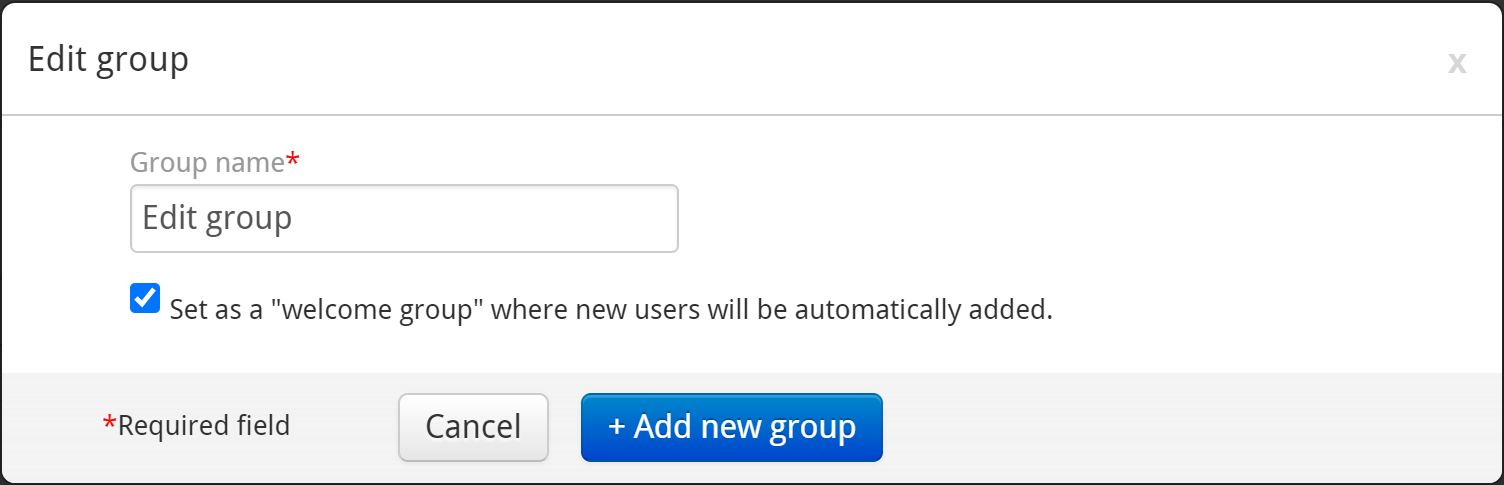
Select Add a new group.
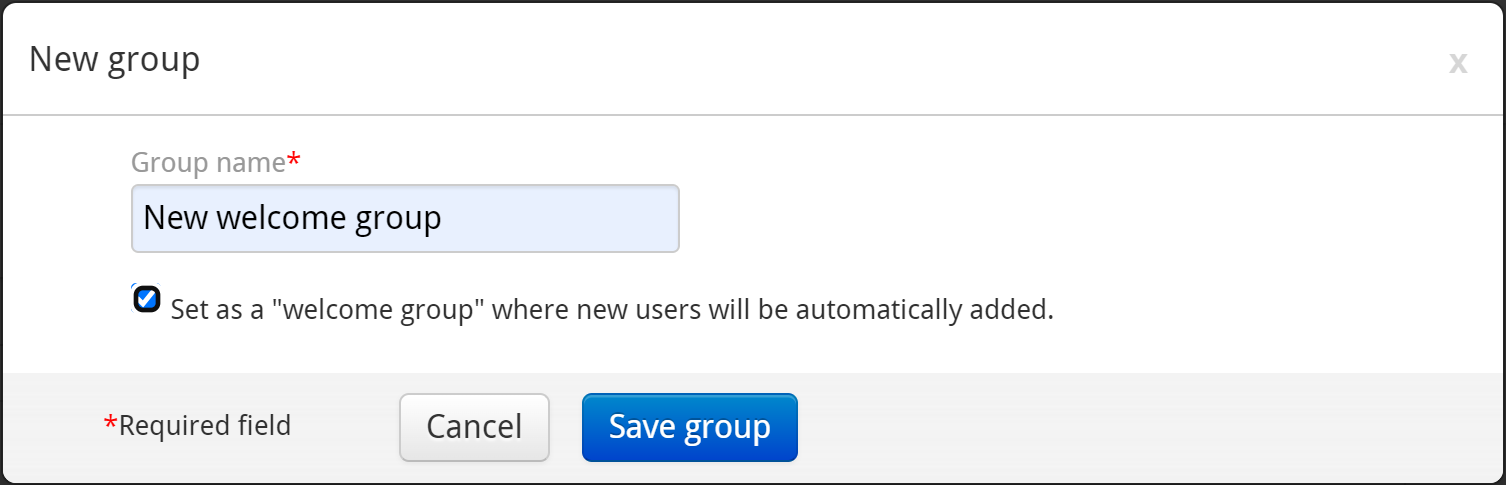
Enter the new group name.
If needed, select Set as a “welcome group” where new users will be automatically added.
Tip
For more information on welcome groups, see welcome-group
Click Save group.
The group is now registered and listed.
Synchronizing a Group From Your Enterprise Directory
Note
Required permissions: Platform (Can Use + Administrate).
Warning
The enterprise directory add-on must have been configured in order to use it.
To learn how to do so, refer to the Configuring enterprise directory access section.
If the add-on is configured correctly, a group or an individual user from the enterprise directory can be added to iObeya. The main benefits are the centralized management of users, whereby everything is managed in the local enterprise directory, as well as the provision of a single account for each user, in accordance with the organization’s software policy.
Adding a Group
When adding a group using the enterprise directory add-on, the group and its members will be created in iObeya, and will automatically be synchronized with the directory.
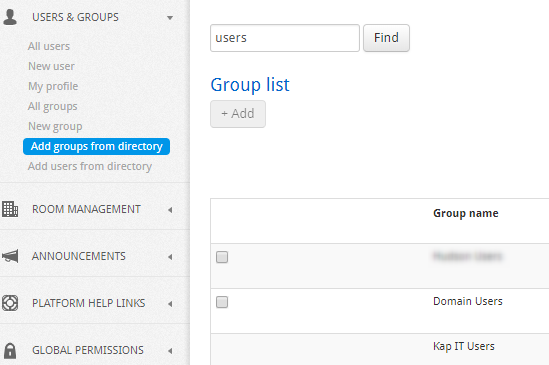
- In the left-hand side menu of the administration interface, select Add groups from directory in the TOOLS section.
- Complete the Group name field, then press Enter.
- Move the cursor over the group you want to add.
- Optionally, select View members to see the users who belong to this group.
- Select Add to automatically create the group and its users in iObeya.
- Optionally, add a selection of groups, by checking the boxes and clicking on Add at the top of the page.
Managing Groups
Managing Group Members
- Select All groups in the left-hand side menu.
- Move the cursor over the group you wish to manage.
- Select Manage group.
Adding Users to a Group
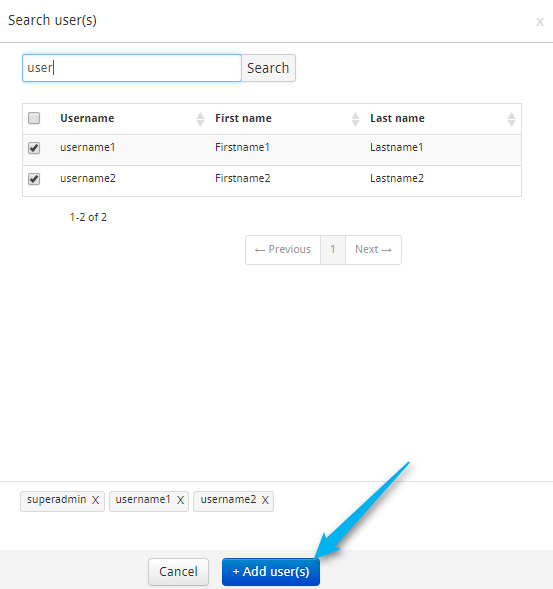
Select Add new user.
A window displays.
Check the boxes of the users you wish to add.
If a check box is missing next to a user’s name, it means that they are already added to this group.
Select Add user(s) at the bottom of the list to add the current selection of users to the group.
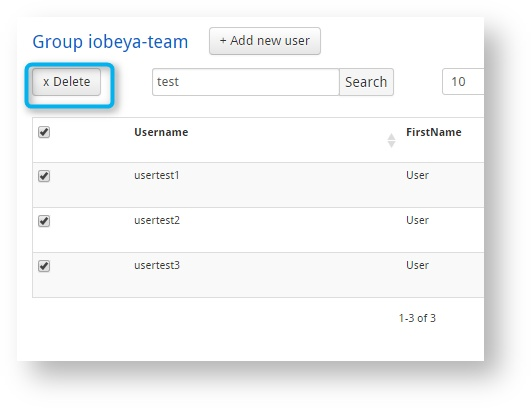
Removing Users From a Group
- Move the cursor over each username.
- Select Delete to remove the user from the group.
Tip
To bulk remove users from a group, make a selection by checking boxes, then select Delete.
Editing a Group
Move the cursor over the group to display the options.
Select Edit information.
Edit the group name, or set it as a welcome group.
Click Save group.
Deleting a Group
Move the cursor over the group to display the options.
Select Delete.
Users are not deleted from the platform.
Tip
To bulk delete groups, make a selection by checking boxes, then select Delete.