Power Automate - Getting started
In this article, we will introduce you to the iObeya connector available on Microsoft Power Automate. You will learn how to configure your iObeya platform and how to create a first flow with Power Automate.

1. Pre-requisites
To use the iObeya connector on Microsoft Power Automate, you need:
- A Power Automate licence giving access to premium connectors. If you don’t have access to Power Automate, or premium connectors, you'll need to check with your IT to upgrade your Power Automate licence.
- A dedicated API bearer token to configure a secured connection between iObeya and Power Automate. Here's the procedure to generate a new bearer token:
- As a platform administrator connected to the iObeya administration interface, click on SETTINGS > API
- Create a new OAuth application endpoint by clicking on Add OAuth application button at the top
- Give a name to your OAuth application (ex: Power Automate)
- Enable Authorization Code and Refresh token
- Use the value "https://global.consent.azure-apim.net/redirect" as a RedirectUri
- Set the Refresh token validity to 360 days
- Specify a Client secret value and write it down. The value will be requested for the authentication when configuring the iObeya connector in Microsoft Power Automate
- Click on + Add application to finalize the configuration.
- iObeya will generate a unique Identifier that appears in the list of applications. Copy this value, it's the ClientID that will be required for the authentication when configuring the iObeya connector in Microsoft Power Automate.
2. How to create a Flow
Now that you have checked the pre-requisites, let's see how to create a new flow using the iObeya connector.
If you are new to Microsoft Power Automate, we recommend you to watch first the following video to learn the basics on creating a new flow.
3. First flow with the iObeya connector
Connect to Microsoft Power Automate platform to access the iObeya connector and the templates available.
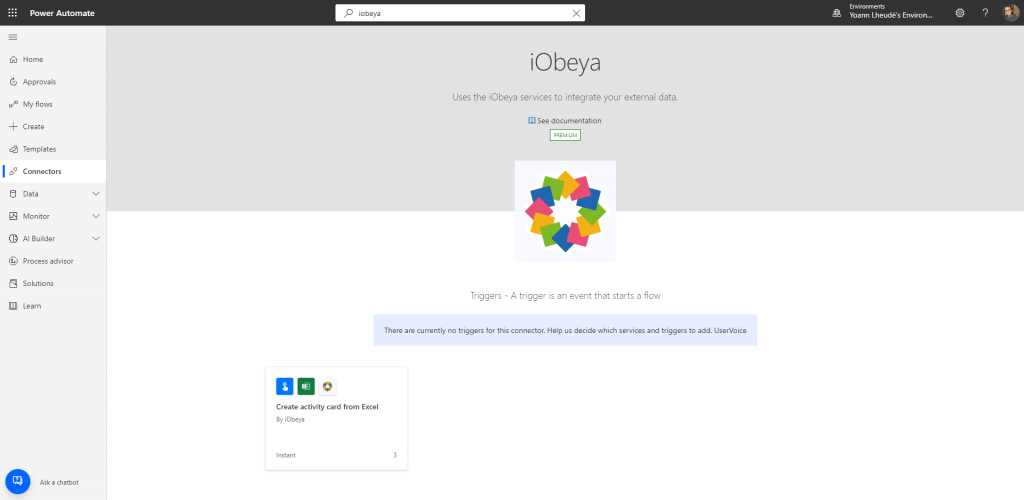
We will publish new templates over time to give you more ideas of integration scenario that can easily be implemented via Power Automate. For the purpose of this quickstart guide, we will start with the existing template named Create activity card from Excel.
You will be asked to sign-in to both services Excel Online (Business) and iObeya. For iObeya you will have to provide the following information:
- Your iObeya cloud platform prefix (ex: on https://demo.iobeya.com the prefix to provide is demo). Do not provide the full url of the platform, only the prefix will be accepted.
- Your iObeya platform ClientID generated earlier in the pre-requisite steps (ex: 6245c31f-754G-4fc3-b643-7fcd95f86d5e).
- Your iObeya platform Client Secret generated earlier in the pre-requisite steps (ex: mysecretondemo).
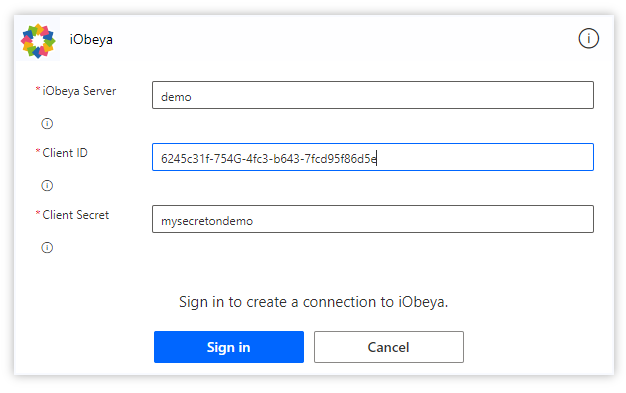
Click on Sing in to start the OAuth authentication process. You will have
to provide the credentials of a user account in iObeya that can access
the rooms and the boards you want to interact with and authorize Power Automate to use this account to access the data. If the information provided are correct, both connectors should be marked as ready to be used with a valid connection.
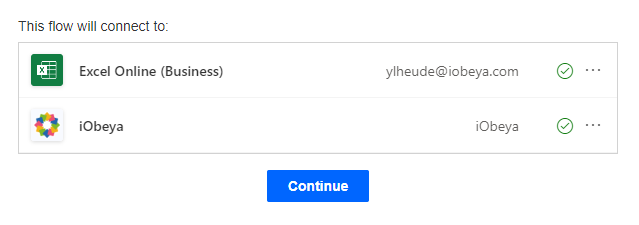
You can press Continue to start configuring your first flow. The first step uses the action List rows present in a table provided by the Excel connector
and requires to select an Excel file and the data that will be used as a source for your flow.
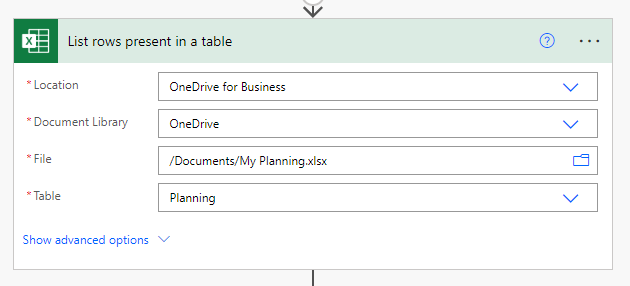
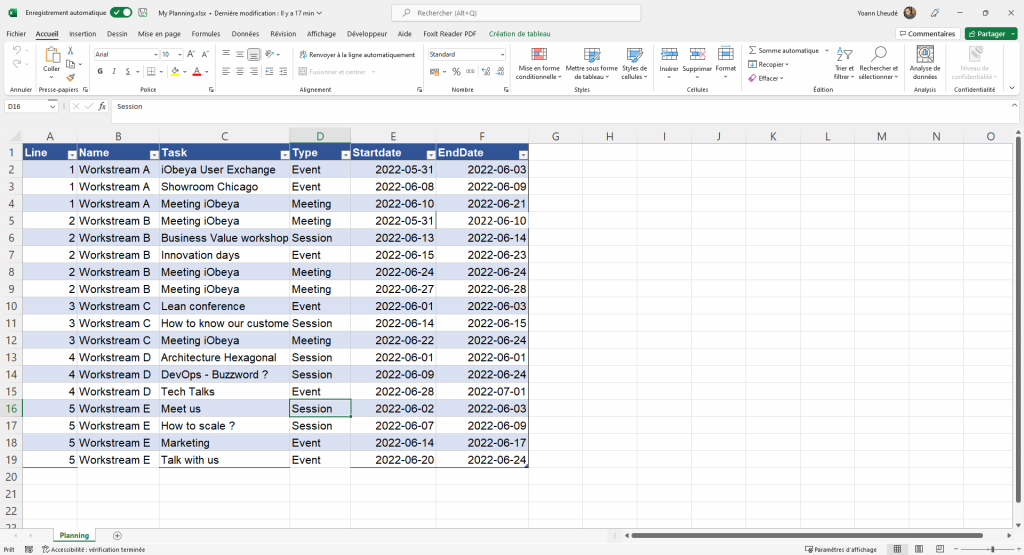
Beware the data in your Excel spreadsheet needs to be in a named table
to be accessible via Power Automate.
For this tutorial, you can download this sample Excel document to understand how it works before working with your own spreadsheets.
Here is an overview of the sample document structure we will use.
The action List rows present in a table will return a list of items that will be used as an input for the next step. This output needs to be processed using an Apply to each control that will embbed the action Create card available with the iObeya connector.
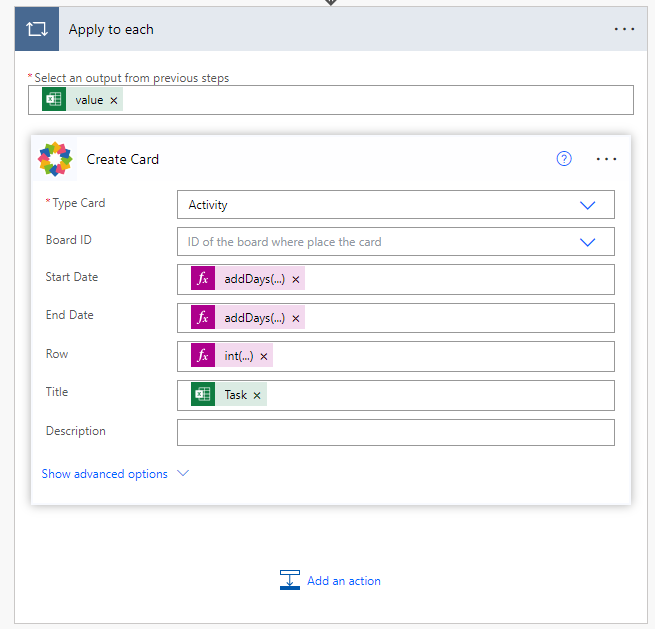
The iObeya connector is already configured with the Activity card type pre-selected and the corresponding fields pre-configured. You will have to provide a Board ID where the cards will be imported. If you click on the dropdown list, the connector will retrieve the first 200 boards in alphabetical order that you have access to in iObeya. Otherwise, you can copy a specific board id directly from iObeya: open the board you want to use and copy the value at the end of the URL (ex: https://demo.iobeya.com/s/download/resources/client-html-plugin/4.12.1.21/public/#/en/board/6517CCEE-5A2E-AA9B-7388-C16BE963FE15).
If you used our sample Excel file, your flow should be ready to be saved and tested 🎉.
Click on Save and then click on Test to start the flow manually and see the result in the iObeya board you've configured.
If you provided the board ID of a planning board, the Activity cards wouldbe imported at the position corresponding to the Start Date, End Date and Row values coming from the Excel file.
If you provided the board ID of any other board, the Activity cards would be imported in the top left-hand corner of your board.
By default, during the import, the flow template will map the Activity card to an existing Activity card toolset named Tasks with 3 differents types
of tasks defined named Meeting, Event and Workshop. This is defined in the advanced settings of the iObeya connector.
Looking for more ?
- Do you want to learn more about this connector capabilities? Browse the iObeya connector documentation
- You are using another RPA/iPaaS platform than Power Automate? Browse the Facade API documentation to discover the API services used with Power Automate
- Interested to have an overview of the integration capabilities of the iObeya platform? Access the integrations page
If you have any questions or would like more information about using iObeya APIs for your business, please don't hesitate to contact us at integrations-support@iobeya.com. Our team of experts is available to provide additional guidance and support, and can also offer personalized demonstrations of these powerful tools to help you get the most out of them. We look forward to hearing from you and helping you achieve your business goals with iObeya.
Type of integration
iPaaS
Tags
Tools

