Empower iObeya QCD with Excel import via Power Automate
The ability to automatically import QCD indicators from an Excel file into iObeya can greatly streamline your work processes and save valuable time. With Power Automate and the iObeya Connector, this task is made simple and easy.
In this article, we will explain how to build a complete Power Automate Flow that extract data from Excel files and put it back into iObeya QCD letters.
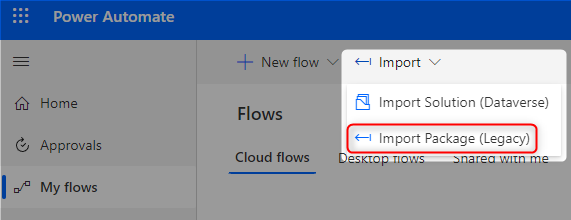
The Power Automate flow can be directly downloaded here and import it into a Power Automate environment.
It is very important to keep in mind that everything here is provided as example that have to be based on given needs, contraints or business rules.
Step 1 : Extract Data from Excel
For the example of this flow, we want each modification of the Excel file to trigger an update of the QCD letter. For this we will use a Sharepoint Action which will be activated at each file change.
This step is here to simplify the process for the users:
- Everything is run automatically (based on Azure platform parameter, typically, such flows are triggered every 1 or 3 minutes).
- The flow is run thanks to the permissions of the user who created it.
It is something optionnal, it is still possible to avoid it and start with the "Retrieve data from Excel" step by providing a given file.

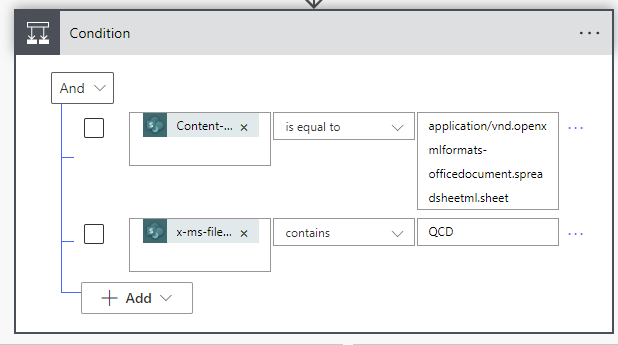
In order to take only the Excel files, we will use the following condition : Content-Type : application/vnd.openxmlformats-officedocument.spreadsheetml.sheet
And here, another condition has been set in order to get only Excel files that contain the 3 letters "QCD" in their names. That is a way to filter only relevant files based on a simple rule defined with the users. It is obvisously possible to adapt, add, remove the conditions here based on the specificies of each business.
Next, we have to extract the information contained in the Excel file. For this we use the action “List rows present in a table” which takes the Sharepoint path as a parameter, a libray and also the name of the file and the table that we want to use.
Again, these parameters are provided here as an example and can be fully customized. It is also possible to imagine a more complete scenario where everything here is dynamic and based on a predefined configuration.
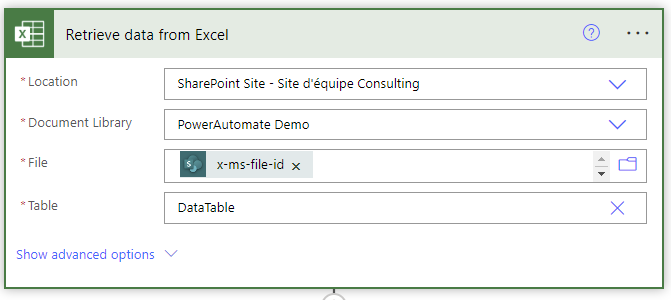
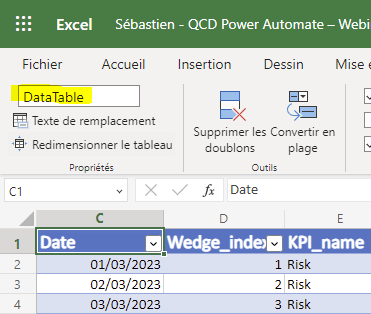
The name of the Table given in the previous block is the one found in the “Design Table” tab of the Excel file.
Step 2 : Build and Compute QCD Letter's indicators
Next, we use the "Compute QCD Indicator" action from the iObeya Connector to process the data in the Excel file and to compute the QCD Indicator values. This action takes the Excel data as input and gives as an output the computed QCD Indicator values.
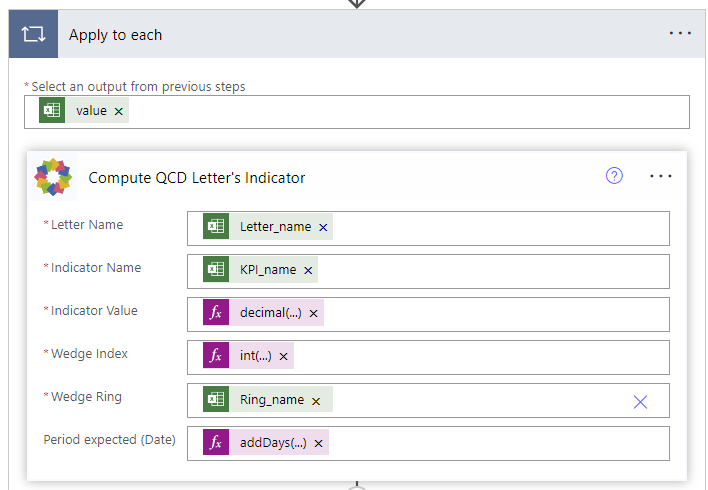
This action is included in a loop (Apply to each) in order to get every rows of the Excel table.
Here, some elements are defined with functions because they have to be formatted as the previous Excel action only returns strings. The following functions are then required in this example:

- Indicator Value:
decimal(items('Apply_to_each')?['KPI_value']) - Wedge Index:
int(items('Apply_to_each')?['Wedge_index']) - Period expected:
addDays('1899-12-30', int(item()['Date']), 'yyyy-MM-dd')
The last parameter period ensures that the update of the values will only be performed if the current period of the corresponding QCD board is the expected one.
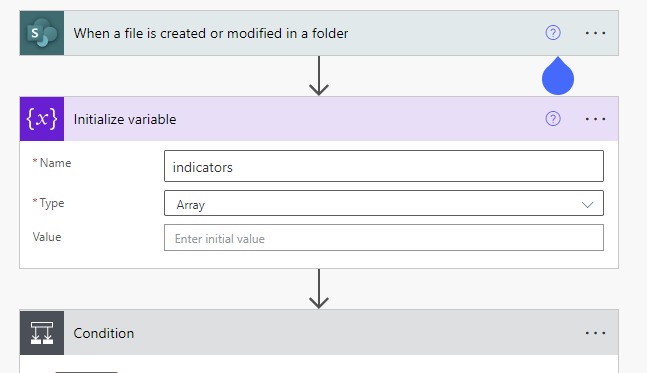
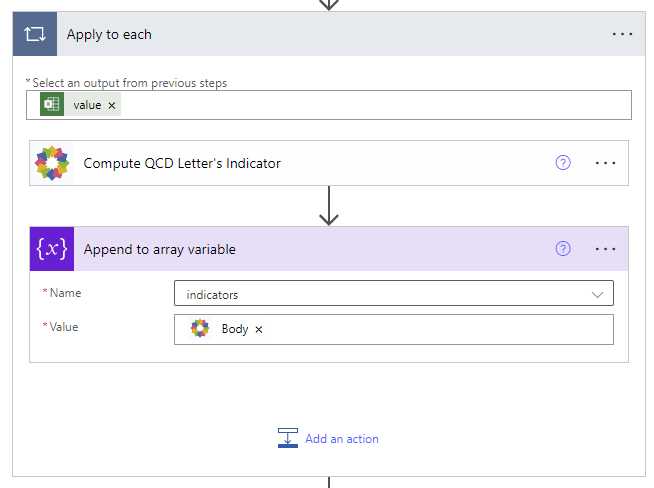
The output of this action has to be appended in a list so it can be given to the next iObeya action. To do this, an Array variable is defined at the top of the flow and the output of “Compute QCD Letter’s Indicator” is set to this table:
Step 3 : Update QCD Indicators
Finally, we use the "Update QCD Indicators" action from the iObeya Connector to update the QCD Indicator in iObeya with the computed values. This action takes the computed values as input and updates the QCD Indicator in iObeya on the selected Board ID.
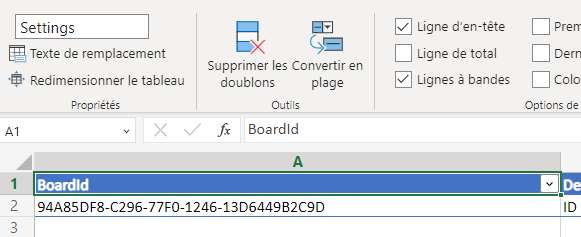
If you want to select your boardID from the Excel File, you can create another Table in your file named "Settings" like this :
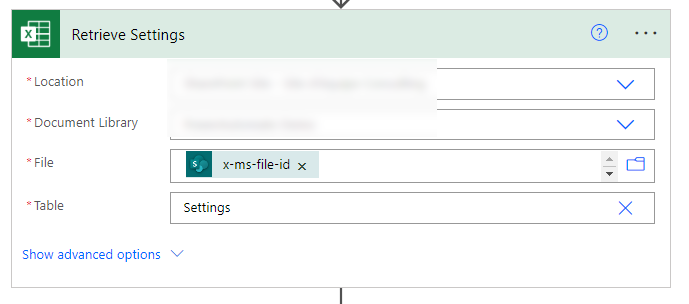
And after, you are able to retrieve Table from Excel :
Finally, use the result of this action to our "Update QCD Indicators" :

first(body('Retrieve_Settings')?['value'])?['BoardId']Tips for Indicators field
The first time the action "Update QCD Indicators" is added, Power Automate displays this interface which doesn't allow to define a dynamic variable.
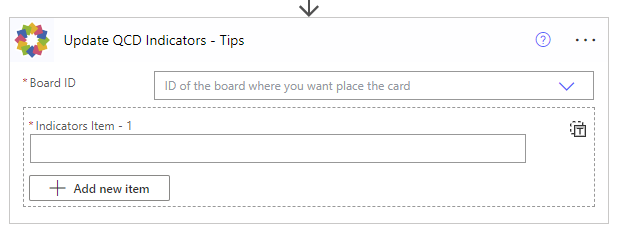
It is necessary to click on the icon on the right in order to edit the field "indicators"

Then, the value [ null ] in the field has to be removed and replaced by the previous variable "indicators" that can be pick up from the popup panel opened from the icon on the right.

Conclusion
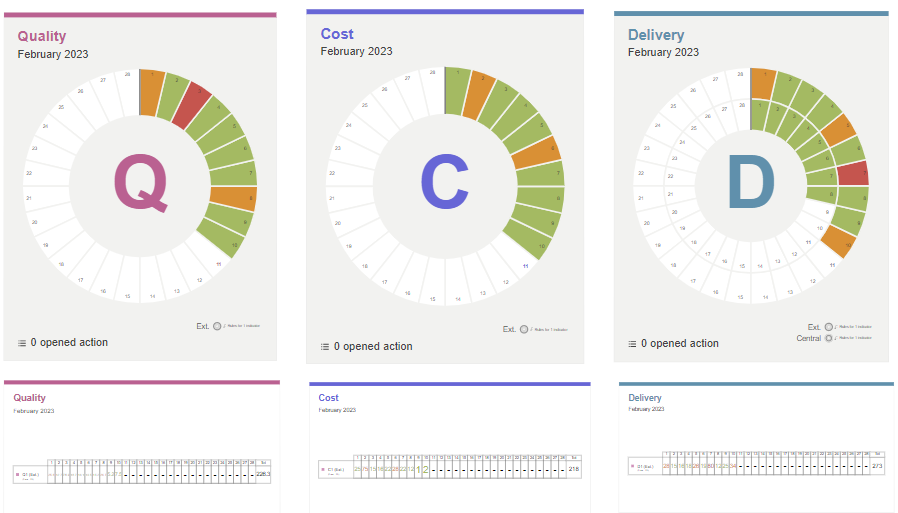
By using Power Automate and the iObeya Connector, it is easy to import QCD indicators from an Excel file into iObeya. This method provides a quick and efficient way to automate the process of updating your QCD indicators, freeing up valuable time and improving your overall productivity. Additionally, triggering the flow with SharePoint Excel file modification ensures that your data is always up-to-date and accurate.
Download these examples
- Excel file
The Excel file used in this article can be downloaded here. It can be reused as it or adapted as needed and in accordance with the flow.
- Power Automate Flow
Here is a link to download the flow as a ZIP file that can be imported into a Power Automate environment or use directly our template
Looking for more ?
- Do you want to learn more about this connector capabilities? Browse the iObeya connector documentation
- You are using another RPA/iPaaS platform than Power Automate? Browse the Facade API documentation to discover the API services used with Power Automate
- Interested to have an overview of the integration capabilities of the iObeya platform? Access the integrations page
If you have any questions or would like more information about using iObeya APIs for your business, please don't hesitate to contact us at integrations-support@iobeya.com. Our team of experts is available to provide additional guidance and support, and can also offer personalized demonstrations of these powerful tools to help you get the most out of them. We look forward to hearing from you and helping you achieve your business goals with iObeya.
Type of integration
Excel to QCD via a PowerAutomate Flow
Tags
Tools


