Create Gemba Walk Process with Forms, Power Automate & iObeya
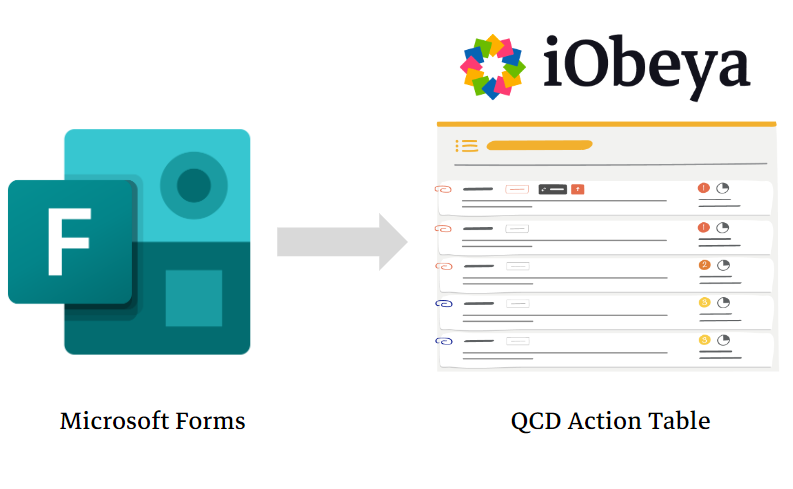
The Gemba Walk is a lean manufacturing technique that involves walking the shop floor to observe processes and identify improvement opportunities.
Integrating data from a Gemba Walk into a visual management platform like iObeya can be a challenging task, but it can be made easier with the help of Microsoft Forms and Power Automate. This article will show you how to create a Gemba Walk form using Microsoft Forms, and how to trigger a Power Automate flow to update information in iObeya based on the form submissions.
Step 1: Create a Gemba Walk Form with Microsoft Forms
To create a Gemba Walk form, you will first need to create a new form in Microsoft Forms. The form should include two fields: one for the problem text and another for the criticity (which can be set as a drop-down list).
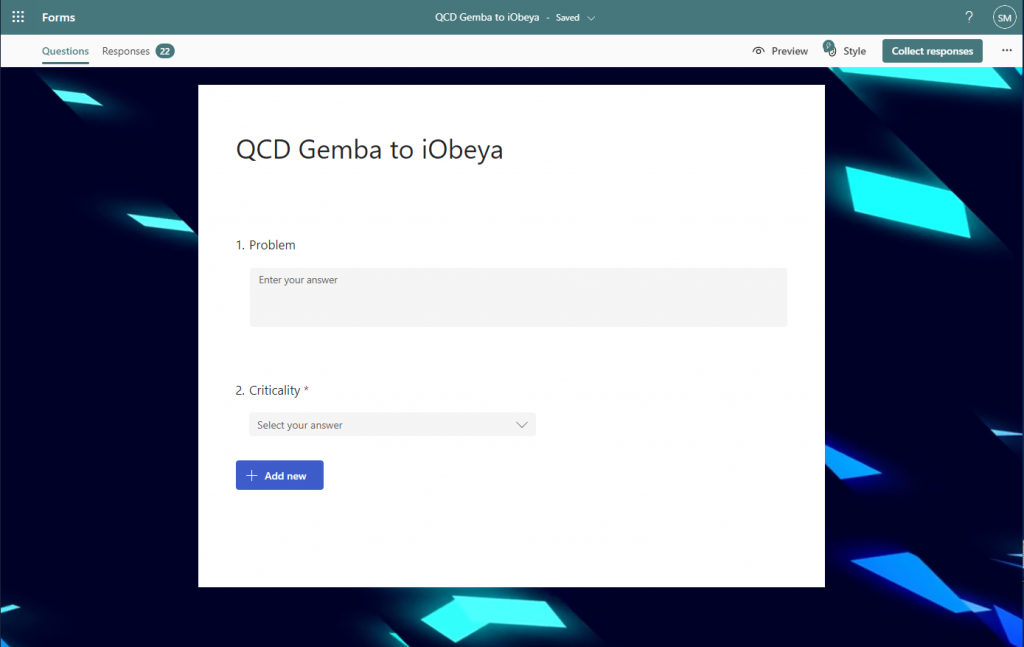
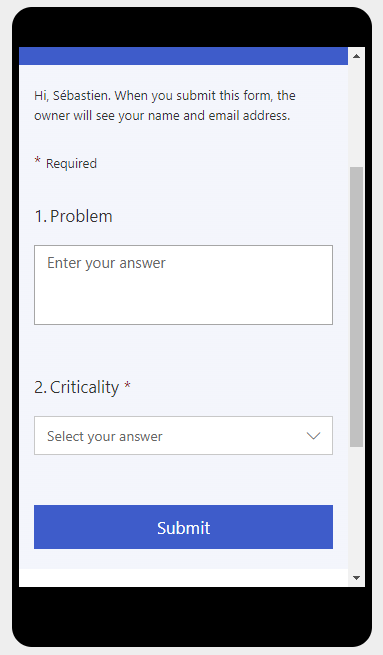
Additionally, Microsoft Forms is also available on mobile devices, making it easy to collect information and input data on-the-go.
Step 2: Trigger the Power Automate Flow
In this step, we will trigger the Power Automate flow with the submission of a Microsoft Form. The flow will be initiated every time a user submits a form. To set this up, follow these steps:
- Go to the Power Automate dashboard and create a new flow.
- Select "Microsoft Forms" as the trigger for the flow.
- Choose the form that you created in the previous step, it should be listed as one of your forms.
- Make sure that the trigger is set to "When a new response is submitted."
With this setup, every time a user submits the form, the flow will be triggered and will continue to the next step of the process.


Step 3: First flow with the iObeya connector
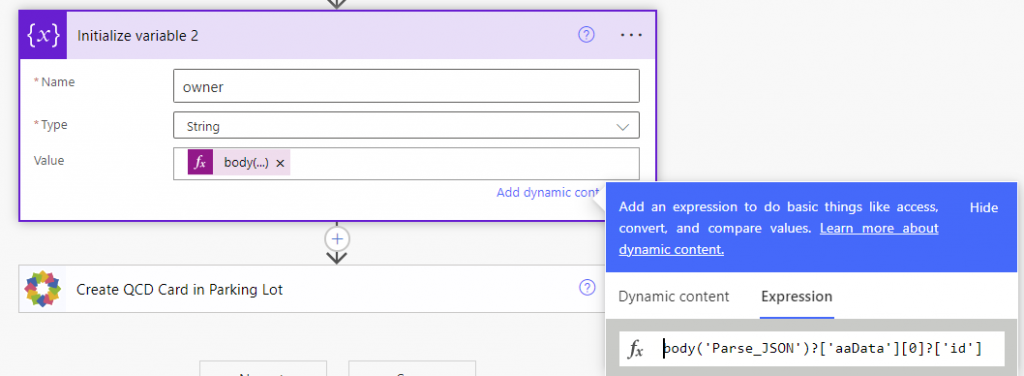
To create a QCD card in iObeya, you need to know the ownerID. You can retrieve this information by calling the iObeya Core API and searching for the user by email address.
Disclaimer
Please note that while the API call /admin/user/usersJson.action is a legacy call (not documented), it is not yet available in the API Facade. It requires a JWT token from a user with administrator rights to access. However, the good news is that this call will soon be available in the API Facade, making the integration process even more streamlined and user-friendly.
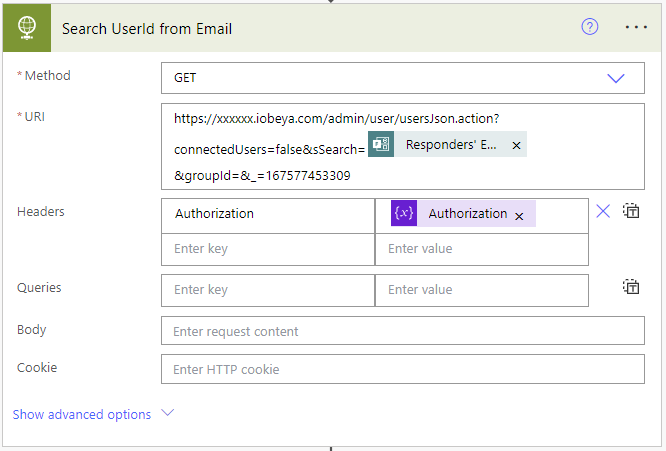
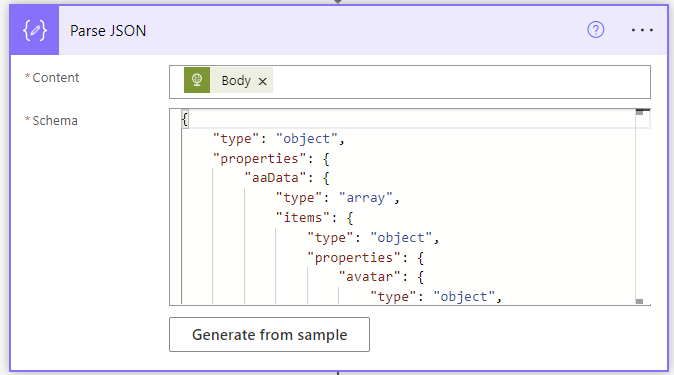
Finally, you can use a Parse JSON action to extract the response of the API call and use it in a Compose action to extract the user ID.
Step 4: Create a QCD Card in iObeya
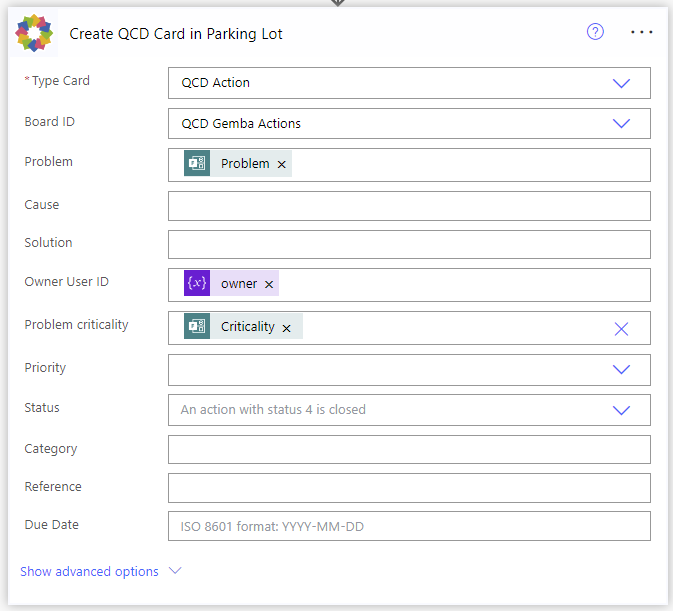
Once you have the user's ID, you can use the iObeya Connector to create a QCD card in iObeya. This card should include the problem text and criticity from the Microsoft Forms submission, as well as the user ID that you extracted in the previous step. You can also set the owner of the QCD card to be the user that you searched for by email.
Note
The Board ID association is important because it determines which iObeya board the QCD Action card should be pushed to. There are several ways to manage the BoardId association. One way is to include a field in the Microsoft Form selected by the end-user, allowing them to choose which board they would like the QCD Action card to be pushed to. Another way is to set the BoardId directly in the Power Automate Flow. And, there is also the option to manage the BoardId association through a mapping in an Excel file.
In the near future, it will also be possible to manage the BoardId association through a new tagging system on boards and elements in the API Facade and directly in iObeya. However, this feature is not yet available and details about its implementation will be shared at a later time.
Step 5: Setting Up an Action Table in iObeya
Once the Gemba Walk form is submitted, the resulting QCD action cards will be added to a board in iObeya. To make sure that these cards do not get lost among other cards on the board, it is recommended to set up an action table.
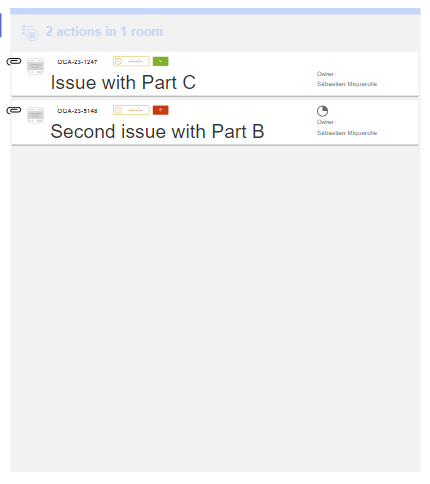
An action table is a tool that will allow you to keep track of all the actions taken and their progress, without worrying about the position of the individual cards.
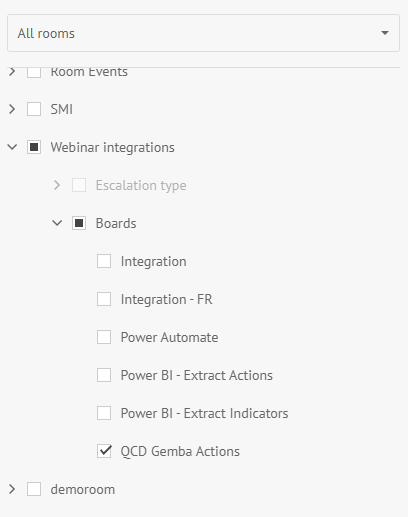
Once the action table is set up, you can configure it to target another board, such as the one where the QCD action cards will be added. This way, you can be sure that all QCD actions cards will be displayed in a clear and organized manner. It is a powerful tool that helps you to keep your Gemba Walk actions organized and tracked easily within iObeya.
Step 6: Enjoy the Automation!
With the setup now complete, when a user submits the Microsoft Form, a new QCD Card will be automatically created and displayed in the action table. This not only saves time by eliminating the need for manual typing, but also ensures that all QCD Actions are accurately captured and tracked in iObeya.
Conclusion
In conclusion, the combination of Microsoft Forms, QCD Actions Card, and Action Table offers significant benefits in integrating data collected from the factory floor through Gemba walks directly into iObeya boards using Power Automate. This provides a seamless and efficient way to centralize and track actions taken to resolve issues identified during the Gemba walks, improving overall process and quality control. By using these tools, organizations can stay organized and on top of their QCD activities, leading to a more productive and efficient manufacturing process.
Looking for more ?
- Do you want to learn more about this connector capabilities? Browse the iObeya connector documentation
- You are using another RPA/iPaaS platform than Power Automate? Browse the Facade API documentation to discover the API services used with Power Automate
- Interested to have an overview of the integration capabilities of the iObeya platform? Access the integrations page
If you have any questions or would like more information about using iObeya APIs for your business, please don't hesitate to contact us at integrations-support@iobeya.com.
Our team of experts is available to provide additional guidance and support, and can also offer personalized demonstrations of these powerful tools to help you get the most out of them. We look forward to hearing from you and helping you achieve your business goals with iObeya.
Type of integration
iPaaS
Tags
Tools

